One of the most common — and often most tedious — tasks in site management is keeping links updated and changing out-of-date URLs. Dreamweaver has long supplied many Find/Replace options for searching entire sites of HTML pages and changing one link to become a different link, but when your site consists of both Flash and HTML content, in the past, it has always been a manual process to change all the links within the Flash movies.
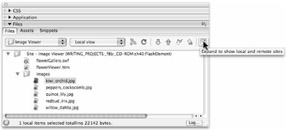
Since Dreamweaver MX, this is no longer a limitation. You can change links even in Flash movies (.swf). The Files panel (Window ð Files, or F8) includes drop-down menus for choosing a site that you want to view and for setting a view style. In Dreamweaver 8, there is now tabbed access to the Assets panel and a new Code snippets panel. As shown in Figure 38-26, you can use a button on the top-right edge of the Files panel to expand the Files panel. Clicking this button ungroups the Files panel from Assets and Snippets (which remain open in the background), and loads some additional view options into the Files panel.

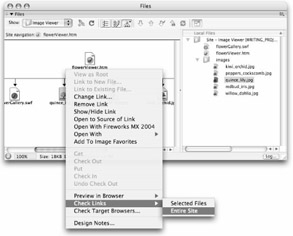
The view shown in Figure 38-27 is set by choosing Map and Files from the Site Map drop-down menu (available from the site map icon at the top of the Files panel).

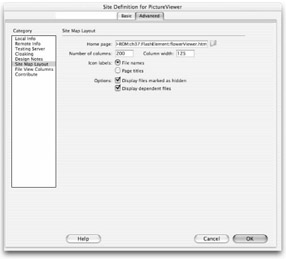
To be able to see a Site Map diagram view (as shown in Figure 38-27), you must have a page defined as your Home page in your site definition and also be able to view any dependent files. You can specify this in the Site Map Layout section of the Site Definition dialog box as shown in Figure 38-28. To load the Site Definition dialog box, choose Site ð Manage Sites from the application menu (or from the Files panel options menu), and then click the Edit button in the Edit sites dialog box.

In the Site Map view of the Files panel, you can click the page icons to drag pages into different relative positions and even change links by clicking and dragging a link icon from one page to another page.
You can check all the links in the site, including links within Flash movies, by right-clicking in the Site Map area of the Files panel and choosing Check Links from the contextual menu. You can also choose Site ð Check Links Sitewide from the application menu, or use the Ctrl+F8 or z+F8 shortcut keys. You can check the entire site or just a subset of folders.
The results of this check appear in the Link Checker tab of the Results panel (refer to Figure 38-29). You can then view them by category — broken links, external links, and orphaned files — and also change the links from this window simply by typing over the link URLs.