Hack 48. Access a Custom Java Object with JavaScript
Receive a serialized Java object via Ajax, then use that object with JavaScript. The programming model for a number of Java applications involves generating JavaBeans that represent data. A JavaBean is an object representation of a concrete thing like a bicycle, with its wheels, pedals, seat, chain rings, and other components as object properties. The purpose of a JavaBean is to represent these concrete entities for a software program that accomplishes a set of practical tasks involving the entity data type, such as an e-commerce site that sells bikes. Therefore, it is natural that some Ajax applications will receive data from a server component in the form of JavaBeans. This hack uses the DWR framework to access a JavaScript representation of a Java object from the server. The hack then displays the object on a web page. The Big Set-upTo use DWR with Ajax, you have to set it up on the server first. "Integrate DWR into Your Java Web Application" [Hack #43] describes this process in detail, so I won't repeat it here, except to show this hack's XML configuration file. On the server end, this file must be stored in /WEB-INF/. The file gives DWR its instructions for creating an instance of the Java class that your application calls remotely from JavaScript: <dwr>
<allow>
<create creator="new" javascript="JsBikeJavaBean">
<param name="class" value="com.parkerriver.BikeJavaBean"/>
</create>
</allow>
</dwr>As specified in this configuration file, the JavaScript name your code uses for the remote method call is JsBikeJavaBean. Figure 5-5 shows the web page when it's first requested. The underlying code requests a serialized version of the BikeJavaBean object when the web page is first loaded. It then displays this object as a string in an alert window. Figure 5-5. Voilà, a serialized Java object
Here is the code for the BikeJavaBean class, for which JsBikeJavaBean is remoted: package com.parkerriver;
import java.util.Map;
import java.util.HashMap;
import org.json.JSONObject;
public class BikeJavaBean {
private Map bikeInfo;
public BikeJavaBean(Map bikeInfo) {
this.bikeInfo = bikeInfo;
}
public BikeJavaBean( ) {
bikeInfo = Collections.synchronizedMap(new HashMap( ));
bikeInfo.put("Trek","0001");
bikeInfo.put("Orbea","0002");
bikeInfo.put("Guru","0003");
bikeInfo.put("Giant","0004");
bikeInfo.put("Look","0005");
bikeInfo.put("Specialized","0006");
bikeInfo.put("Cannondale","0007");
}
public String[] getbikeMakers( ){
return (String[])bikeInfo.keySet( ).
toArray(new String[]{});
}
public Map getBikeInfo( ) {
return bikeInfo;
}
public String toJSON( ){
/* There are different ways to serialize a Java object
using a JSONObject constructor; here we are constructing
a JSONObject using the Java object's HashMap */
JSONObject jo = new JSONObject(getBikeInfo(  ));
return jo.toString(4);
}
}This is an object that contains a hash table structure involving the names of bike makers keyed to some imaginary product codes. Our JavaScript object named JsBikeJavaBean (check out the earlier configuration) is bound to this Java object. Pay special attention to the toJSON( ) method. This is the method that our Ajax code will call to access a serialized version of the JavaBean. The code uses a JSONObject type, which derives from the Java API for JavaScript Object Notation. The Java API for JSON offers Java classes that make it easier to return JSON-formatted values to Ajax applications [Hack #7]. We have bundled this API and related classes in with the rest of our server-side Java classes. The purpose of returning JSON-formatted values to Ajax is that they can easily be converted to JavaScript objects, which often makes it easier for Ajax to work with the data (see http:///www.json.org). The bean's code creates a JSONObject by passing into the JSONObject's constructor the bean's HashMap of bike-maker data. This code essentially wraps the bean's data inside this special object: JSONObject jo = new JSONObject(getBikeInfo( )); return jo.toString(4); The code then calls the JSONObject's toString( ) method, which returns the string version of the bike-maker names and product codes that show up in the browser alert window. Here is the HTML code for the web page. As usual, the key parts of this page are the script tags that import the necessary JavaScript libraries: <!DOCTYPE html PUBLIC "-//W3C//DTD XHTML 1.0 Strict//EN"
"http://www.w3.org/TR/2000/REC-xhtml1-20000126/DTD/xhtml1-strict.dtd">
<html xmlns="http://www.w3.org/1999/xhtml" xml:lang="en" lang="en">
<head>
<meta http-equiv="content-type" content="text/html; charset=utf-8" />
<script type="text/javascript" src=
"/parkerriver/ajaxhacks/js/hacks5_5.js"></script>
<script type="text/javascript" src=
"/parkerriver/dwr/interface/JsBikeJavaBean.js"></script>
<script type="text/javascript" src=
"/parkerriver/dwr/engine.js"></script>
<script type="text/javascript" src=
"/parkerriver/dwr/util.js"></script>
<title>Bike Information</title>
</head>
<body>
<h3>Our list of Bike Designers</h3>
<div id="bean"></div>
</body>
</html>The two highlighted script tags import the JavaScript libraries that are required to use DWR: JsBikeJavaBean.js, which in our case binds a JavaScript object of that name to the JavaBean running on the server; and engine.js, which is the framework code. hacks5_5.js represents the code for this hack, and util.js is an optional library that contains several useful functions. When the user dismisses the alert window, the web page's code uses the returned JavaBean object (in JSON format) to display the object's data on the page. Figure 5-6 shows this page. Figure 5-6. Displaying a serialized JavaBean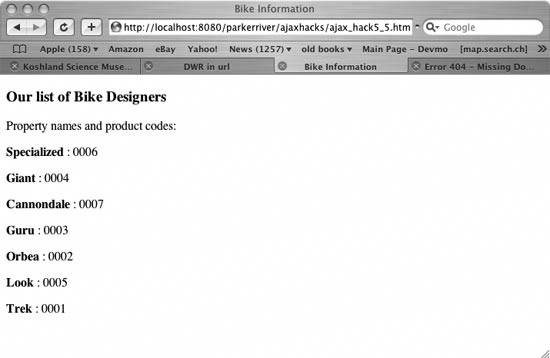
You are probably curious by now what the code in hacks5_5.js does. How does the web page code display the JavaBean information that the server component returns? How does the web page make the request in the first place? Let's take a look: window.onload=function( ){
JsBikeJavaBean.toJSON(function(javaStr){
alert(javaStr);
var div = document.getElementById("bean");
//remove old content
div.innerHTML="";
//convert the return value to a Java object
var javaObj = new Function("return "+javaStr)( );
var innerHt="<p>Property names and product codes:</p>";
for(var propName in javaObj) {
    innerHt += "<p>";
    innerHt += "<strong>";
    innerHt += propName;
    innerHt += "</strong> : ";
    innerHt += javaObj[propName];
    innerHt += "</p>";
}
div.innerHTML=innerHt;
});
};The framework takes care of making the HTTP request, so the code does not contain any references to XMLHttpRequest or the httpRequest( ) function you have seen in other hacks. The JsBikeJavaBean.toJSON( ) function is a remote method call that returns the serialized (or JSONized) JavaBean. DWR uses the callback mechanism, in which the argument to the remote method is a function that handles the server's return value. That function, in turn, has the return value as its lone argument. Our code uses a function literal, in which the entire function definition is passed in to the remote method call. First, an alert window shows the returned string. The code then converts the JSON-formatted string into a JavaScript object using a special technique.
In the code, the variable javaObj now represents a plain old JavaScript object that the code easily explores with a for/in loop. This loop builds a string, which displays the object's values inside a div element: for(var propName in javaObj) {
innerHt += "<p>";
innerHt += "<strong>";
innerHt += propName;
innerHt += "</strong> : ";
innerHt += javaObj[propName];
innerHt += "</p>";
}
div.innerHTML=innerHt;Hacks like this can easily integrate existing JavaBeans that various server components might use. Using the Java API for JSON is just a matter of downloading and compiling the source code for objects such as JSONObject and JSONArray, which you can find at http://www.crockford.com/JSON/java/. |
