3.1. Document-Centric ApproachesA document-centric approach to AJAX simply means that your main interaction with the server is pulling down pages of content. This doesn't mean that the pages aren't dynamically generated, but it does mean you're pulling down the content in a ready-to-use or parse format. The simplest use case is to download a chunk of HTML from your server and insert it into the page using innerHTML. The biggest differentiator between document-centric approaches and remote scripting is how the design relates with the server. Remote scripting-style AJAX is tightly coupled to the server and gives you a direct interface to the server-side code, using a standardized system to transfer the call and request between the client and the server. Document-centric approaches are loosely tied to the server; the only requirement is that the data be in the usable format, allowing you to generate plain text, HTML, or XML in whatever manner you want. One advantage that document-centric approaches have is that they are highly scalable because more of the work happens on the client. Document-centric approaches are not a magic bullet for scalability or performance, because dynamically generated content can have many bottlenecks; however, they do closely resemble current Web models, which allow the same optimization strategies to be used. 3.1.1. Adding New HTML Content to a Page with AJAXOne of the basic actions performed on every Web page is the displaying of new content when a user clicks a link. In many circumstances, this works fine, but when you want to keep the original content, you have a problem. HTML offers two solutions to the problem: frames and IFrames. Both allow multiple pages to be embedded into a single page. The problem with frame-based solutions is that you're still stuck loading entire pages; that being said, you can easily use frame-based solutions to add a new row to a table or provide a status message. AJAX offers an easy way out: load the HTML directly using XMLHttpRequest and add it to your page by replacing the content of a DIV using innerHTML. An example of using the HttpClient.js XMLHttpRequest wrapper we built earlier (Listing 2-3) is shown in Listing 3-1. The pages that are being loaded, content1.html and content2.html, are also shown; they can be any fragment of HTML or other text you want to load into the DIV. Listing 3-1. Adding HTML Content.html
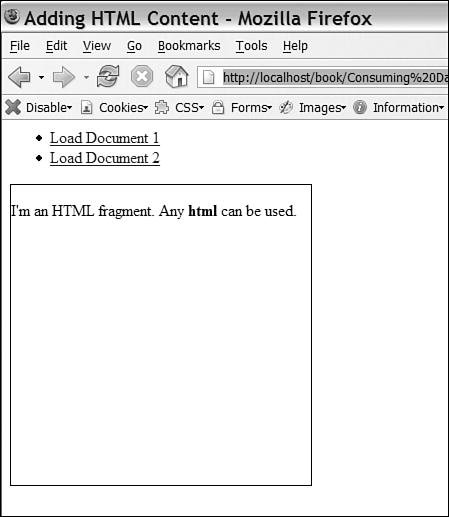
Line 4 includes the XMLHttpRequest wrapper, HttpClient, which is instantiated on line 7. Because we want to make an asynchronous request, we turn that mode on at line 8 and then create our callback function (lines 1012). This callback will take the result from the load and set the innerHTML of the target element to it. Lines 1416 create a JavaScript function that we can call from HTML links. This function, replaceContent, takes a single parameter, page, which is the URL we want to load. Line 15 makes the remote request. The second parameter is null because we have no POST data that we want to send as a payload. The rest of the example is a list of test calls to replaceContent and the user interface (UI) elements used by the JavaScript code. Lines 2223 load Content1.html, and lines 2425 load Content2.html. Lines 2830 create a DIV element with an ID of HttpClientStatus. Whenever you are using HttpClient.js, you need to provide an element with this ID. The element should be hidden by default; this is accomplished by setting display:none in the style attribute. When the XMLHttpRequest object downloads content from the server, the HttpClientStatus element will be shown by setting the style.display attribute to block. Lines 3233 provide a DIV with an ID of target; this is where the downloaded content is displayed. The results of Listing 3-1 loading content1.html are shown in Figure 3-1. content1.html <p>I'm an HTML fragment. Any <b>html</b> can be used.</p> content2.html I'm some other content. In this case I don't contain anything but text. Figure 3-1. Using AJAX to perform basic content replacement
In Listing 3-1, we took a normal HTML document and used AJAX to load in new content at will. This basic technique can be accomplished through the use of frames, but AJAX gives you a lot more flexibility. We can divide the page in any way we choose, dynamically updating something as small as a single word or as large as the majority of the page. Dynamically updating a page with content is powerful, and it fits well into any server-side development model, because you're simply increasing the number of pages you generate while decreasing their size and scope. 3.1.2. Consuming XML Using DOMAnother popular way to load new data is to use XML. XML is useful when you want abstraction between the code on the server that produces the data and the JavaScript client code that uses it. This allows you to change out the back end without affecting the front end. It also allows you to expose data for other clients through the same generic API. The XML Document Object Model (DOM) is similar to the HTML one that we've used in other examples. An easy way to visualize the DOM is to picture a tree of objects, one for each XML element on the page. For example, the following sample XML document will make DOM with four nodes: the root Document node, an Element node for the rootTag, and an Element node for the childTag. The childTag has a Text node containing Some Text. <rootTag> <childTag>Some Text</childTag> </rootTag> A visual representation of this tree is shown here: Document
Element (rootTag)
Element (childTag)
TextTo turn this DOM model into HTML, we will need to use a couple basic methods and properties:
The other step we need to take is to get the XML document result from XMLHttpRequest instead of the plain text. To do this, set the Content-type of the downloaded page to text/xml. This causes the responseXML property of XMLHttpRequest to create a DOM document from the contents. In the following examples, we take an XML list of resource links about a subject and turn them into a simple HTML list. The two test lists contain PHP resource links and a list of book sellers. Listing 3-2 contains the list of PHP resources, whereas Listing 3-3 contains the list of sellers. These files are used by Listing 3-4, which uses the DOM to update the current page and build the list. Listing 3-2. PhpResources.xml
Listing 3-3. BookSellers.xml
Listing 3-4. DOMExample.html
The JavaScript HttpClient class (from Chapter 2, "Getting Started") gives us cross-browser XMLHttpRequest support. On line 4, we include the library, and on line 7, we create an instance of the client. Then, on line 8, we set isAsync to true because we want to make an asynchronous request for the XML data file. Next, on lines 1028, we add our callback function; this function takes the downloaded XML document, creates an HTML list, and then shows the list using innerHTML. On line 11, we grab the XML DOM document from response XML. We have to use the XMLHttpRequest object directly because HttpClient doesn't wrap this. Depending on the complexity of the HTML page, updating a node with innerHTML can be an expensive operation. To keep this to a minimum, we use a variable to hold our HTML content and then update it all at once at the end of the function. On lines 1315, we read the type attribute from the site's tag and use it to make a title for our list. Then on line 17, we get an array of all the site nodes in our XML document, which is looped through on lines 1823. In each iteration of the site's array, we build one list element. This is a pretty straightforward process; the only item of note is the use of firstChild() and nodeValue() to get to the text content of the site tag. These calls are needed because text content exists in its own node in the DOM, and there is no innerHTML attribute to read from the text content and its markup, as is the case with the HTML DOM. The rest of the page gives you a basic UI for testing. Lines 3032 provide a helper function that requests the download of new XML files. When the download is done, the callback function that builds the output will be called. Lines 3742 contain a list with links to process the sample XML files, and lines 4446 contain a basic loading DIV that is shown while waiting for the XML documents to be downloaded. Finally, we have a target DIV that is used by the callback function as a place to display the generated list. The output of Listing 3-4, showing the PHP resources list, is shown in Figure 3-2. Figure 3-2. Updating an HTML page by consuming XML documents using the DOM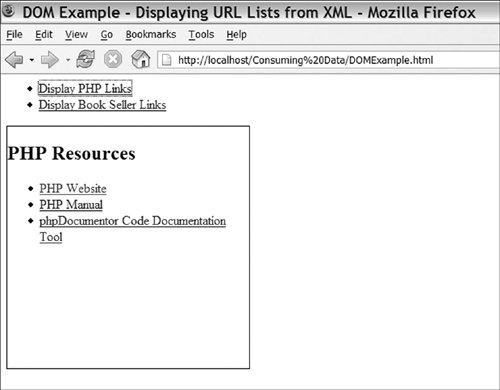
When tied with dynamically updates, DOM-based consumption of XML can be an efficient way to dynamically display data on the browser. Using the DOM manipulation function can make for tedious programming, so it isn't usually the best approach for generating a large amount of content from nonstructured data. 3.1.3. Consuming XML Using XSLTeXtensible Stylesheet Language Transformations (XSLT) is another popular way to take a DOM document and generate new output. The advantage it has over DOM is that the transformation and the data are in an XML file. XSLT has been used by many successful AJAX applications, such as Google Maps, but it does have a number of drawbacks. XSLT browser support is uneven, and even when two browsers, such as Internet Explorer 6 and Firefox 1.0, support the same main features, the application programming interfaces (APIs) for controlling the transformations from JavaScript are completely different. This difference is large enough that you can't just write a simple wrapper like you can for XMLHttpRequest. If you need cross-browser support, you'll need to rely on a library like Sarissa instead. (The Sarissa library is explained in detail in Chapter 8, "Libraries Used in Part II: Sarissa, Scriptaculous.") XSLT can also be problematic simply due to its complexity. Not only will you need to learn how to write the XSLT style sheets that drive the actual transformation, but you'll also need to learn XPath, which is used to refer to XML nodes inside the style sheet. Because XSLT is a World Wide Web Consortium standard, there are tools and documentation out there to help, but in many cases, the added effort required over a DOM approach isn't worth the effort. Although the purpose of this book isn't to teach you how to write an XSLT style, I will explain the basics of the one used. Listing 3-5 replaces the JavaScript DOM code in Listing 3-4 with an XSLT transformation. The same XML data files (PhpResources.xml and Booksellers.xml) that are used in the DOM example are used here. The Mozilla XSLT API is used in these examples because it's easier to understand, and all you have to do to make it work in IE is include the Sarissa library. Listing 3-5. XSLTExample.html
The first 18 lines cover the basic setup; we include our HttpClient XMLHttpRequest wrapper and the Sarissa XML compatibility library. On line 7, we create an HttpClient instance; this will be used to load both the style sheet and the XML files we're going to transform; on line 8, we set isAsync to true because we will be making only asynchronous requests. On line 9, we create a new xsltProcessor instance; this will be loaded with a style sheet in the setup function (lines 1118) and then used to transform XML files loaded by the displayResources function (lines 2030). On lines 1316, we create a callback to run when the style sheet is loaded. It grabs the new XML DOM from the client (line 14) and then adds it to the xsltProcessor using its importStylesheet method (line 15); this style sheet is shown in Listing 3-6. The setup function completes by making the actual request (line 17) and is run by an onload handler (line 33). The displayResources function is called by links in the HTML page; it loads new XML files and then transforms them. Lines 2127 add a callback method that processes the downloaded XML document. Line 23 uses the processor we created to generate a new DOM document formatted by the style sheet we imported on line 15. Line 24 clears the target element on the HTML page, and then on lines 2526, we append the content of the transformed DOM document. document.importNode has to be used for this process to work in a cross-browser manner. The rest of the HTML page (lines 3449) has no changes from the DOM example. It's just a basic list of actions to be performed and a target to display the results. Listing 3-6 finishes up the process; it is run on each XML file to produce HTML that is similar to the DOM example. Line 8 creates the list title using value-of to output the type attribute. Lines 1019 loop over each site tag in the file, outputting a list item with the link inside it. You can see the output of this script showing the PHP resource list in Figure 3-3. Figure 3-3. Using XSLT to transform XML documents loaded using AJAX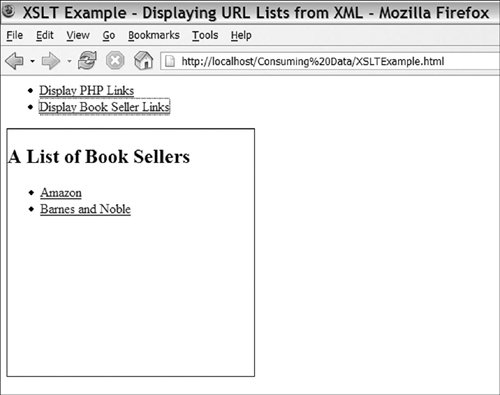
Listing 3-6. Resources.xsl
XSLT is an extremely powerful technique for managing AJAX transformation, and because it's supported by most browsers, it's easy to see how it could be paired with AJAX. XSLT's strength lies in its ability to create rules that will work against nonstructured or structured schemas. This trait allows it to easily transform any type of XML document and generate new content to add to the current HTML page. If you are already dealing with XML on the server side, XSLT makes a great choice because there is a good chance you're already familiar with its basics. |