
Moving an Object in the Document
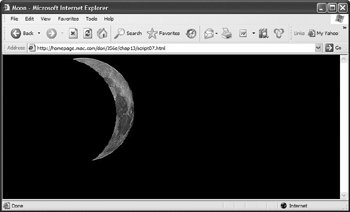
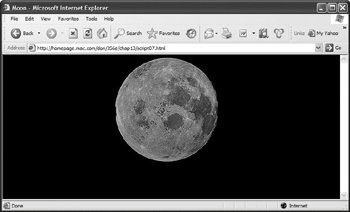
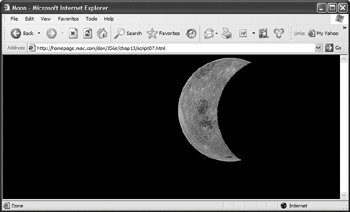
It's possible to use JavaScript to move an object (an image, or text, or whatever) around your screen. In fact, you can make an object appear to move in three dimensions, so that it looks as through it passes behind other objects in the document. In this example, you'll see how to move an image of the Moon behind two other objects so it appears to wax and wane.
This requires three documents: the HTML document (Script 13.10), the CSS style sheet (Script 13.11), and the JavaScript file (Script 13.12). The Moon makes its journey in Figures 13.7, 13.8, and 13.9. We're using JavaScript to manipulate an image using the id assigned in the HTML, and CSS to set the positioning for all the objects on the page: specifically their z-index, which is an indicator of which object is shown on top of another object. The object with the higher-numbered z-index is shown when two objects occupy the same space.
Script 13.10. The HTML for the object moving example uses ids to tag the elements we want to manipulate.
<!DOCTYPE html PUBLIC "-//W3C//DTD XHTML 1.0  Transitional//EN">
<html xmlns="http://www.w3.org/1999/xhtml">
<head>
     <title>Moon</title>
     <script language="Javascript" type="text/ javascript" src="script07.js">
     </script>
     <link rel="stylesheet" rev="stylesheet" href="script07.css" />
</head>
<body>
     <img src="images/black_dot.gif" width="250" height="250" id="leftfore" alt="" />
     <img src="images/full_moon.jpg" width="232" height="232" id="mover" alt="Full Moon" />
     <img src="images/black_dot.gif" width="250" height="250" id="rightfore" alt="" />
</body>
</html>
|
Script 13.11. The CSS sets the initial positions of each object.
body {
     background-color: #000;
}

#leftfore, #mover, #rightfore {
     position: absolute;
     top: 5px;
}

#leftfore {
     left: 0;
     z-index: 2;
}

#mover {
     left: 5px;
     z-index: 1;
}

#rightfore {
     left: 470px;
     z-index: 2;
}
|
Script 13.12. The JavaScript gets the Moon moving.
window.onload = slide;

function slide() {
     document.getElementById("mover").style. left = currPos("mover") + 1 + "px";

     if (currPos("mover") <= currPos ("rightfore")) {
        setTimeout("slide()",10);
     }

     function currPos(elem) {
        return document.getElementById(elem). offsetLeft;
     }
}
|
To move an object:
1. |
function slide(){
  document.getElementById("mover"). style.left = currPos("mover") + 1 + "px";
If you look at Script 13.10, you'll see that the image that we want to move has an id of mover. To move the image object (in a way that works cross-browser), we have to change that object's style.left property. Here, we change it by getting the object's current position (as covered below), incrementing it by 1, and finally adding px to the end to put it in the correct format. Changing style.left is all that's needed to move it to its new location.
| 2. |
if (currPos("mover") <= currPos("rightfore")) {
Now that we've moved the image object, we need to figure out if we want to keep on moving itthat's done by checking its current position and comparing it to the current position of rightfore, the right-most foreground image. If mover has a current position that is less than or equal to that of rightfore, that is, it's still to its left, then we want to keep moving it over.
| 3. |
setTimeout("slide()",10);
Here's where we tell JavaScript to keep on moving mover, by calling setTimeout() to call slide() again in ten milliseconds.
| 4. |
Several places above needed to get the current position of an element, and here's where we'll do it. All we need is the id of that element.
| | | 5. |
return document.getElementById (elem).offsetLeft;
Given the id of the object, we can get the object. And given that, all we need is its offsetLeft property, which is the object's left position. The offsetLeft property contains a numeric value, so we can just return it as-is.
|
 Tips Tips
You might be wondering: if offsetLeft is numeric, why jump through all those hoops to instead change the style.left property? We have to do that because offsetLeft is read-only; that is, you can read its value, but you can't change it. There aren't any cross-browser, writeable, numeric positioning elements. The z-index for each object is set in Script 13.11. Those numbers don't have to be sequential; so long as one number is higher than another, that one will be on top.
|