After you deploy the Secure Access Web user interface it's set to forms authentication by default. This chapter describes how to change the application settings so that you can sign in using your Windows NT account.
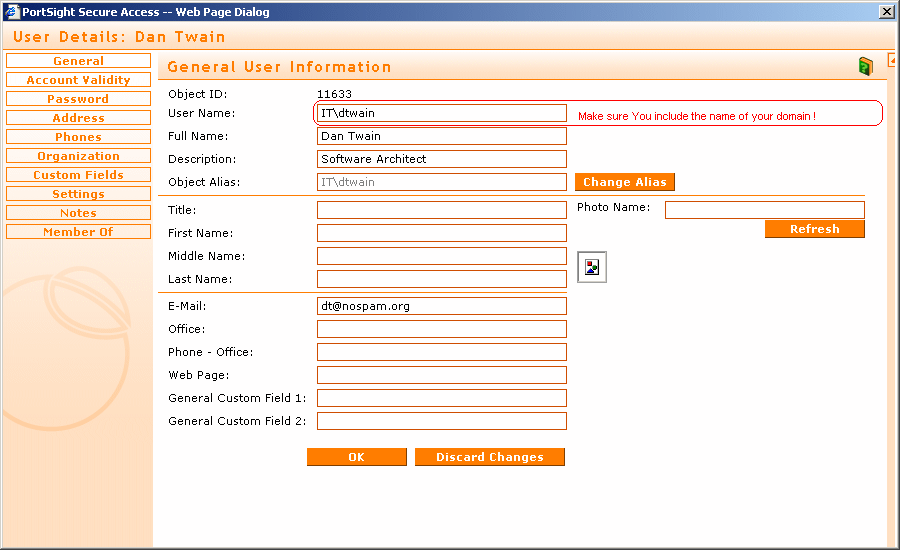
If the Secure Access Web user interface is set for the Windows authentication, it compares the Windows NT login name of the current user with the "user name" field in the Secure Access database. The "user name" field must contain the user name including domain - e.g. "MYDOMAIN\JohnF". Make sure you use back slash ("\").
Log on as Administrator (the default password is administrator if you haven't changed it yet). Create a new account in Secure Access. See chapter How to create a new user later in this help if you're not sure how to do it. Set user name to your user name (including domain - e.g. MyDomain\JohnF). This will ensure that Secure Access binds your Windows NT identity with this new user account.
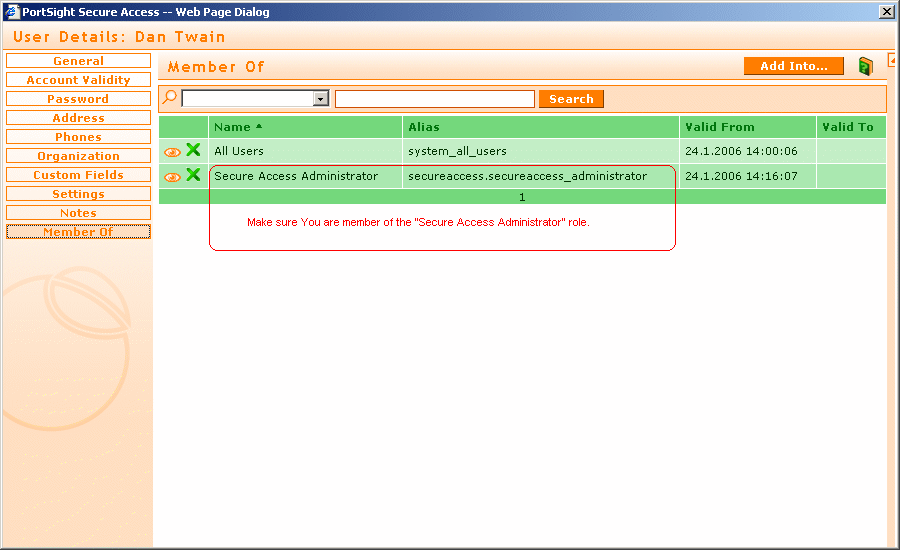
Open the User Details dialog for your account and choose the "Member Of" section. Click "Add Into..." and choose "Secure Access Administrator (Role)". This will ensure you will have administrator's rights after you log on using the Windows authentication.
Locate the Web.config file in the folder you have specified during the deployment of the catalog. Open it using Visual Studio.NET, Notepad or other editor.
Find the /configuration/system.web/authentication section. It contains following code by default:
<authentication mode="Forms" > <forms name="SecureAccessCookie" path="/" loginUrl="LogonForm.aspx" protection="All" timeout="60"> </forms> </authentication> |
Replace the whole <authentication> ... </authentication> section with following text:
<authentication mode="Windows" /> |
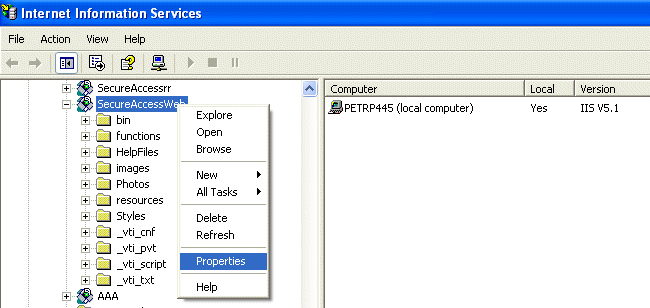
Open Control Panels on your computer. Open the Administrative Tools folder and launch the Internet Information Services console. Locate your computer and the Web site you use (typically "Default Web Site"). Find the SecureAccess virtual directory (the name may differ according to the "Physical path" value you entered during the deployment of the catalog in the Secure Access Catalog Manager). Right-click this virtual directory and choose "Properties".
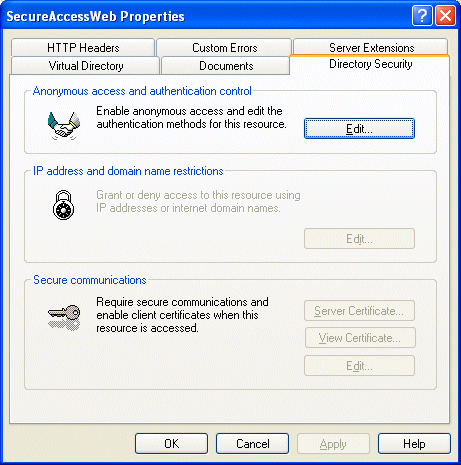
Choose the "Directory Security" tab and click the "Edit..." button in the "Anonymous access and authentication control" section.
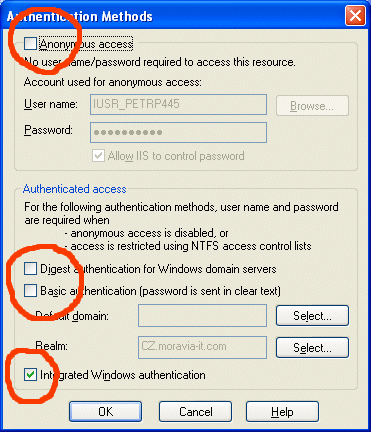
In the "Authentication Methods" dialog, make sure that "Anonymous access", "Digest authentication" and "Basic authentication" boxes are UNCHECKED and that the "Integrated Windows authentication" box is CHECKED (see following figure). Click "OK" on this dialog and click "OK" on the virtual directory properties dialog.
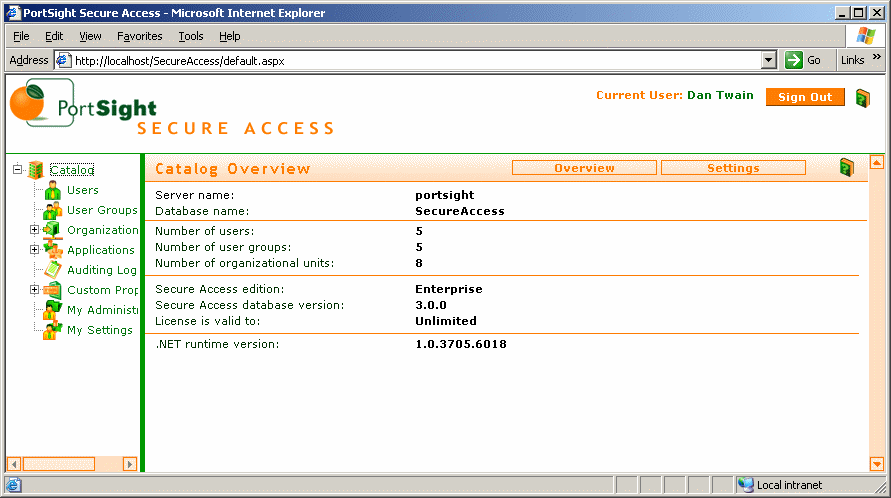
Close all Internet Explorer windows with Secure Access Web user interface and open a new one. Navigate to the Secure Access user interface (typically "http://localhost/SecureAccess"). The logon form shouldn't be displayed and you should be directly signed in the Secure Access user interface. You should see your name in the upper-right corner.
You should see all items in the main menu (Users, User Groups, Organizational Units, etc.).
