Saving a Report
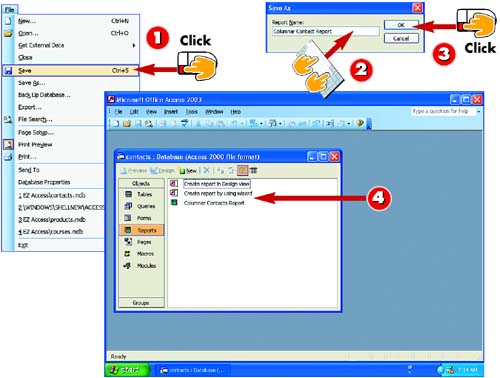
 | Open the File menu and choose Save. If you are saving changes to an existing report, the Save process is complete; if you are saving a report for the first time, proceed to step 2. |
 | The Save As dialog box opens. Type a name for the report in the Report Name field. |
 | Click OK. |
 | The report is saved. When you close the report, it will be listed in the database window with the name you typed in step 2. |
|
When you create a report using the Report Wizard, it is saved automatically with the name you specify. If you create an AutoReport or a report from scratch (not covered in this book), however, you'll need to name and save it manually. In addition, you must save a report after making changes to the report's design. |
|
Using the Save As Command
When you modify a report's design, the new version of the report replaces the report you started with. If you want to keep the original report, save the new report under a new name by using the File, Save As command. Type a new name. |
|
Saving the Report
If you prefer, you can click the Save button to save a report. If you try to close a report without saving first, you will be prompted to save; click Yes to save the report. |
|