Once you have created a Profile and defined the elements and metaclasses, you can save (export) the Profile to disk for future UML models.
To save a Profile, follow the steps below:
| · | a single profile spread over multiple diagrams within the same Profile Package, find the Profile Package in the Project Browser window, right-click it and select the menu option |
| · | one of multiple profiles within the same Profile Package, right-click anywhere in the background of the Profile diagram and select the menu option |
| · | a single diagram within the Profile Package, choose either the menu option or the menu option. |
| 2. | The Save UML Profile dialog displays.
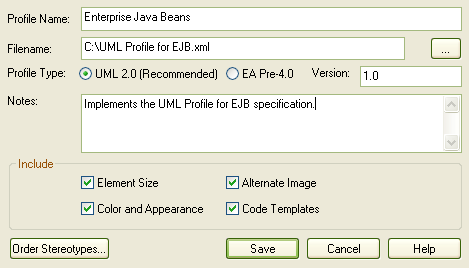
|
| 3. | Click on the [] (Browse) button, and select the destination for the XML Profile file to be exported. If necessary, edit the profile filename, but do not delete the .xml extension. |
| 4. | Against the , select the radio button. |
Note: You can also create stereotypes using the same format as for pre-4.0 versions of Enterprise Architect, by clicking on the radio button. This has a reduced feature set and is provided for legacy use.
| 5. | Set the required export options for all stereotypes defined in the profile: |
| · | - select the checkbox to export the element size attributes |
| · | - select the checkbox to export the color (background, border and font) and appearance (border thickness) attributes |
| · | - select the checkbox to export the metafile images |
| · | - select the checkbox to export the code templates, if they exist. |
| 6. | Click on the button to define the order in which elements should appear in the generated profile (and therefore in the Resources window and Enterprise Architect UML Toolbox). The Order Stereotypes dialog displays.
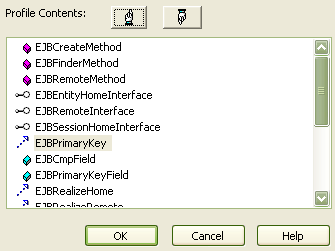
|
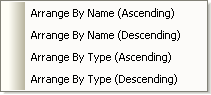
| 7. | In this dialog, you can select individual items and use the 'Hand' buttons to move the items up or down in the list. Alternatively, you can right-click on the dialog and select to list the items in ascending or descending alphabetical or type order.
|
| 8. | Click on the button to save the profile to disk. |


