When generating RTF documentation from Enterprise Architect, tables are included when items such as Attributes and Methods are selected in the For each Object section in the Rich Text Format Report dialog. MS Word offers several levels of customization for tables and can be used to tidy the formatting of the tables in situations where the margins of the table exceed the dimensions of the page size selected in Word for printing.
Resizing Tables
When the amount of detail for a documented item such as an attribute or operation exceeds the margins of the page in MS Word it is necessary to manually resize the table in order to view all of the details. To manually resize the table follow the steps below:
| 1. | Select the table that exceeds the margin size. |
| 2. | Mouse over the border of the table until the mouse pointer changes into the icon shown below. |
| 3. | Drag the cursor to the left to reduce the width of the table and then select the File | Print Preview menu option to confirm that the table borders are within the page margins. |
| 4. | Resize all of the tables that overhang the margins of the page by using the steps detailed above. |
Applying Styles to Tables
One of the customizable properties of MS Word when working with tables is the ability to apply a style to a table, which enables you to rapidly change the appearance of the table. To achieve this effect follow the steps below:
| 1. | Open the Enterprise Architect RTF report in which to change the table styles. |
| 2. | Locate and select the table for which to adjust the appearance. |
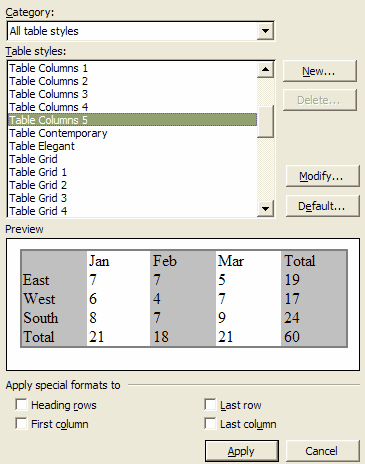
| 3. | Select the Table | Table Auto Format menu option. The Table Autoformat dialog displays. |
From here you can specify a predefined table style from the Table styles list, or create a new style by clicking on the New button. The table styles defined in the Table Autoformat dialog only apply to one table at a time so you must apply the style to each table created individually.


