The Generate Code dialog enables you to control how and where your source code is generated. Normally you access this dialog from the context menu of a single class or interface. Right-click on the class or interface and select from the context menu. Alternatively, select the class or interface and press.
This dialog has the following options:
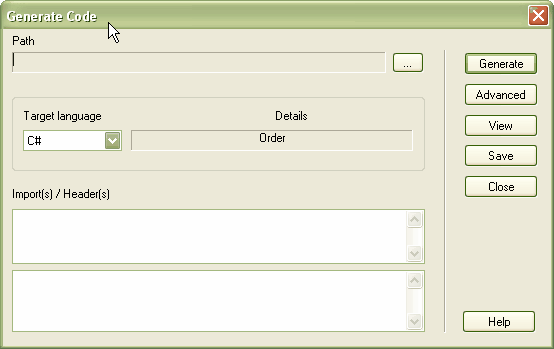
| · | The where the source is to be generated. Click on the (Browse) button to display a file browser dialog. |
| · | The for generation. Click on the drop-down arrow and select the language to generate; this becomes the permanent option for that class, so change it back if you only want to do one pass in another language. |
| · | . Click on this button to define advanced settings. Note that the settings you make here only apply to the current class. |
| · | (1). An area in which you enter any special import statements (or #includes in C++). For C++ this area is placed in the header file. |
| · | (2). An area in which you define additional import or include statements (or even macros and #defines in C++). In C++ this area is placed in the CPP file, in Java it is appended to the first import statements and placed in the .java file. |
| · | . Click on this button to generate your source code; Enterprise Architect displays the status of progress as the generation proceeds. |
| · | . Click on this button to view the generated source code in your default editor. You can also set up the default editor on the DDL page of the Options dialog (). |


