Be careful what you wish for, you just might get it. VB programmers have been grousing about the lack of free threading for years through many versions of VB. Well, now you have it.
The threading model in .NET allows you to get into a world of trouble with bugs that are hard to track down and performance penalties that you may not be aware of. It takes quite a bit of careful programming to use threading effectively.
There are a number of ways to use multithreading to your advantage. In this section I show you just one of them.
| Note |
This section is not by any means a complete treatise on multithreading. I expect you to know something about multithreading before you start. The most lucid explanation on multithreading I have found is in Dan Appleman's book Moving to VB .NET: Strategies, Concepts, and Code, Second Edition (Apress, 2003). |
This method uses multithreading to enhance a Windows Forms control so it frees up more time for the user to do something else if needed. Multithreading with Windows Forms controls is not the easiest of tasks. You need to do quite a bit of marshaling of data back and forth between threads to get things to work correctly.
Before I start on multithreading, I want to mention three methods that all controls have. These methods are specific to multithreading:
BeginInvoke
Invoke
EndInvoke
The BeginInvoke method allows a thread to call a delegate asynchronously on a control that was created on another thread. In other words, if you had a TreeView control created on thread 1, thread 2 could call a delegate on thread 1 that is attached to the TreeView control on thread 1. Because BeginInvoke is asynchronous, thread 2 is not blocked while the delegate on thread 1 is running.
The Invoke method does the same thing as the BeginInvoke method, except the calling thread is blocked until the delegate returns. This is a synchronous call.
The EndInvoke method uses an IAsyncResult object that results from the BeginInvoke method call. Because the BeginInvoke method call is asynchronous, you may not get this result back right away. If you make a call to EndInvoke and the delegate you called from the BeginInvoke method is not ready, the EndInvoke method will block until the delegate finishes. You need be somewhat careful with the EndInvoke method because your thread could be blocked for quite some time. The IAsyncResult object contains state information about the thread operation. It allows calling threads to be signaled when an operation is completed.
With that information under your belt, it is time to start the multithreading project. Here is what it does:
It creates a user control that is based on the TreeView control.
It allows the user to pass in an array of strings that will be turned into nodes in this control.
The user control will have two threads running to manage the addition of nodes to the TreeView control.
The threads will work in such a way as to allow the user to continue with the GUI while nodes are being added to the tree.
A test program will be added to the solution that proves it is working.
Start with a new C# or VB project. Mine is called "QuickTree." This project is a Windows Control Library project—it is not a Windows Forms project. Perform the following steps:
Change the name of the user control class to QuickTree.cs.
Change the name of the class itself to QuickTree.
Add a TreeView control to the user control form.
Call the TreeView control tree. Change the Dock property to Fill.
Figure 10-10 shows the Solution Explorer window.
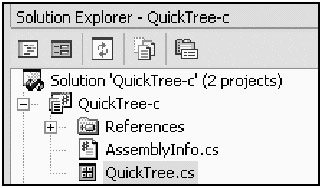
Don't worry that two projects are indicated. The second one is the tester you will code later.
When you change the name of the class in the code pane, it should read as follows.
C#
public class QuickTree : System.Windows.Forms.UserControl
VB
Public Class QuickTree
  Inherits System.Windows.Forms.UserControl
You first need to add some statements to this class that reference the proper namespaces.
C#
using System;
using System.Collections;
using System.ComponentModel;
using System.Drawing;
using System.Data;
using System.Windows.Forms;
using System.Threading;
Option Strict On

Imports System
Imports System.Collections
Imports System.ComponentModel
Imports System.Drawing
Imports System.Data
Imports System.Windows.Forms
Imports System.Threading
Here is something for you C# developers to do. The TreeView control that you added to this user control is private to this user control. You need to make it public. You do this so that any client that uses this new UserControl will still be able to manipulate the tree normally, as well as through the extra methods you will provide.
Now add some variables to this class.
C#
    #region vars

    private delegate void NodeAddDelegate(TreeNode[] tnodes);
    private               NodeAddDelegate NodeDelegate;

    private               EventHandler    onFillComplete;
    public event          EventHandler    FillComplete;

    private               ArrayList       tnodes;
    private               TreeNode        BaseNode;
    private               Thread          FillThread;
    private               bool            filling;
    private               bool            WaitForFill;

    #endregion
#Region "vars"

  Private Delegate Sub NodeAddDelegate(ByVal tnodes() As TreeNode)
  Private NodeDelegate As NodeAddDelegate

  Private on_FillComplete As EventHandler
  Public Event FillComplete As EventHandler

  Private tnodes As ArrayList
  Private BaseNode As TreeNode
  Private FillThread As Thread
  Private filling As Boolean
  Private WaitForFill As Boolean

#End Region
I declare a delegate that takes as an argument an array of TreeNodes. This delegate adds the tree nodes to the TreeView control. For speed, it adds them using the TreeView.AddRange method.
I also declare an event handler called onFillComplete. (The VB name is slightly different because of VB's annoying habit of being case insensitive.) I then declare an event called FillComplete. I use this event to notify the client that the tree has been filled using the multithreaded method. This is not necessary, but it is nice to let the client know when you are done.
Finally, I declare a thread and some control variables. Let's start off the real code with some extra properties and methods that an external client can use in addition to the normal TreeView methods.
C#
    #region properties/methods

    public bool OK2Fill
    {
      get{return !filling;}
    }

    public ArrayList Strings
    {
      set{tnodes = (ArrayList)value.Clone();}
    }

    public void StartFill(TreeNode node)
    {
      BaseNode = node;

      //Do not interrupt a fill
      if(filling)
        return;

      //Make sure that someone actually put this control on the form
      //This could have been called without initializing the tree.
      if(tree.IsHandleCreated)
      {
        filling = true;
        FillThread = new Thread(new ThreadStart(tnodeThread));
        FillThread.Start();
      }
      else
        WaitForFill = true;
    }

    public void StopFill()
    {
      //Obviously if I am not filling then no need to join threads
      if (!filling)
      {
        return;
      }

      if (FillThread.IsAlive)
      {
        FillThread.Abort();
        FillThread.Join();
      }

      FillThread = null;
      filling = false;
    }

    #endregion
#Region "properties/methods"

  Public ReadOnly Property OK2Fill() As Boolean
    Get
      Return Not filling
    End Get
  End Property

  Public WriteOnly Property Strings() As ArrayList
    Set(ByVal Value As ArrayList)
      tnodes = CType(Value.Clone(), ArrayList)
    End Set
  End Property

  Public Sub StartFill(ByVal node As TreeNode)
    BaseNode = node

    'Do not interrupt a fill
    If filling Then Return

    'Make sure that someone actually put this control on the form
    'This could have been called without initializing the tree.
    If (tree.IsHandleCreated) Then
      filling = True
      FillThread = New Thread(New ThreadStart(AddressOf tnodeThread))
      FillThread.Start()
    Else
      WaitForFill = True
    End If
  End Sub

  Public Sub StopFill()
    'Obviously if I am not filling then no need to join threads
    If Not filling Then Return

    If FillThread.IsAlive Then
      FillThread.Abort()
      FillThread.Join()
    End If

    FillThread = Nothing
    filling = False
  End Sub

#End Region
There is some interesting code in here. I have a property that lets the client know if it is OK to monkey around with the TreeView control directly. Because I send nodes over to this control for a multithreaded add, I can easily do this several times in a row before the first add is finished. Also, because the TreeView control is public, the client could easily do something like clear the control before it is finished. Although I am not going to stop direct manipulation of the tree, I will let the client know if it is OK.
The second property in this region is one that copies an array of strings into memory. I use this list of strings to convert to TreeNodes, which are added to the tree asynchronously.
The next method is the StartFill method, which checks to see if the tree is actually created yet by checking for its handle. If everything is OK, I spin up a new thread and let it rip. If the handle is not yet created, I set the control variable that allows the thread to start after the handle has been created. You will see this bit of code shortly.
The StopFill method checks to see if the thread is alive and running. If so, it stops the thread and blocks the calling thread until this one is finished. You can add a timeout to the join method in case the calling thread is hung. This allows you to kill the thread based on a timeout.
The next region of code to add contains the event handlers and delegates.
C#
    #region events/Delegates

    //If the user kills the program before the tree has filled then you will
    //need to stop the fill first. This is why the Base.OnHandleDestroyed
    //is called after the stop fill.
    protected override void OnHandleDestroyed(EventArgs e)
    {
      if (!tree.RecreatingHandle)
      StopFill();
      base.OnHandleDestroyed(e);
    }

    //This overridden method sort of delays things a little if the calling program
    //was too aggressive and started a fill before the tree was ready to accept it
    protected override void OnHandleCreated(EventArgs e)
    {
      base.OnHandleCreated(e);
      if(WaitForFill)
      {
        WaitForFill = false;
        StartFill(BaseNode);
      }
    }

    //This method is called via a BeginInvoke by the background
    //thread
    private void AddNodes(TreeNode[] tnodes)
    {
      tree.BeginUpdate();

      if(BaseNode != null)
      {
        BaseNode.Nodes.AddRange(tnodes);
        BaseNode.Expand();
      }
      else
        tree.Nodes.AddRange(tnodes);

      tree.EndUpdate();
    }

    //This method is called by the background thread when it is
    //finished handing over all the nodes it needs to add.
    private void OnFillComplete(object sender, EventArgs e)
    {
      //Only call this delegate if someone has hooked up to it
      //otherwise it is null and you will get a major crash. C# ONLY!!
      if(FillComplete != null)
      FillComplete(sender, e);
    }

    #endregion
#Region "events/Delegates"

  'If the user kills the program before the tree has filled then you will
  'need to stop the fill first. This is why the Base.OnHandleDestroyed
  'is called after the stop fill.
  Protected Overrides Sub OnHandleDestroyed(ByVal e As EventArgs)
    If Not tree.RecreatingHandle Then
      StopFill()
    End If
    MyBase.OnHandleDestroyed(e)
  End Sub

  'This overridden method sort of delays things a little if the calling program
  'was too aggressive and started a fill before the tree was ready to accept it
  Protected Overrides Sub OnHandleCreated(ByVal e As EventArgs)
    MyBase.OnHandleCreated(e)
    If WaitForFill Then
      WaitForFill = False
      StartFill(BaseNode)
    End If
  End Sub

  'This method is called via a BeginInvoke by the background
  'thread
  Private Sub AddNodes(ByVal tnodes() As TreeNode)
    tree.BeginUpdate()

    If Not BaseNode Is Nothing Then
      BaseNode.Nodes.AddRange(tnodes)
      BaseNode.Expand()
    Else
      tree.Nodes.AddRange(tnodes)
    End If

    tree.EndUpdate()
  End Sub

  'This method is called by the background thread when it is
  'finished handing over all the nodes it needs to add.
  Private Sub OnFillComplete(ByVal sender As Object, ByVal e As EventArgs)
    'Only call this delegate if someone has hooked up to it
    'otherwise it is null and you will get a major crash.
    RaiseEvent FillComplete(sender, e)
  End Sub

#End Region
Here is where some tricky work goes on.
The first two methods override the OnHandleCreated and OnHandleDestroyed methods. I override the OnHandleCreated method to allow a deferred fill. Remember, the StartFill method checked to see if the tree handle was created, and if not it set the WaitForFill variable. Well, this event handler catches the creation of the handle, and if this variable was set it starts the fill process. This is a way to make sure that the client does not have to wait around for the control to be created before starting the fill.
The OnHandleDestroyed event is used to kill the worker thread before the tree is destroyed. If you did not use this event and you killed the window containing this control while the thread was running, your program would crash. Notice that I defer the call to the base method until after stopping the thread. Remember that the Thread.Join method blocks the calling thread (this one) before returning. By deferring the call to the base method until after the join has returned, I make sure that the window is not destroyed before it is time.
The AddNodes method is nothing you haven't seen before. It takes an array of nodes and adds it to a base node. If the base node does not exist, it adds all the nodes as root nodes. We all know by now that adding a few thousand root nodes makes for an oppressively long time to clear the tree. This is why the StartFill method takes a node as an argument. It allows this control to add nodes to an already existing node. This makes the clear method very fast.
The OnFillComplete delegate is used to raise an event while in the current thread. This delegate is called by the worker thread when it is done. As I stated earlier, this method is not necessary, but it does make things consistent because the event is raised by the calling thread rather than the worker thread.
Notice that this C# version of this method checks to see if a client has connected to this event before calling it. If you did not check for null here, your program would crash if no client wired up a delegate to this event.
The VB code does not check for null here, as the internal VB code takes care of this if no one is listening.[2]
The next region of code to add contains the worker thread.
C#
    #region Worker Thread

    private void tnodeThread()
    {
      ArrayList NodeList = new ArrayList();
      Array NodeArray;

      try
      {
        tnodes.TrimToSize();
        for(int k=0; k<tnodes.Count; k++)
        {
          NodeList.Add(new TreeNode((string)tnodes[k]));
          if(decimal.Remainder((decimal)NodeList.Count, 20) == 0)
          {
          NodeArray = Array.CreateInstance(typeof(TreeNode), NodeList.Count);
          NodeList.CopyTo(NodeArray);
          IAsyncResult r = this.BeginInvoke(NodeDelegate,
                                            new object[] {NodeArray});
          NodeList.Clear();
          //Sleep for 300 milliseconds to pretend we are doing something
          //really complicated
          Thread.Sleep(300);
        }
      }

      if(NodeList.Count > 0)
      {
        NodeArray = Array.CreateInstance(typeof(TreeNode), NodeList.Count);
        NodeList.CopyTo(NodeArray);
        IAsyncResult r = this.BeginInvoke(NodeDelegate,
                                          new object[] {NodeArray});
      }
    }
    finally
    {
      filling = false;
      //I could raise the event from here but it would be coming from
      //a different thread. If a client did not know this was a multithreaded
      //control then it could expect the event to be raised from the same
      //thread that the client is in.
      BeginInvoke(onFillComplete, new object[] {this, EventArgs.Empty});
    }

  }

  #endregion
VB
#Region "Worker Thread"

  Private Sub tnodeThread()
    Dim NodeList As ArrayList = New ArrayList()
    Dim NodeArray As Array
    Dim k As Int32

    Try
      tnodes.TrimToSize()
      For k = 0 To tnodes.Count - 1
        NodeList.Add(New TreeNode(CType(tnodes(k), String)))
        If Decimal.Remainder(CType(NodeList.Count, Decimal), 20) = 0 Then
          NodeArray = Array.CreateInstance(GetType(TreeNode), NodeList.Count)
          NodeList.CopyTo(NodeArray)
          Dim r As IAsyncResult = Me.BeginInvoke(NodeDelegate, _
                                                 New Object() {NodeArray})
          NodeList.Clear()
          'Sleep for 300 milliseconds to pretend we are doing something
          'really(complicated)
          Thread.Sleep(300)
        End If
      Next
      If NodeList.Count > 0 Then
        NodeArray = Array.CreateInstance(GetType(TreeNode), NodeList.Count)
        NodeList.CopyTo(NodeArray)
        Dim r As IAsyncResult = Me.BeginInvoke(NodeDelegate, _
                                               New Object() {NodeArray})
      End If
    Finally
      filling = False

      'I could raise the event from here but it would be coming from
      'a different thread. If a client did not know this was a multithreaded
      'control then it could expect the event to be raised from the same
      'thread that the client is in.
      BeginInvoke(on_FillComplete, New Object() {Me, EventArgs.Empty})
    End Try

  End Sub

#End Region
This thread consists of only a single method. First, I wrap the code in a Try-Finally block. This ensures that the "filling" variable gets reset and the FillComplete delegate gets called before I leave this method. No matter what, the Finally clause guarantees this.
I make an array of nodes and add the strings as nodes one by one into the array. Once the array has 20 items, I create a simple array of nodes that gets passed to the NodeDelegate via the BeginInvoke call.
You can see that I clear the node list array after I make the call. Using the Decimal.Remainder function allows me to comment out the NodeList.Clear() call and keep adding to the list if I want while sending 20 nodes at a time to the delegate. I chose 20 as an arbitrary number.
Most worker threads are in existence because they do a lot of work and you don't want the user to have to wait around for it to be done. This thread does not do so much work. To simulate a lot of work, I added a call to a sleep method. This call slows down the filling of the tree and lets you better see the effect of the background thread.
Because this thread sleeps for a while, I know as a programmer that the worker thread that adds nodes to the tree is done at the end of this sleep time. I am assuming that it is safe to continue on with my work. In reality, I should be calling EndInvoke with IAsyncResult from the BeginInvoke method. The EndInvoke call in this case should come after the sleep call. This ensures that the worker thread is actually done before I continue on. If the worker thread is not done, the EndInvoke method blocks the main thread from continuing until the worker thread finishes. Just to be safe, you should always call EndInvoke after calling BeginInvoke. You avoid so many problems that way.
Notice that I do not add nodes to the TreeView control on this thread. Instead, I marshal the nodes over to the calling thread via the BeginInvoke method. This allows the thread that made the tree to add the nodes. You really need to do this with a Windows Forms control. You do not have complete control over the control, and you may create a conflict or a deadlock if the control is trying to do something (such as clear 10,000 root nodes) while another thread is busy adding nodes. It is always preferable to do any manipulation of a Windows Forms control on the thread it was created on.
| Tip |
Always manipulate a control on the thread it was created on to avoid any potential conflict. |
The last thing to do is wire up all the delegates in the constructor. Here is the code.
C#
    public QuickTree()
    {
      InitializeComponent();

      tnodes         = new ArrayList();
      NodeDelegate   = new NodeAddDelegate(AddNodes);
      onFillComplete = new EventHandler(OnFillComplete);
      filling        = false;
    }
VB
  Public Sub New()
    MyBase.New()

    'This call is required by the Windows Form Designer.
    InitializeComponent()
    tnodes = New ArrayList()
    NodeDelegate = New NodeAddDelegate(AddressOf AddNodes)
    on_FillComplete = New EventHandler(AddressOf OnFillComplete)
    filling = False
  End Sub
There you have it. You now have a TreeView control that has been enhanced with a method that adds nodes via a worker thread. It allows you to add many thousands of nodes while still working in the GUI. How about trying it out?
The first thing you need to do is compile the new control. This will end up as a DLL in the BIN directory for you VB fans and in the BIN\Debug directory for you C# folks.
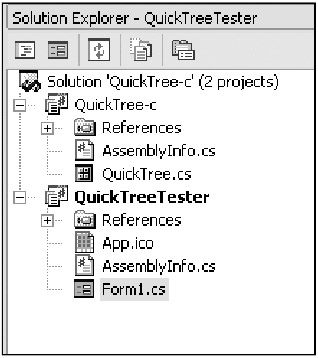
Add a new project to your QuickTree solution. Call this project QuickTreeTester. Right-click this new project and make it the start-up project for the solution. Your solution space should look similar to Figure 10-11.
Size the default form to be about 570×470. Also make this form start in the center of the screen.
Before you add any controls to your form, you need to add your new user control to the Toolbox. You did this several times in Chapter 8, so I go over it lightly here.
Right-click the Toolbox while in the General tab. There is nothing in this tab, so it is easy to see when you have added a control.
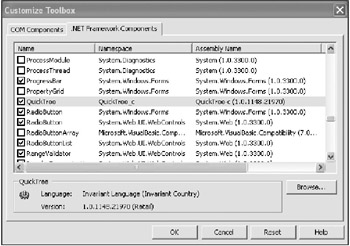
Choose the Customize Toolbox choice and click the .NET Framework Components tab. In this tab, click the Browse button and choose the QuickTree DLL that is in either your BIN subdirectory or the BIN\Debug subdirectory for your project. Once you have double-clicked the control, it will appear in your Toolbox browser, as shown in Figure 10-12.
Click OK and your new control will appear in your Toolbox. Now it's time to add some controls to this test form:
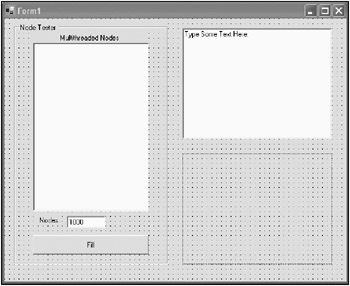
Add a GroupBox to the left side of the form. Size it to fit almost the entire left side of the form. Change its text to Node Tester.
Inside the GroupBox, add a Label whose text reads Multithreaded Nodes. Center the text in the Label.
Inside the GroupBox, add your new QuickTree user control. It should look like a TreeView control when you drop it on the form. Name this control qt.
Inside the GroupBox, add a Label whose text reads Nodes under the QuickTree control.
Inside the GroupBox, add a TextBox called txtNodes next to the Label. Enter 1000 in the Text property.
Inside the GroupBox, add a Button called cmdFill. Its text should read Fill.
Next to the GroupBox, add a RichTextBox.
Below the RichTextBox, add a Panel called P1.
Figure 10-13 shows what the form looks like.
You are able to fill in the TextBox with some number of nodes that you want in the tree. The RichTextBox gives you something to do while the nodes are being added. You will use the Panel as a place to scribble some picture with your mouse while nodes are being added. If the multithreading works as planned, you should be able to type or scribble while seeing nodes being added to the tree in chunks of 20.
| Note |
I will show you code that sets up the Panel for drawing with the mouse. Some of the code to accomplish this with the mouse will be fairly advanced. Some of this code is similar to an example I wrote for my book GDI+ Programming with C# and VB .NET (Apress, 2002). If you are interested in all the capabilities of GDI+ in .NET, I encourage you to pick up this book.[3] |
Now for the tester code. You need the following namespace references.
C#
using System;
using System.Drawing;
using System.Collections;
using System.ComponentModel;
using System.Windows.Forms;
using System.Data;
using System.Threading;
using System.Drawing.Drawing2D;
VB
Option Strict On

Imports System
Imports System.Collections
Imports System.ComponentModel
Imports System.Drawing
Imports System.Data
Imports System.Windows.Forms
Imports System.Threading
Imports System.Drawing.Drawing2D
Next, of course, is the local variable section.
    #region Class local storage

    private Point         mStartPoint;
    private Point         mLastPoint;
    private GraphicsPath  mPath;
    private Rectangle     mInvalidRect;

    #endregion
VB
#Region "vars"

  Private Delegate Sub NodeAddDelegate(ByVal tnodes() As TreeNode)
  Private NodeDelegate As NodeAddDelegate

  Private on_FillComplete As EventHandler
  Public Event FillComplete As EventHandler

  Private tnodes As ArrayList
  Private BaseNode As TreeNode
  Private FillThread As Thread
  Private filling As Boolean
  Private WaitForFill As Boolean

#End Region
You need to add the following methods. Add them below the Form_Load event handler.
C#
    private void AllowNumbers(object sender, KeyPressEventArgs e)
    {
      if(!Char.IsNumber(e.KeyChar) && e.KeyChar != (char)8 )
        e.Handled = true;
    }

    private void TreeComplete(object sender, EventArgs e)
    {
      MessageBox.Show("Tree is done filling");
    }

    private void FillTree(object sender, EventArgs e)
    {
      ArrayList s = new ArrayList();
      int x = int.Parse(txtNodes.Text);

      for(int k=0; k<x; k++)
        s.Add(k.ToString());
      s.TrimToSize();

      //Do not try to bypass the fill without knowing that it is ok
      if(qt.OK2Fill)
      {
        qt.tree.Nodes.Clear();
        TreeNode n = qt.tree.Nodes.Add("BaseNode");
        qt.Strings = s;
        qt.StartFill(n);
      }
    }
VB
Private Sub AllowNumbers(ByVal sender As Object, ByVal e As KeyPressEventArgs)
  If Not Char.IsNumber(e.KeyChar) AndAlso e.KeyChar <> 8.ToString() Then
    e.Handled = True
  End If
End Sub

Private Sub TreeComplete(ByVal sender As Object, ByVal e As EventArgs)
  MessageBox.Show("Tree is done filling")
End Sub

Private Sub FillTree(ByVal sender As Object, ByVal e As EventArgs)
  Dim s As ArrayList = New ArrayList()
  Dim x As Int32 = Int32.Parse(txtNodes.Text)
  Dim k As Int32
  For k = 0 To x - 1
    s.Add(k.ToString())
  Next
  s.TrimToSize()

  'Do not try to bypass the fill without knowing that it is ok
  If qt.OK2Fill Then
    qt.tree.Nodes.Clear()
    Dim n As TreeNode = qt.tree.Nodes.Add("BaseNode")
    qt.Strings = s
    qt.StartFill(n)
  End If
End Sub
The AllowNumbers method allows only digits to be entered in the TextBox. You have seen me do this several different ways, including using regular expressions. As my mother says, "There is more than one way to skin a cat."
The TreeComplete delegate connects to the event that is fired by the user control QuickTree. All I do here is pop up a message box to tell you it is done.
The FillTree method starts the ball rolling. It creates an array of strings that are passed into the QuickTree control. Note that I add a base node directly to the tree before I start filling it in. Also notice that I ask the control if it is OK to start playing around with it.
This next region of code handles the painting of the Panel control.
C#
    #region Panel Painting code

    private void PanelPaint(object sender, PaintEventArgs e)
    {
      Graphics G = e.Graphics;

      G.SmoothingMode = SmoothingMode.HighSpeed;

      if (mPath.PointCount > 0)
        G.DrawPath(Pens.Black, mPath);

      G.DrawRectangle(Pens.Red, 0, 0, P1.Width-1, P1.Height-1);
    }

    private void M_Down(object sender, MouseEventArgs m)
    {
      if (m.Button == MouseButtons.Left)
      {
        mStartPoint = new Point(m.X, m.Y);
        mLastPoint = mStartPoint;
        mPath = new GraphicsPath();
        P1.Invalidate();
      }
    }

    private void M_Up(object sender, MouseEventArgs m)
    {
      mPath.CloseFigure();
      P1.Cursor     = Cursors.Default;

      P1.Invalidate();
    }

    private void M_Move(object sender, MouseEventArgs m)
    {
      if(m.Button == MouseButtons.Left)
      {
        mPath.AddLine(mLastPoint.X, mLastPoint.Y, m.X, m.Y);
        mLastPoint.X = m.X;
        mLastPoint.Y = m.Y;

        mInvalidRect = Rectangle.Truncate(mPath.GetBounds());
        mInvalidRect.Inflate( new Size(2, 2) );
        P1.Invalidate(mInvalidRect);
      }
    }

    #endregion
VB
#Region "Panel Painting code"

  Private Sub PanelPaint(ByVal sender As Object, ByVal e As PaintEventArgs)
    Dim G As Graphics = e.Graphics

    G.SmoothingMode = SmoothingMode.HighSpeed
    If mPath.PointCount > 0 Then
      G.DrawPath(Pens.Black, mPath)
    End If

    G.DrawRectangle(Pens.Red, 0, 0, P1.Width - 1, P1.Height - 1)
  End Sub

  Private Sub M_Down(ByVal sender As Object, ByVal m As MouseEventArgs)
    If m.Button = MouseButtons.Left Then
      mStartPoint = New Point(m.X, m.Y)
      mLastPoint = mStartPoint
      mPath = New GraphicsPath()
      P1.Invalidate()
    End If
  End Sub

  Private Sub M_Up(ByVal sender As Object, ByVal m As MouseEventArgs)
    mPath.CloseFigure()
    P1.Cursor = Cursors.Default

    P1.Invalidate()
  End Sub

  Private Sub M_Move(ByVal sender As Object, ByVal m As MouseEventArgs)
    If m.Button = MouseButtons.Left Then
      mPath.AddLine(mLastPoint.X, mLastPoint.Y, m.X, m.Y)
      mLastPoint.X = m.X
      mLastPoint.Y = m.Y
      mInvalidRect = Rectangle.Truncate(mPath.GetBounds())
      mInvalidRect.Inflate(New Size(2, 2))
      P1.Invalidate(mInvalidRect)
    End If
  End Sub

#End Region
Here is what is happening. The M_Down, M_Move, and M_Up methods connect to the appropriate events for the Panel. The M_Down delegate creates a Point structure and initializes a GraphicsPath. The M_Move delegate takes note of the mouse position and creates a line that extends from the last known mouse position to the current position. This line then gets added to the GraphicsPath and the Panel is invalidated. Before I invalidate the Panel, I calculate the size of a rectangle that will hold the GraphicsPath. This rectangle gets sent to the Invalidate command. I do this to minimize the amount of drawing that is done on the screen. It creates less flicker and faster drawing. The M_Up method closes the GraphicsPath by connecting the end point directly to the start point. It then does one last Invalidate of the Panel.
When the Panel is invalidated, the OnPaint event for the control gets fired. I handle this event with the PanelPaint delegate. This delegate makes sure that the painting is done as fast as possible. It then draws the path using a black pen. (The Pens class is static. Remember static classes?) I check first to see if there are any points in the GraphicsPath. You could have clicked the mouse here and created nothing. I also draw a red border around the Panel to give it some definition.
The last thing to do is wire up all the delegates and perform some initialization. This is done in the constructor.
C#
    public Form1()
    {
      InitializeComponent();

      //Set Drawing Panel Properties
      P1.BackColor      = Color.Bisque;
      P1.Paint          += new PaintEventHandler(this.PanelPaint);
      P1.MouseDown      += new MouseEventHandler(this.M_Down);
      P1.MouseUp        += new MouseEventHandler(this.M_Up);
      P1.MouseMove      += new MouseEventHandler(this.M_Move);
      mPath             = new GraphicsPath();

      //Set double buffer to ameliorate screen flicker
      this.SetStyle(ControlStyles.AllPaintingInWmPaint,true);
      this.SetStyle(ControlStyles.DoubleBuffer,true);

      cmdFill.Click     += new EventHandler(FillTree);
      txtNodes.KeyPress += new KeyPressEventHandler(AllowNumbers);
      qt.FillComplete   += new EventHandler(TreeComplete);
    }
VB
  Public Sub New()
    MyBase.New()

    'This call is required by the Windows Form Designer.
    InitializeComponent()

    'Set Drawing Panel Properties
    P1.BackColor = Color.Bisque
    AddHandler P1.Paint, New PaintEventHandler(AddressOf PanelPaint)
    AddHandler P1.MouseDown, New MouseEventHandler(AddressOf M_Down)
    AddHandler P1.MouseUp, New MouseEventHandler(AddressOf M_Up)
    AddHandler P1.MouseMove, New MouseEventHandler(AddressOf M_Move)
    mPath = New GraphicsPath()

    'Set double buffer to ameliorate screen flicker
    Me.SetStyle(ControlStyles.AllPaintingInWmPaint, True)
    Me.SetStyle(ControlStyles.DoubleBuffer, True)

    AddHandler cmdFill.Click, New EventHandler(AddressOf FillTree)
    AddHandler txtNodes.KeyPress, New KeyPressEventHandler(AddressOf _
                                                            AllowNumbers)

    AddHandler qt.FillComplete, New EventHandler(AddressOf TreeComplete)

  End Sub
I color the Panel and set the ControlStyles of the form itself. The ControlStyles I chose here allow for double buffering of the drawing. Double buffering virtually eliminates flicker when repainting the screen. I also wire up the new event from the QuickTree control as well as the button in the tester screen.
It is now time to put this multithreaded TreeView to a test. Compile the program and fix any errors. If you cannot fix any errors, then download the code for this program from the Downloads section of the Apress Web site (http://www.apress.com). I guarantee it works.
Figure 10-14 shows the form as I am drawing on the Panel and typing in the RichTextBox.
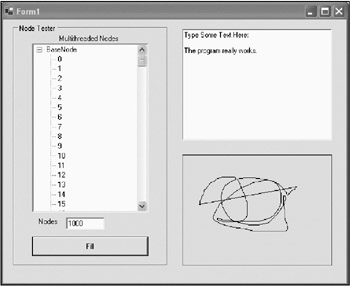
If this was an e-book, I could perhaps animate this picture and show you that the nodes are being added and I am drawing at the same time. Maybe next year.
At some point while you are typing or scribbling, you will see a message pop up stating that all the nodes are there. Figure 10-15 shows this.
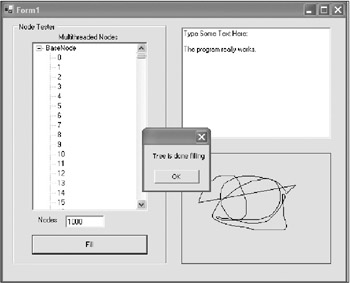
You can prove to yourself that you are constantly adding nodes by dragging down the scroll thumb while nodes are being added. You will see the thumb scrolling back up until it is done.
I chose the drawing panel as a test because it requires quite a bit of system time in the form of events. None of the mouse events seems to hinder or slow down the filling of the tree.
Multithreading is cool. Have I forgotten anything, though? What about race conditions between threads?
I use two variables in the worker thread, the Filling variable and the tnodes array, that can cause problems between it and the main thread. It is entirely possible for these variables to be changed by one thread while the other is trying to use them.
The Filling variable is not so bad. The main thread does not fiddle with this while the worker thread is running. Also, the main thread looks at this variable only after starting the worker thread. If the worker thread changes it from true to false while the main thread is trying to use it, no big deal. The main thread will just bail out of the StartFill method if false or continue if true. Because the worker thread changes this variable only when it is finished, no damage will be done.
The tnodes array is another matter. This is one reason I added the OK2Fill property to this control. I am giving the client a chance to be nice and not change anything with the tree while stuff is going on. This is not enough, however.
Suppose the client altered the strings that are the basis for the tnodes array while the worker thread was filling the tree. Some undesirable effects would happen. Your first line of defense here is to alter the Strings property of the control.
C#
    public ArrayList Strings
    {
      set
      {
        if(!filling)
        tnodes = (ArrayList)value.Clone();
      }
    }
  Public WriteOnly Property Strings() As ArrayList
    Set(ByVal Value As ArrayList)
      If Not filling Then
        tnodes = CType(Value.Clone(), ArrayList)
      End If
    End Set
  End Property
Here I made sure that I was not in the process of filling the tree before changing the tnodes list. Again, the Filling variable could be changing while this property is using it, but by then the worker thread is done with the tnodes array and it does not matter.
Now you are probably thinking about using a SyncLock to block a thread from using any shared variables while another thread is using them. This works, of course, but it is not necessary here. There is no need to block threads here if you think about what is going on in the program.
If this program was more complicated (such as appending nodes while the first set was being added), then the code would differ a lot and perhaps then you would need some more variables that would require locking between threads.
This program is simple and, as such, it does not need a lot of thread synchronizing. You can soon get yourself into hot water, however. Try your thread legs out with small programs like this, and then graduate to full-bore multiprocessor/ multithreaded programs only after you have learned what to do and what not to do.