Sometimes when you write a cascading if statement, all the if statements look very similar, because they all evaluate an identical expression. The only difference is that each if compares the result of the expression with a different value. For example:
if (day == 0)
    dayName = "Sunday";
else if (day == 1)
    dayName = "Monday";
else if (day == 2)
    dayName = "Tuesday";
else if (day == 3)
    ...
else
    dayName = "Unknown";
In these situations, you can often rewrite the cascading if statement as a switch statement to make your program more efficient and more readable.
The syntax of a switch statement is as follows (switch, case, and default are keywords):
switch ( controllingExpression )
{
case constantExpression :
    statements
    break;
case constantExpression :
    statements
    break;
...
default :
    statements
    break;
}
The controllingExpression is evaluated once, and the statements below the case whose constantExpression value is equal to the result of the controllingExpression run as far as the break statement. The switch statement then finishes, and the program continues at the first statement after the closing brace of the switch statement.
If none of the constantExpression values are equal to the value of the controllingExpression, the statements below the optional default label run.
For example, you can rewrite the previous cascading if statement as the following switch statement:
switch (day)
{
case 0 :
    dayName = "Sunday";
    break;
case 1 :
    dayName = "Monday";
    break;
case 2 :
    dayName = "Tuesday";
    break;
...
default :
    dayName = "Unknown";
    break;
}The switch statement is very useful, but, unfortunately, you can't always use it when you might like to. Any switch statement you write must adhere to the following rules:
You can use switch only on primitive data types, such as int or string. With any other types, you'll have to use an if statement.
The case labels must be constant expressions, such as 42 or “42”. If you need to calculate your case label values at run time, you must use an if statement.
The case labels must be unique expressions. In other words, two case labels cannot have the same value.
You can specify that you want to run the same statements for more than one value by providing a list of case labels and no intervening statements, in which case, the code for the final label in the list is executed for all cases. However, if a label has one or more associated statements, execution cannot fall through to subsequent labels, and the compiler generates an error. For example:
switch (trumps)
{
case Hearts :
case Diamonds :      // Fall-through allowed – no code between labels
    color = "Red";   // Code executed for Hearts and Diamonds
    break;
case Clubs :
    color = "Black";
case Spades :        // Error – code between labels
    color = "Black";
    break;
}In the following exercise, you will complete a program that reads the characters of a string and maps each character to its XML representation. For example, the '<' character has a special meaning in XML (it's used to form elements) and must be translated into "<". You will write a switch statement that tests the value of the character and traps the special XML characters as case labels.
Start Visual Studio 2005.
Open the SwitchStatement project, located in the \Microsoft Press\Visual CSharp Step by Step\Chapter 4\SwitchStatement folder in your My Documents folder.
On the Debug menu, click Start Without Debugging.
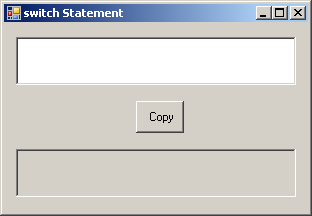
Visual Studio 2005 builds and runs the application. There are two text boxes separated by a Copy button.
Type the following sample text into the upper text box:
inRange = (lo <= number) && (number <= hi);
Click Copy.
The statement is copied verbatim into the lower text box, and no translation of the '<' character occurs.
Close the form.
Display the code for Form1.cs in the Code and Text Editor window. Locate the copyOne method.
The copyOne method copies one character from the upper text box to the lower text box. At the moment, copyOne contains a switch statement with a single default section.
In the following few steps, you will modify this switch statement to convert characters that are significant in XML to their XML mapping. For example, the '<' character will be converted to the string "<".
Add the following statements to the switch statement, above the default label:
case '<' : target.Text += "<"; break; case '>' : target.Text += ">"; break; case '&' : target.Text += "&"; break; case '\"' : target.Text += """; break; case '\'' : target.Text += "'"; break;
On the Debug menu, click Start Without Debugging.
Visual Studio 2005 builds and runs the application.
Type the following statement into the upper text box:
inRange = (lo <= number) && (number <= hi);
Click Copy.
The statement is copied into the lower text box. This time, each character undergoes the XML mapping implemented in the switch statement.
Close the form.
If you want to continue to the next chapter
Keep Visual Studio 2005 open, and turn to Chapter 5.
If you want to exit Visual Studio 2005 now
On the File menu, click Exit. If you see a Save dialog box, click Yes.