With the advent of the .NET Framework, Microsoft decided to update its model for accessing databases, ActiveX Data Objects (ADO), and created ADO.NET. ADO.NET contains several enhancements over the original ADO architecture, providing improved interoperability and performance. If you are already familiar with ADO, you will notice that the object model of ADO.NET is a little different. For one thing, the RecordSet type no longer exists—Microsoft has created the TableAdapter and DataSet classes that support disconnected data access and operations, allowing greater scalability because you no longer have to be connected to the database all the time. (To be fair, ADO provided disconnected RecordSets, but they were the exception rather than the rule when used by programmers.) Therefore, your applications can consume fewer resources. With the connection pooling mechanisms of ADO.NET, database connections can be reused by different applications, thereby reducing the need to continually connect to and disconnect from the database, which can be a time-consuming operation.
ADO.NET is designed to be easy to use, and Visual Studio 2005 provides several wizards and other features that you can use to generate data access code.
Northwind Traders is a fictitious company that sells edible goods with exotic names. The Northwind database contains several tables with information about the goods that Northwind Traders sells, the customers they sell to, orders placed by customers, suppliers that Northwind Traders obtains goods from to re-sell, shippers that they can use to send goods to customers, and employees who work for Northwind Traders. Figure 23-1 shows all the tables in the Northwind Traders database and how they are related to each other. The tables that you will be using in this chapter are Orders and Products.

Before proceeding further, you need to create the Northwind Traders database.
On the Windows Start menu, click All Programs, click Accessories, and then click Command Prompt to open a command prompt window. In the command prompt window, go to the \Microsoft Press\Visual CSharp Step by Step\Chapter 23 folder in your My Documents folder.
In the command prompt window, type the following command:
sqlcmd –S YourServer\SQLExpress –E –iinstnwnd.sqlReplace YourServer with the name of your computer.
This command uses the sqlcmd utility to connect to your local instance of SQL Server 2005 Express and run the instnwnd.sql script. This script contains the SQL commands that create the Northwind Traders database and the tables in the database, and fills them with some sample data.
When the script finishes running, close the command prompt window.
In this set of exercises, you will write a program that connects to the database, retrieves the contents of the Products and Suppliers tables, and displays their contents. In the Northwind Traders database, each product is supplied by a single supplier, but an individual supplier can supply more than one product.
In the first exercise, you will create a data source that connects to the Northwind Traders database and retrieves the contents of these tables, by using the wizards provided with Visual Studio 2005.
Using Visual Studio 2005, create a new project by using the Windows Application template. Name the project DisplayProducts and save it in the \Microsoft Press\Visual CSharp Step by Step\Chapter 23 folder in your My Documents folder.
On the Data menu, click Add New Data Source.
The Data Source Configuration Wizard starts. You use this wizard to create a connection to a data source. A data source can be a database, an object, or a Web service. Using an object or a Web service as a data source is beyond the scope of this book, but we will describe how to create and use Web services in Chapter 28, “Creating and Using a Web Service.”
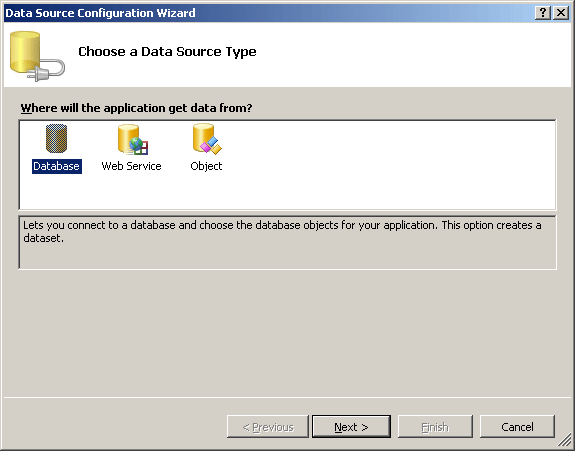
Ensure the Database icon is selected, and then click Next. The next page of the wizard prompts you to provide information about the connection to the database you want to use. You have not created any data connections yet, so click the New Connection button.
The Choose Data Source dialog box appears, allowing you to select the data source and data provider to use. The data source specifies the type of database you want to use, and the data provider specifies how you will connect to the database. Some data sources can be accessed by using more than one data provider. For example, you can connect to SQL Server by using the .NET Framework Data Provider for SQL Server, or the .NET Framework Data Provider for OLE DB. The .NET Data Provider for SQL Server is optimized for connecting to SQL Server databases, whereas the .NET Framework Data Provider for OLE DB is a more generic provider that can be used to connect to a variety of data sources, not just SQL Server.
For this application, click the Microsoft SQL Server data source, and make sure the .NET Framework Data Provider for SQL Server is selected as the data provider.
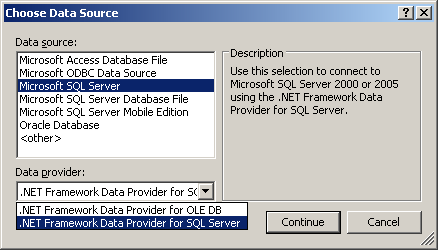
Click Continue to proceed to the next step.
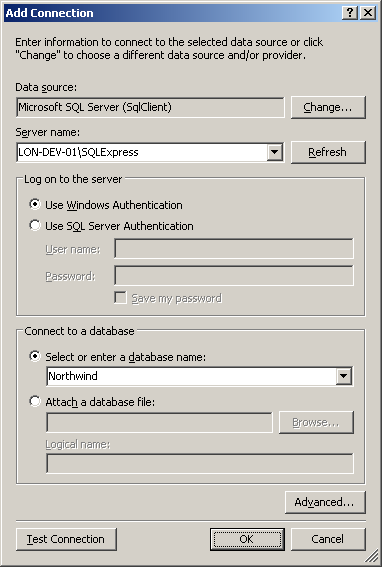
The Add Connection dialog box appears next. You use this dialog box to specify which SQL Server you want to connect to, the authentication mechanism to use, and the database you want to access.
Type YourServer\SQLExpress in the Server name box, where YourServer is the name of your computer. Select the Use Windows Authentication option to log on to the server. This option uses your Windows account name to connect to the database, and is the recommended way to log on to SQL Server. Select the Northwind database, and then click OK.
You are returned to the Data Source Configuration Wizard. The new data connection is given the name YourServer\SQLExpress.Northwind.dbo.
Click the + sign by the Connection String label.
You will see a string that contains the connection details you have just specified. This information is held in a format that can be used by the SQL Server provider to connect to the server.
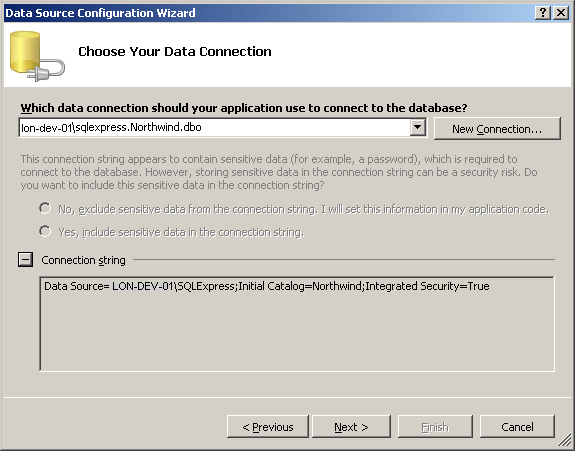
Click Next.
The connection information you have specified can also be saved in an application configuration file. This feature allows you to modify the connection string without needing to rebuild the application; you simply edit the application configuration file. It is useful if you envisage ever needing to use a different database from the one you built the application with.
Save the connection information with the default name.
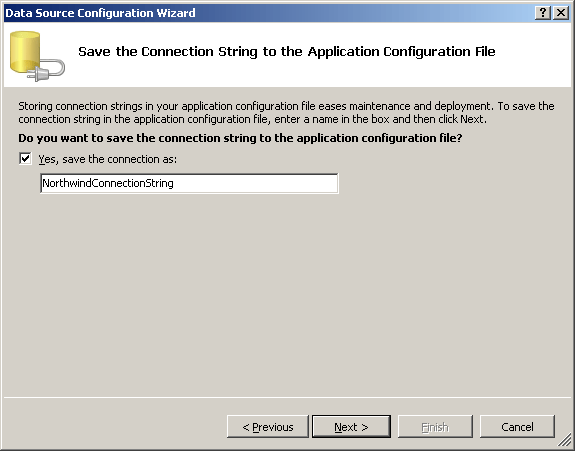
Click Next.
The next page of the wizard allows you to select the data you want to use. You can retrieve data from tables or views in the database, or access the results of stored procedures and functions in SQL Server.
Expand the Tables folder and select the Products and Suppliers tables.
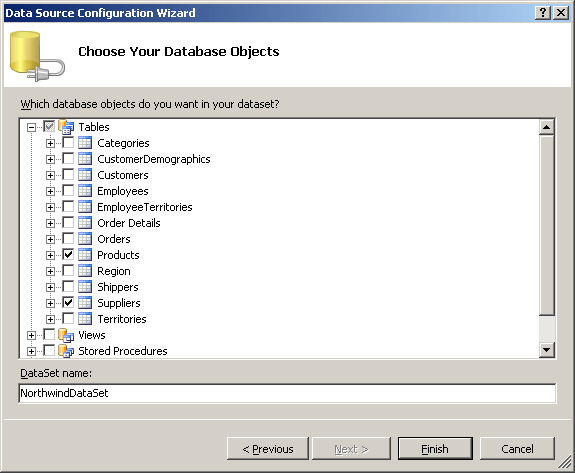
The wizard generates a DataSet object called NorthwindDataSet that you can use to manipulate the data returned. A DataSet object represents an in-memory copy of tables and rows retrieved from a database.
Click Finish to complete the wizard.
The ADO.NET object model uses DataSets to cache data retrieved from a database. An application that defines DataSet objects can execute queries that populate them, and then display and update the data that they contain. Internally, a DataSet object contains one or more DataTable objects; each DataTable corresponds to a table specified when the DataSet is defined. In the following exercise you will see that NorthwindDataSet contains two DataTable objects called Products and Suppliers.
In the Northwind database, the Products and Suppliers tables have a many-to-one relationship; each product is supplied by a single supplier, but each supplier can supply many products. The Northwind database implements this relationship by using primary and foreign keys. The Data Source Configuration Wizard uses this information to create a DataRelation object as part of NorthwindDataSet. A DataRelation object ensures that the same relationship that exists in the database is maintained between the Products and Suppliers DataTable objects in memory.
At runtime, how does an application actually populate a DataSet? The answer lies in another object called the TableAdapter. A TableAdapter contains methods that you can use to build a DataSet. The two most common methods are called Fill and GetData. The Fill method fills an existing DataSet and returns an integer specifying how many rows were retrieved. The GetData method creates a new, populated DataSet.
That's enough theory for now. Let's see what this all means in practice.
In the Data menu, click Preview Data.
The Preview Data dialog box appears, enabling you to view the data returned by the data source you have just created.
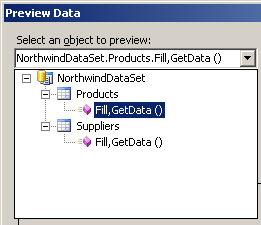
Click the drop-down list labelled Select an object to preview.
You will see a tree-view containing the contents of NorthwindDataSet. The DataSet contains two DataTable objects called Products and Suppliers described earlier. Underneath each DataTable you will see a node marked Fill, GetData(). (You might need to expand the Suppliers DataTable to view its child node.) This node corresponds to the TableAdapter object for each TableAdapter.
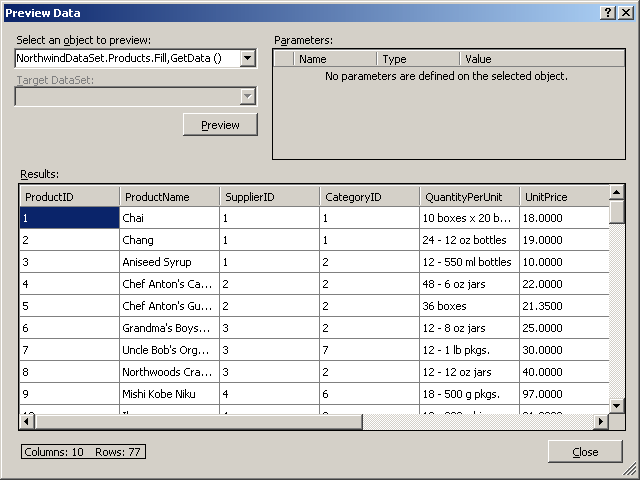
Click the Fill, GetData() node under Products, and then click the Preview button.
The Results window displays the rows from the Products table in the database.
In the Select an object to preview drop-down list, click the Fill, GetData() node under Suppliers. Click Preview.
This time, the data from the Suppliers table is displayed.
Click Close to close the Preview Data dialog box.
Now that you have seen how to define DataSets, let's see how you can use them in an application.
In the Solution Explorer, right-click Form1.cs and rename the form as DataForm.cs. A dialog box appears asking whether you would like Visual Studio 2005 to modify all the references in this project to use the new name. Click Yes.
Display DataForm in the Designer View window. Using the Properties window, change its Text property to Suppliers and Products, and change its Size property to 800, 410.
On the Data menu, click Show Data Sources. The Data Sources window appears, displaying NorthwindDataSet with the Products and Suppliers DataTable objects. Expand the Products and Suppliers DataTable objects.
The columns in each table appear, together with an icon indicating how each column will be displayed on the form. Most columns will be displayed as textbox controls, although the Discontinued column in the Products DataTable will appear as a checkbox; this is because the corresponding column in the database is a bit column that can only contain True/False values. Also notice that Products appears twice: once as a DataTable object in its own right, and once as a column in the Suppliers DataTable. You will shortly see how this feature allows the relationship between a supplier and the products it supplies to be coordinated.

Click the Suppliers DataTable. A drop-down menu appears by the name. Click the drop-down menu, and select Details.
This action will change the display layout for suppliers to a set of fields rather than the default grid layout. The Details layout is useful for displaying the data in the “one” side of a many-to-one relationship, while the Grid view is more suited to the “many” side.

Click the SupplierID column in the Suppliers DataTable. Another drop-down menu appears. Click this drop-down menu. You will see the different ways that the data in this column can be presented. The SupplierID column is actually the primary key for this table in the database, and so it should not be changed. For this reason, click the Label control.
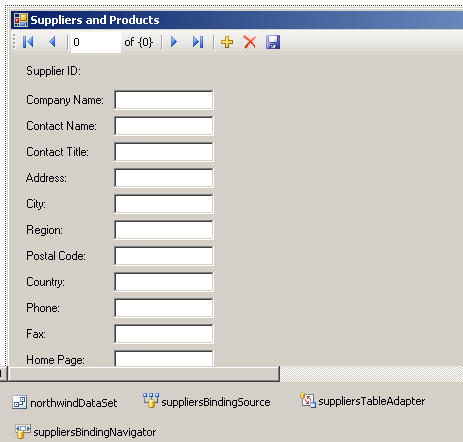
Click the Suppliers DataTable and drag it to the top left corner of the Suppliers and Products form.
Notice that a number of components appear underneath the form. The table below summarizes these components. Also notice the tool strip that appears at the top of the form. This tool strip contains items for navigating through the list of suppliers, as well as for adding, modifying, and deleting rows, and for saving changes back to the database.
Component |
Description |
northwindDataSet |
This is the data source used by the form. It is a NorthwindDataSet object. It provides methods for updating data in the database. |
suppliersBindingSource |
This component acts as an intermediary between the controls on the form, and the data source. A BindingSource component keeps track of the currently selected row in the DataSet, and ensures that the controls on the form display the data for that row. A BindingSource provides methods for navigating through a DataSet, adding, removing, and updating rows |
suppliersTableAdapter |
This is the TableAdapter object for the Suppliers table, providing methods for retrieving rows from the Suppliers table in the database and populating the data source. |
suppliersBindingNavigator |
This is a BindingNavigator control that provides a standardized mechanism for navigating through the rows in a DataSet. It is the visible tool strip that appears at the top of the form containing the tool strip items for most of the common data-related actions. |
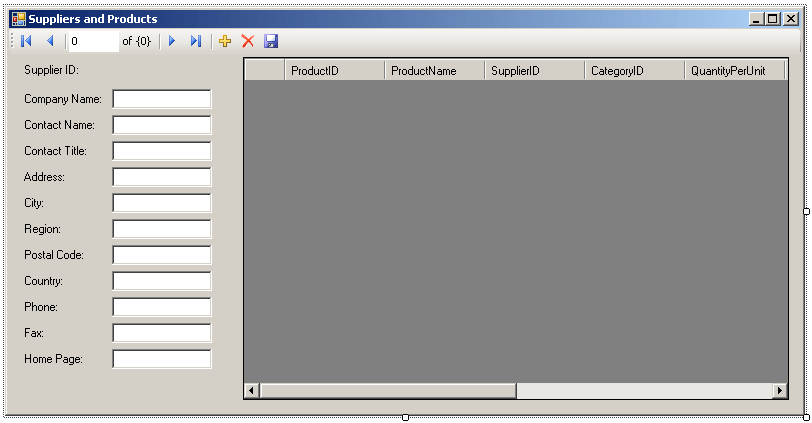
Click the Products DataTable that is nested inside the Suppliers DataTable and drag it onto the form, to the right of the Supplier fields.
A DataGridView control appears on the form. Also notice that two more components appear underneath the form: productsBindingSource which is a BindingSource control that coordinates the rows in the DataGridView with northwindDataSet, and products TableAdapter which is used to retrieve rows from the database into the Products Data Table.
Click the DataGridView control on the form and expand it to fill the right-hand side of the form.
While the DataGridView control is still selected (click it if it is not), click the Smart Tag handle that appears at the top right-hand corner of the control.
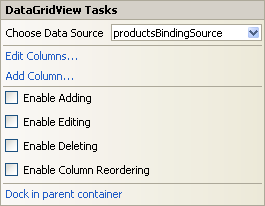
The DataGridView Tasks dialog box appears. You can use this dialog box to quickly modify the commonly used properties of the DataViewGrid control, and perform tasks such as changing the properties of the columns displayed, and changing the actions supported by the control. To keep the application straightforward, clear the Enable Adding, Enable Editing, Enable Deleting, and Enable Column Reordering checkboxes. You will learn more about using the DataGridView control in Chapter 24, “Working with Data Binding and DataSets.”
Start the application running without debugging. When the form appears, the first supplier (Exotic Liquids) is displayed together with the three products it supplies. Click the Move next button in the tool strip.
The supplier New Orleans Cajun Delights appears, together with the four products it supplies. You can overtype any of the supplier's details to change them, although the changes will not be saved to the database until you click the Save button in the tool strip.
Click the Add new button in the toolstrip.
The form clears, and you can enter the details of the new supplier. Notice how a new supplier ID is automatically generated. As before, the details of the new supplier will not be saved to the database unless you click the Save button in the tool strip.
Click the Delete button in the tool strip to remove this new supplier.
Existing supplier number 29 automatically appears.
Close the form without saving any changes to the data and return to the Visual Studio 2005 programming environment.