Master Pages represent a sort of metapage. They have much the same structure as normal pages. However, they live in files named with the “master” extension. A Master Page serves as a template that renders a common appearance to all pages based on it. Master Pages use XHTML document tags (such as <html>, <head>, and <body>) that apply only to the Master Page. When you surf to a page that has a Master Page applied to it, the request and response are filtered through the Master Page. The Master Page may not be served by itself, ensuring that each page has a common look and feel. ASP.NET merges the Master Page and the ASPX page (the content page) into a single class. At that point, the class processes requests and renders output like any other System.Web.UI.Page–derived class.
Because Master Pages are similar to normal ASPX pages, they may contain the same sort of content and functionality as normal pages. That is, they may contain server-side controls, user controls, and markup. In addition to markup and controls, a Master Page may contain instances of the System.Web.UI.WebControls.ContentPlaceHolder control. As its name implies, the content placeholder stands in place of the real content that will eventually appear in pages based upon the Master Page. A Master Page renders all the elements it contains. That is, those elements not contained within a System.Web.UI.WebControls.ContentPlaceHolder control.
Because Master Pages play a part in how the final page handler is synthesized, they work a bit differently than the straight inheritance technique described above (that is, writing a base class to implement common functionality via inheritance). As the page executes, the Master Page injects its own content into the ASPX page using the Master Page. Specifically, the Master Content ends up being represented by a control that is added to the ASPX page's Controls collection, where it's rendered in the same way all other controls are.
In addition to most normal page attributes and functionality, Master Pages may contain the following directives (which are also available to ASC files).
AutoEventWireup
ClassName
CompilerOptions
Debug Description
EnableViewState Explicit
Inherits
Language
Strict
Src
WarningLevel
Master
The following exercise illustrates developing a site around a Master Page.
Create a new site named MasterPageSite.
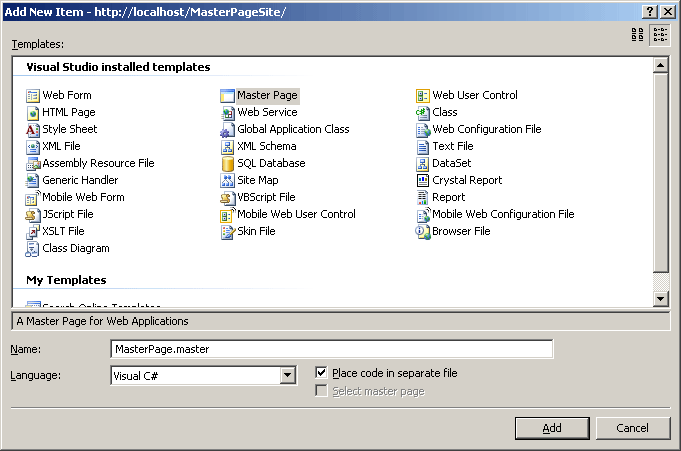
Add a new item to the page. Select MasterPage from the available templates. Name it MasterPage.master. The following graphic shows adding a Master Page template.
Visual Studio will pump out code like this in a file named MasterPage.master:
<%@ Master Language="VB"
CodeFile="ASPNetStepByStepMasterPage.master.vb"
Inherits="ASPNetStepByStepMasterPage" %>

<!DOCTYPE html PUBLIC "-//W3C//DTD XHTML 1.1//EN"
"http://www.w3.org/TR/xhtml11/DTD/xhtml11.dtd">

<html xmlns="http://www.w3.org/1999/xhtml">
<head runat="server">
    <title>Untitled Page</title>
</head>
<body>
    <form id="form1" runat="server">
    <div>
        <asp:contentplaceholder
        id="ContentPlaceHolder1 runat="server">
        </asp:contentplaceholder>
    </div>
    </form>
</body>
</html>
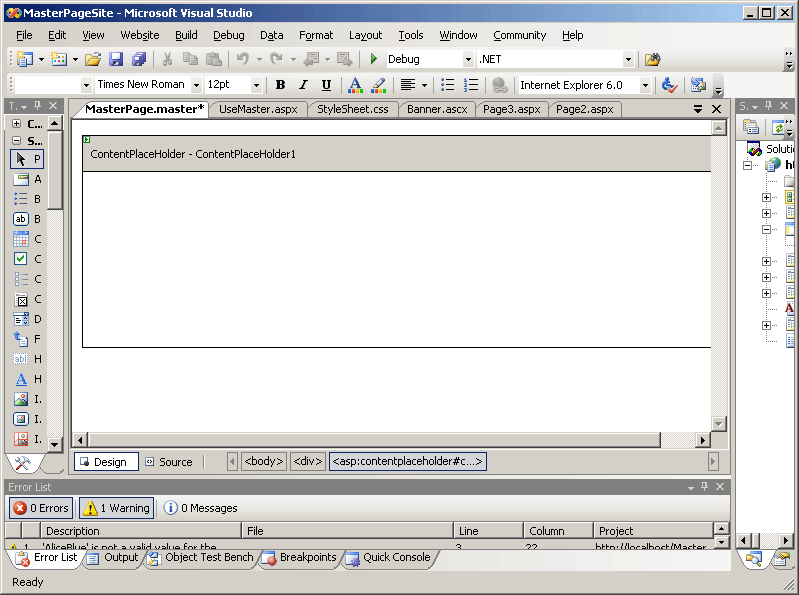
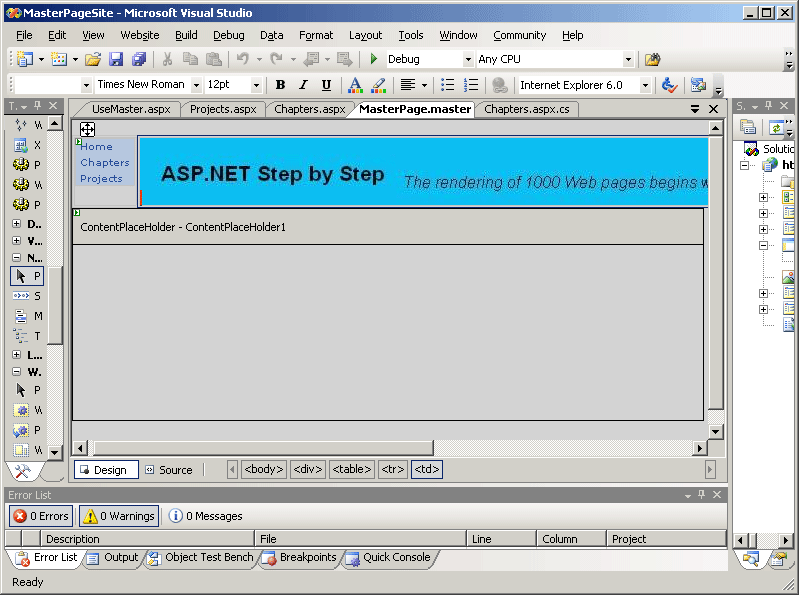
This is what the Master Page looks like in design mode:
Update the background color of the Master Page. In the Properties dialog box, select the Document element from the combo box and update the document's background color. The example here uses light gray. This will let you see that the Master Page is really being used in subsequent ASPX files.
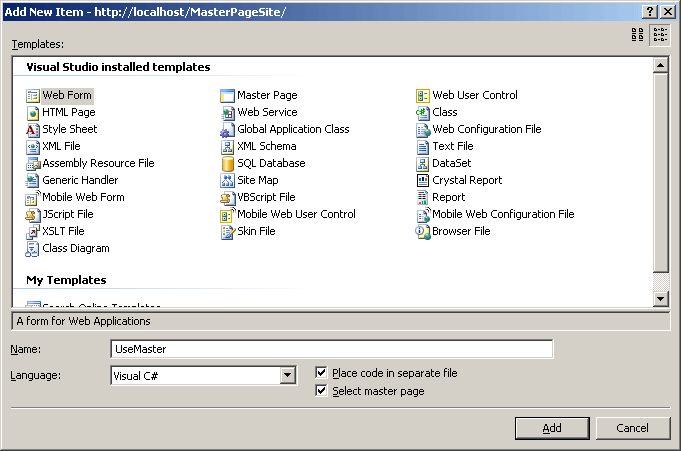
Create a new form and name it UseMaster.aspx. Make sure the Select master page check box is checked, like so:
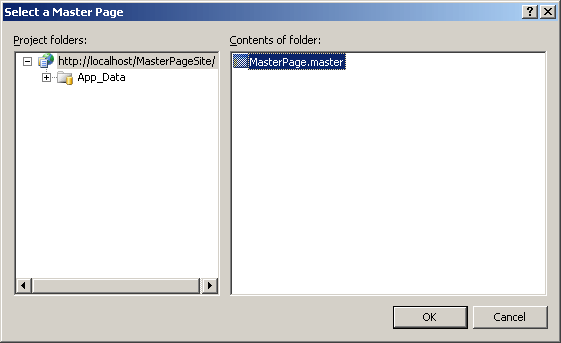
Visual Studio will ask you to select a Master Page, as shown in the following graphic.
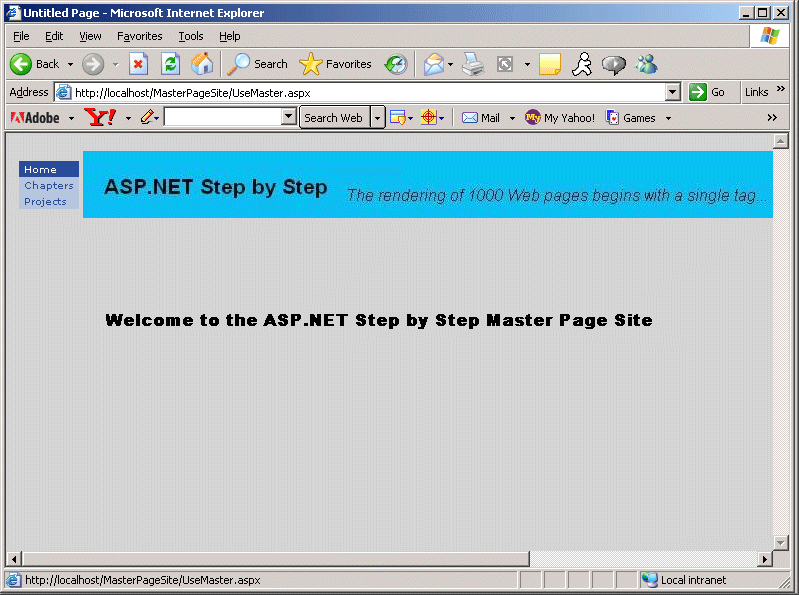
When you view UseMaster.aspx in the designer, it looks like the MasterPage.master file. Notice the grayish hue applied to the page. This lets you know the Master Page is really being applied here.

This is the code generated by Visual Studio to support using the Master Page:
<%@ Page Language="C#"
   MasterPageFile="~/MasterPage.master" AutoEventWireup="true"
   CodeFile="UseMaster.aspx.cs" Inherits="UseMaster"
   Title="Untitled Page" trace="false" %>

<%@ Register Src="Banner.ascx"
TagName="Banner"
TagPrefix="uc1" %>
<asp:Content ID="Content1"
   ContentPlaceHolderID="ContentPlaceHolder1" Runat="Server"">
</asp:Content>
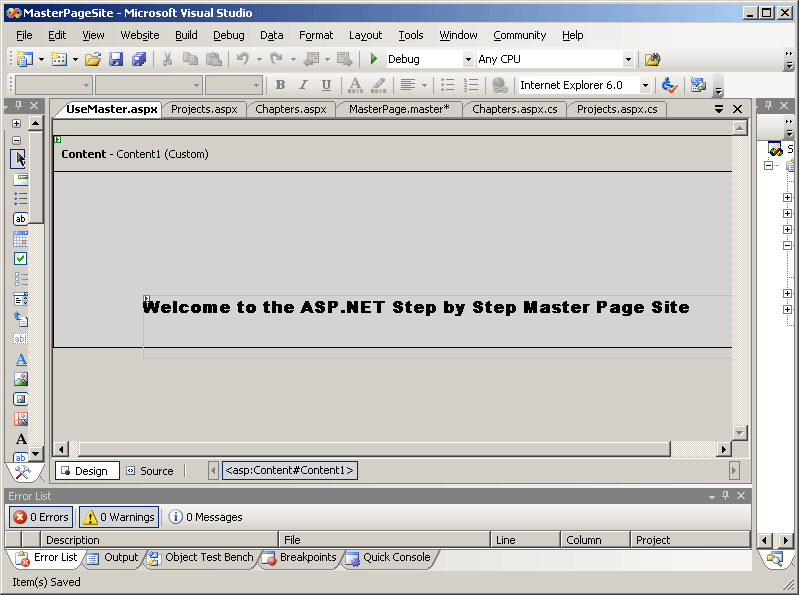
Now add some content to UseMaster.aspx. Add a label to the content placeholder. Have it say something so you can distinguish this as a separate page.
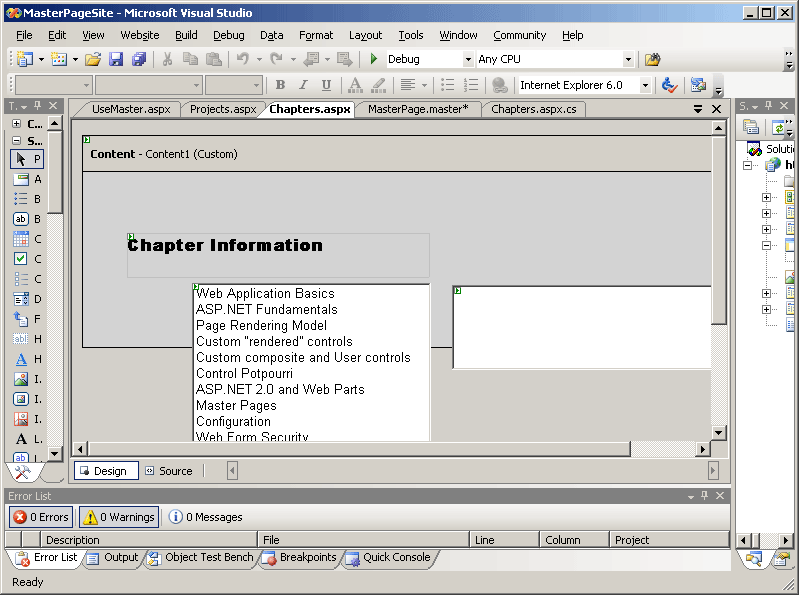
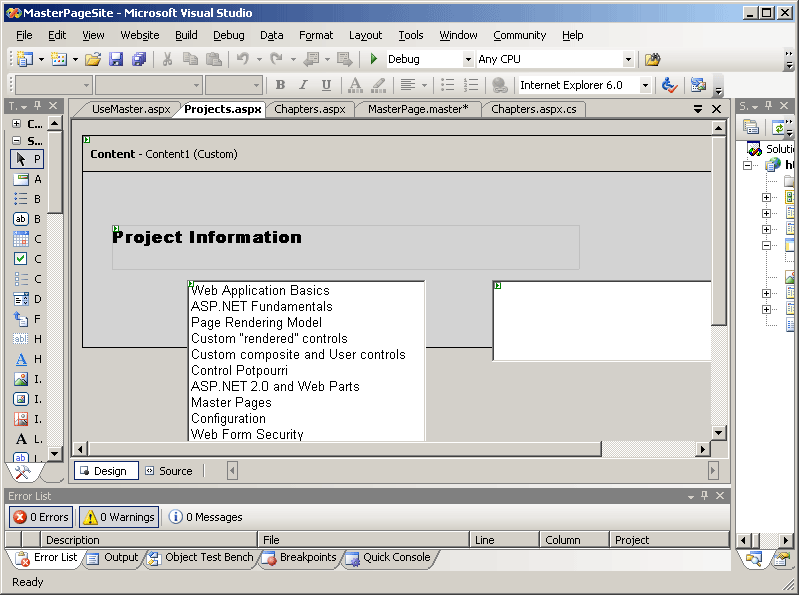
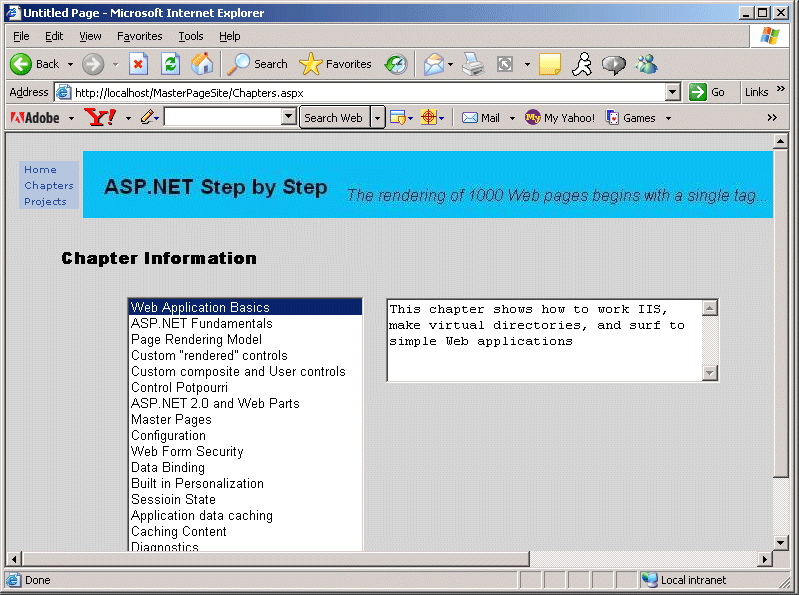
Add two more pages to the site. The example here includes a page describing the chapter content of this book and a second page describing the projects. You may use this, or add your own content. The important thing is to add two more pages and apply the Master Page to them (that is, create the Web forms with the Select master page box checked).
Add some content to the two pages in the content placeholders. That way you can distinguish the pages (we'll add navigation support later).
The following two graphics show the example site's pages containing a ListBox to select the topic and a TextBox to hold information about the topic.
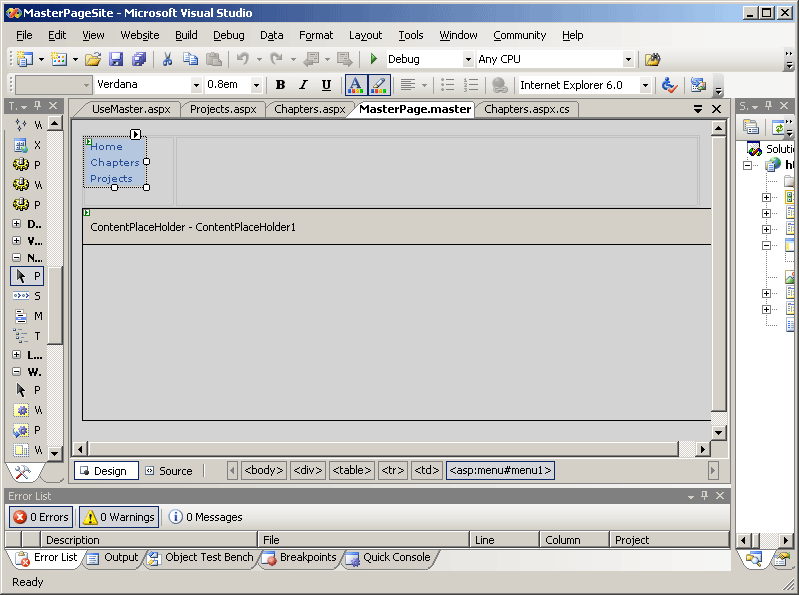
Go back to the MasterPage.master page and update it so it has a bit more content. Use the Layout | Insert Table menu option to insert a table immediately above the content pane on the Master Page. Give the table one row and two columns. Size it so that the left cell is narrow and the right cell is wide. It should look something like this:

Add a menu to the leftmost cell in the table. In customizing the menu, add an AutoFormat style to it. The example here uses the Classic style. Add three items to the menu for navigating to the three pages in this site—the Home page, the Chapters page, and the Projects page.

Set up the appropriate navigation for each menu option. That is, have the Home menu item navigate to the UseMaster.aspx page. Have the Chapters menu item navigate to the Chapters.aspx file. Finally, have the Projects menu item navigate to the Projects.aspx file. You may do this by clicking the navigation button in the Navigation field of the Property page:

You should end up with something like this:
Finally, no Master Page is complete without a banner. Use the bitmap editor (or Paintbrush—Pbrush.exe) to draw a banner. The one in this example is about 1000 pixels wide by 90 pixels high. Drop the banner into the table cell on the right. Your Master Page should something look like this now:
Because the UseMaster.aspx, Chapters.aspx, and Projects.aspx files were created using the Master Page, they have the menu and banner built in automatically. Surf to the UseMaster.aspx file and browse through the menu items. You should see that each page has a common look and feel, but with the correct content.

Master Pages offer significant improvements over earlier versions of classic ASP and ASP.NET for developing a common look and feel among all the pages in your application. Of course, you may use multiple Master Pages in a project, and you may also nest them.
A second way to help manage the look and feel of your application is ASP.NET Themes.