User controls live in ASCX files, just as Web forms live in ASPX files. ASPX files contain <form> tags defining HTML forms. ASCX files never have <form> tags because they’re designed to be inserted into existing forms. Here’s a very simple user control:
<h1>Hello, world</h>
Assume that this HTML is stored in a file named Hello.ascx. Furthermore, assume that someone wants to insert this user control into a Web form. Here’s an ASPX file that does just that:
<%@ Register TagPrefix="user" TagName="Hello" src="Hello.ascx" %>

<html>
  <body>
    <form runat="server">
      <user:Hello RunAt="server" />
    </form>
  </body>
</html>
When executed, this Web form displays “Hello, world” in big bold letters, thanks to the HTML embedded in the user control. The <user:Hello> tag declares an instance of the control. The @ Register directive at the top of the file tells ASP.NET what to do when it encounters a <user:Hello> tag. The Src attribute identifies the control’s ASCX file. TagName assigns a name to the control (“Hello”), and TagPrefix defines the prefix that precedes the name (“user”) in a tag that declares a control instance. You don’t have to use “user” as your tag prefix; you can use “foo” or your company name or whatever you like. However, every ASPX file that incorporates a user control must have an @ Register directive defining the tag name and tag prefix and linking both to an ASCX file.
Hello.ascx is so simple that it barely qualifies as a user control, but it nonetheless demonstrates three important principles:
-
User controls are stored in ASCX files
-
@ Register directives declare tag names and tag prefixes and map them to ASCX files
-
Tags registered with @ Register add user controls to Web forms
What this example doesn’t show is that user controls can have methods, properties, and events, just like server controls. Moreover, they can include server-side scripts, just like ASPX files. In a moment, we’ll build a more sophisticated user control that demonstrates these principles and others. But first, there’s another directive you should know about: @ Control.
ASPX files often include @ Page directives that provide directions to the ASP.NET compilation engine, enable and disable certain features of ASP.NET, and more. ASCX files never contain @ Page directives. They contain @ Control directives instead.
The @ Control and @ Page directives share many common attributes and in fact are nearly identical save for the directive name. For example, suppose you wanted to enable debugging support in an ASCX file. Instead of putting this statement at the top of the file:
<%@ Page Debug="true" %>
you’d put this one:
<%@ Control Debug="true" %>
To enable debugging support and specify the default language for inline code blocks, you’d write this:
<%@ Control Debug="true" Language="C#" %>
Like @ Page directives, @ Control directives can appear only once in a file. But you can include as many attributes in an @ Control directive as you want.
ASCX files can contain @ Import and @ Assembly directives just like ASPX files. If, in an ASCX file, you use types belonging to namespaces that aren’t imported by default or types in assemblies that ASP.NET doesn’t link to automatically, you can use @ Import and @ Assembly to resolve the differences. The syntax for these directives is exactly the same in ASCX files as it is in ASPX files. For a review of @ Import and @ Assembly, see Chapter 5.
With these fundamentals in mind, let’s build a more ambitious user control—a login control that accepts user names and passwords typed by the user. We’ll build the control in steps. The end result will be the control shown in Figure 7-1, which not only accepts user names and passwords, but also performs some simple validation on them.
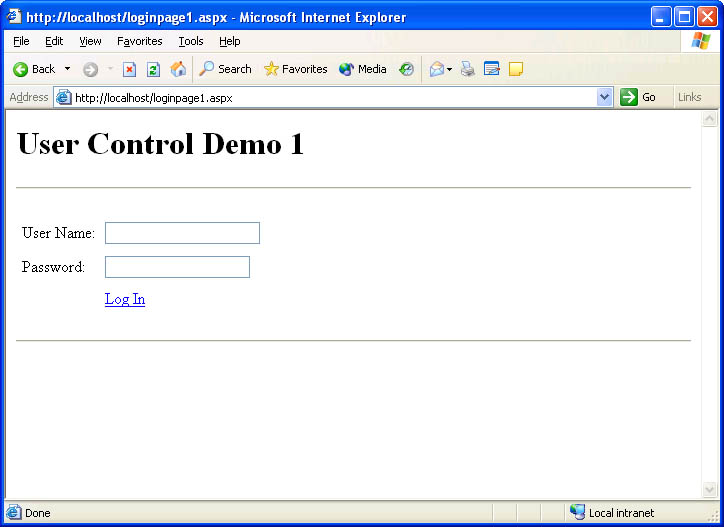 Figure 7-1
Step 1 in building the login control is to create a text file named LoginControl1.ascx. Step 2 is to type in the code in Figure 7-2. That code declares three Web controls—two TextBox controls and one LinkButton control—and uses an HTML table to align them on the page. The TextBox controls provide input fields for user names and passwords. The LinkButton control submits the form containing the login control to the server.
<table cellpadding="4">
  <tr>
    <td>User Name:</td>
    <td><asp:TextBox ID="MyUserName" RunAt="server" /></td>
  </tr>
  <tr>
    <td>Password:</td>
    <td><asp:TextBox ID="MyPassword" TextMode="password"
      RunAt="server" /></td>
  </tr>
  <tr>
    <td></td>
    <td><asp:LinkButton Text="Log In" RunAt="server" /></td>
  </tr>
</table>
Figure 7-2
To test the login control, you need a Web form. Figure 7-3 contains the source code for a Web form named LoginPage1.aspx that declares an instance of the login control with the statement
<user:LoginControl RunAt="server" />
The @ Register directive at the top of the file defines the tag prefix user and the tag name LoginControl and associates them with LoginControl1.ascx. When this page is executed, ASP.NET derives a class from System.Web.UI.UserControl and adds the content found in LoginControl1.ascx to the derived class. Then it instantiates the derived class, adds the resulting object to the page’s control tree (a hierarchical list of the controls defined on the page), and executes the control along with any other controls declared on the page.
<%@ Register TagPrefix="user" TagName="LoginControl"
  src="LoginControl1.ascx" %>

<html>
  <body>
    <h1>User Control Demo 1</h1>
    <hr>
    <form runat="server">
      <user:LoginControl RunAt="server" />
    </form>
    <hr>
  </body>
</html>
Figure 7-3
If you open LoginControl1.aspx in your browser right now, you’ll see the page in Figure 7-1. The login control is present, but it’s not functional yet. One reason it’s not functional is that a server-side script can’t read user input from the TextBoxes. Even if you assign the login control an ID (for example, “My-Login”), the following statement won’t compile because MyUserName is a protected member of the class that ASP.NET generates to represent the login control:
string name = MyLogin.MyUserName.Text;
The solution is to add public properties enabling scripts to access the data encapsulated in the login control. The next section describes how.
User controls can have properties just like server controls. When you design a user control, you should try to anticipate all the different ways that other developers will want to customize it and then make it easy for them by exposing properties that they can use to customize the control’s appearance and behavior.
Adding a property to a user control is simple. You define the property in a <script> block in the control’s ASCX file. At run time, ASP.NET adds the code in the script block to the class that it derives to represent the user control. Any properties declared in the <script> block become members of that class.
The ASCX file in Figure 7-4 adds three public properties to the login control:
-
A BackColor property that exposes the control’s background color
-
A UserName property that exposes the text in the “MyUserName” TextBox
-
A Password property that exposes the text in the “MyPassword” TextBox
Changes are highlighted in bold so that you can more easily distinguish the differences between LoginControl1.ascx and LoginControl2.ascx. The BackColor property does nothing more than read and write the BgColor property of the underlying table, which, thanks to the runat=“server” attribute in the <table> tag, is an instance of System.Web.UI.HtmlControls.HtmlTable.
<table id="MyTable" cellpadding="4" runat="server">
  <tr>
    <td>User Name:</td>
    <td><asp:TextBox ID="MyUserName" RunAt="server" /></td>
  </tr>
  <tr>
    <td>Password:</td>
    <td><asp:TextBox ID="MyPassword" TextMode="password"
      RunAt="server" /></td>
  </tr>
  <tr>
    <td></td>
    <td><asp:LinkButton Text="Log In" RunAt="server" /></td>
  </tr>
</table>

<script language="C#" runat="server">
  public string BackColor
  {
      get { return MyTable.BgColor; }
      set { MyTable.BgColor = value; }
  }
?
  public string UserName
  {
      get { return MyUserName.Text; }
      set { MyUserName.Text = value; }
  }
?
  public string Password
  {
      get { return MyPassword.Text; }
      set { MyPassword.Text = value; }
  }
</script>
Figure 7-4
The ASPX file in Figure 7-5 displays the modified login control. Once more, changes are highlighted in bold. Note the BackColor attribute in the control tag. It changes the control’s background color by initializing the control’s BackColor property. In addition, a server-side script now displays a personalized greeting on the Web page using the name typed into the user name TextBox. (See Figure 7-6.) The script retrieves the contents of the TextBox by reading the control’s UserName property. If you want, UserName and Password can also be used as attributes in the control tag to preload the TextBoxes with text.
<%@ Register TagPrefix="user" TagName="LoginControl"
  src="LoginControl2.ascx" %>

<html>
  <body>
    <h1>User Control Demo 2</h1>
    <hr>
    <form runat="server">
      <user:LoginControl ID="MyLogin" BackColor="#ccccff"        RunAt="server" />
    </form>
    <hr>
    <h3><asp:Label ID="Output" RunAt="server" /></h3>  </body>
</html>

<script language="C#" runat="server">  void Page_Load (Object sender, EventArgs e)
  {
      if (IsPostBack)
          Output.Text = "Hello, " + MyLogin.UserName;
  }
</script>
Figure 7-5
So far, so good. At least the login control is usable. But observe how the server-side script traps the postback generated when the user clicks the Log In button: it processes the Page.Load event that fires when the postback occurs. A better solution—and one more in keeping with the Web Forms programming model—is to have the login control fire an event of its own when the user clicks the Log In button. That’s precisely what you’ll do in the next section.
 Figure 7-6
You add events to a user control by declaring them in a <script> block. Like properties declared in a <script> block, events declared there become members of the class that ASP.NET derives from UserControl to represent the control.
Figure 7-7 contains version 3 of the login control. This version declares an event named Login. It also wires the Log In button to a Click handler named OnLoginButtonClicked that fires a Login event if neither TextBox is empty. The revised test page in Figure 7-8 adds an OnLogin attribute to the <user:LoginControl> tag that responds to Login events by activating OnLoginUser. You can try it out by typing a user name and password and clicking the Log In button. The user name that you typed should appear at the bottom of the page. This design is better than the one in the previous section because the greeting is displayed only when the Log In button is clicked—even if the page includes other controls that cause postbacks.
<table id="MyTable" cellpadding="4" runat="server">
  <tr>
    <td>User Name:</td>
    <td><asp:TextBox ID="MyUserName" RunAt="server" /></td>
  </tr>
  <tr>
    <td>Password:</td>
    <td><asp:TextBox ID="MyPassword" TextMode="password"
      RunAt="server" /></td>
</tr>
  <tr>
    <td></td>
    <td><asp:LinkButton Text="Log In" OnClick="OnLoginButtonClicked"      RunAt="server" /></td>
  </tr>
</table>

<script language="C#" runat="server">
  public string BackColor
  {
      get { return MyTable.BgColor; }
      set { MyTable.BgColor = value; }
  }
?
  public string UserName
  {
      get { return MyUserName.Text; }
      set { MyUserName.Text = value; }
  }
?
  public string Password
  {
      get { return MyPassword.Text; }
      set { MyPassword.Text = value; }
  }

  public event EventHandler Login;

  void OnLoginButtonClicked (Object sender, EventArgs e)
  {
      if (Login != null && UserName.Length > 0 && Password.Length > 0)
          Login (this, new EventArgs ()); // Fire Login event
  }</script>
<%@ Register TagPrefix="user" TagName="LoginControl"
  src="LoginControl3.ascx" %>

<html>
  <body>
    <h1>User Control Demo 3</h1>
    <hr>
    <form runat="server">
      <user:LoginControl ID="MyLogin" BackColor="#ccccff"
??????OnLogin="OnLoginUser" RunAt="server" />
    </form>
????<hr>
    <h3><asp:Label ID="Output" RunAt="server" /></h3>
  </body>
</html>

<script language="C#" runat="server">
  void OnLoginUser (Object sender, EventArgs e)
  {
      Output.Text = "Hello, " + MyLogin.UserName;
  }</script>
With the addition of properties and events, the login control is now a self-contained component. For the final step in its evolution, we’ll use code-behind to get the C# code out of the ASCX file and into a compiled DLL. While we’re at it, we’ll make the login control a little smarter by having it run some simple validation code on the user name and password that the user enters. Furthermore, rather than type handlers for Login events as generic EventHandlers, we’ll define a custom delegate named LoginEventHandler that receives a LoginEvent-Args revealing whether the login is valid. LoginEventArgs is a custom data type that we’ll include in the same DLL that holds the code-behind class.
The revised source code for the login control appears in Figure 7-9. The ASCX file contains the HTML that defines the control and an @ Control directive whose Inherits attribute identifies the login control’s base class. Normally ASP.NET would derive the control class from UserControl. Now, however, it will derive from LoginBase, which itself derives from UserControl.
LoginBase.cs contains the source code for the LoginBase class. LoginBase declares fields named MyTable, MyUserName, and MyPassword that map to the controls of the same names in the ASCX file. It declares a custom delegate named LoginEventHandler, and it declares an event named Login, whose type is LoginEventHandler. When the Log In button is clicked, LoginBase fires a Login event accompanied by a LoginEventArgs object whose IsValid property is true if the login is valid or false if it’s not. To judge whether the user’s credentials are valid, OnLoginButtonClicked checks for the user name “jeffpro” and the password “imbatman.” In real life, it would validate against a back-end database (or at least an XML file), but the principle is valid nonetheless.
<%@ Control Inherits="LoginBase" %>

<table id="MyTable" cellpadding="4" runat="server">
  <tr>
    <td>User Name:</td>
    <td><asp:TextBox ID="MyUserName" RunAt="server" /></td>
  </tr>
  <tr>
    <td>Password:</td>
    <td><asp:TextBox ID="MyPassword" TextMode="password"
      RunAt="server" /></td>
  </tr>
  <tr>
    <td></td>
    <td><asp:LinkButton Text="Log In" OnClick="OnLoginButtonClicked"
      RunAt="server" /></td>
  </tr>
</table>
using System;
using System.Web.UI;
using System.Web.UI.HtmlControls;
using System.Web.UI.WebControls;

public class LoginEventArgs
{
    private bool LoginValid;

    public LoginEventArgs (bool IsValid)
    {
        LoginValid = IsValid;
    }

    public bool IsValid
    {
        get { return LoginValid; }
    }
}

public class LoginBase : UserControl
{
    protected HtmlTable MyTable;
    protected TextBox MyUserName;
    protected TextBox MyPassword;
    public string BackColor
    {
        get { return MyTable.BgColor; }
        set { MyTable.BgColor = value; }
    }
?
    public string UserName
    {
        get { return MyUserName.Text; }
        set { MyUserName.Text = value; }
    }
?
    public string Password
    {
        get { return MyPassword.Text; }
        set { MyPassword.Text = value; }
    }

    public delegate void LoginEventHandler (Object sender,
        LoginEventArgs e);

    public event LoginEventHandler Login;

    public void OnLoginButtonClicked (Object sender, EventArgs e)
    {
        if (Login != null) {
            bool IsValid = (UserName.ToLower () == "jeffpro" &&
                Password == "imbatman");
            Login (this, new LoginEventArgs (IsValid));
        }
    }
}
The test page in Figure 7-10 responds to Login events by displaying a greeting if the login is valid or an error message if it’s not. Before you run LoginPage4.aspx, you must compile LoginBase.cs and place the resulting DLL in the application root’s bin directory so that ASP.NET can find it. Here’s the command to create the DLL:
csc /t:library LoginBase.cs
If you run LoginPage4.aspx from wwwroot, place the DLL in wwwroot\bin.
<%@ Register TagPrefix="user" TagName="LoginControl"
  src="LoginControl4.ascx" %>

<html>
  <body>
    <h1>User Control Demo 4</h1>
    <hr>
    <form runat="server">
      <user:LoginControl ID="MyLogin" BackColor="#ccccff"
        OnLogin="OnLoginUser" RunAt="server" />
    </form>
    <hr>
    <h3><asp:Label ID="Output" RunAt="server" /></h3>
  </body>
</html>

<script language="C#" runat="server">
  void OnLoginUser (Object sender, LoginEventArgs e)
  {
      if (e.IsValid)
          Output.Text = "Hello, " + MyLogin.UserName;
      else {
          Output.Text = "Invalid login";
          MyLogin.UserName = "";
          MyLogin.Password = "";
      }
  }</script>
Figure 7-10