|
|
< Day Day Up > |
|
17.6 Create and Use Library ItemsTo create a Library item, start by opening the Library window. Choose Window - > Assets, and click the Library items button (it looks like an open book, as shown in Figure 17-4) to reveal the Library category. Now select the part of your document that you wish to save as a Library item: a blob of text, a graphic, or whatever. Note, however, that Library items can only contain page elements that appear in the document window梚n other words, only HTML from the <body> of a Web page. You can't include anything that appears in the <head> of a page, like Cascading Style Sheets, Dreamweaver Behaviors (Chapter 12), or meta tags. Furthermore, Library items must include a complete set of HTML tags梑oth an opening and closing tag梐s well as all tags necessary to complete the original object. For example, Dreamweaver won't let you turn just a single cell, row, or column in a table into a Library item. If you try, Dreamweaver will add the entire table to the Library.
Next, add the selection to the Library. As you may expect, Dreamweaver provides several ways to do this:
The new item appears in the Assets panel, bearing the jaunty name "Untitled." Just type to replace that proposal with a more useful name, such as Copyright notice or Logo. Your new Library element is ready to use. NOTE
Even though you can't turn a CSS style into a Library item, you can turn HTML that has been styled with CSS into a Library item. For example, you can add to the Library a paragraph that has a custom CSS style applied to it. When you attempt to add this paragraph to the Library, Dreamweaver will warn you that the item may not look the same when you place it in other documents梑ecause the style sheet information doesn't come along for the ride. To make sure the Library item appears correctly, make sure that you attach the same style sheet to any page where you use that item. External style sheets (Section 6.1.2) make this easy. The Asset panel's Library category lists the name, file size, and location of each Library item in the current local site. When you select a Library item from the list, you see a small preview. In this example, the Library item "copyright" is a copyright notice.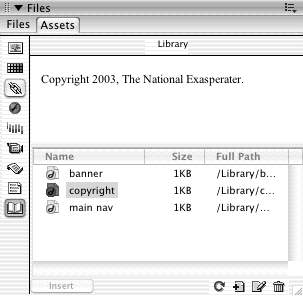
17.6.1 Add Library Items to a PageTo add a Library item to a Web page, drag it directly out of the Assets panel's Library items listing onto your page. (The long way: Click to plant your insertion point in the Web page, click the Library item you want in the Assets panel, and click the Insert button on the Assets panel, shown in Figure 17-4.) NOTE
Library items (.lbi files) also appear in the Site panel in a site's Library folder. Dragging a Library item from the Site panel to a page, however, doesn't insert it into the page. It merely opens the Library item for editing. When you insert a Library item into a Web page (or turn a selected item into a Library item), it sprouts a light yellow background color梠r, in the case of nontransparent graphics, it takes on a gray, darkened look. The highlighting indicates that Dreamweaver intends to treat the Library item as a single object, even though it may be made of many different HTML elements. You can select it or drag it around, but you can't change it. Remember, too, that the placed Library item is linked to the original copy in the Library. The copy in your document will change automatically to reflect any changes you make to the copy in the Library, using the technique described next.
|
|
|
< Day Day Up > |
|

 Library