|
|
< Day Day Up > |
|
8.8 Nesting LayersNesting doesn't necessarily mean that one layer appears inside another layer; rather, it means that the HTML for one layer is written inside the code for another layer. The nested layer itself can appear anywhere on the page (see Figure 8-10). The main benefit of nested layers is that the parent layer梩he layer containing the HTML of one or more other layers梒an control the behavior of its child layers. For example, suppose you create one layer and nest two layers inside it. If you move the parent layer on the screen, the two child layers follow it, which gives you an easy way to move several layers in unison. Furthermore, the parent layer can control the visibility of its children. When you hide the parent layer (see Section 12.4.5), the nested layers also disappear. NOTE
Netscape 4 has big problems displaying nested layers. For example, it often ignores the positioning and visibility you specify. If you need to make your pages compatible with Netscape 4 browsers, it's best to avoid nesting layers. An inner nested layer doesn't necessarily appear inside the outer layer. The HTML for the layer at far right, for example, is nested inside the large gray box layer. Yet a layer that appears on top of another layer isn't necessarily a nested layer, either; the light gray box here isn't nested at all. But the HTML for a nested layer does appear within the code for the outer layer. To identify a nested layer, click a Layer marker (the shield) within a layer; the nested layer's selection handle appears.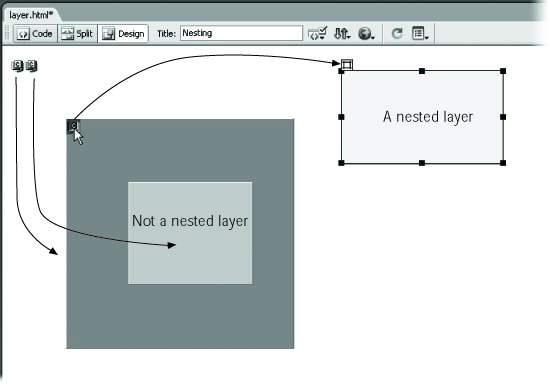
Here's how to create a nested layer:
The Insert Div Tag tool makes creating a nested layer easy. Just make sure to select either "After start" or "Before end" of tag option (top), followed by the name of the parent layer (bottom).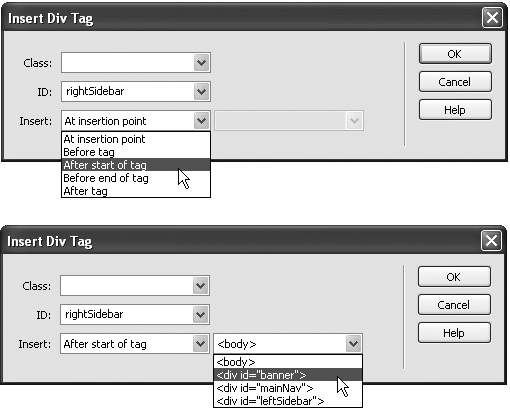
The Layer marker for a nested layer appears inside the border of the outer layer. 8.8.1 Undoing nested layersIf you later want to un-nest a nested layer, just drag its Layer marker to a new spot in the document window梠utside of any other layers. |
|
|
< Day Day Up > |
|
 Layout Objects