Creating More Effective Rollovers
To make the illusion of animation work, you need to make sure that the replacement image appears immediately, with no delay while it is fetched from the server. To do that, you use JavaScript to preload all the images into the browser's cache (so that they are already on the user's hard disk when they are needed) and place the images into variables used by your script. Then, when the user moves the mouse over an image, the script swaps out one variable containing an image for a second variable containing the replacement image. Script 4.2 shows how it is done. The visible result is the same as in Figures 4.1 and 4.2, but the apparent animation is smoother.
Script 4.2. The only JavaScript on this HTML page is the pointer to the external .js file.
<!DOCTYPE html PUBLIC "-//W3C//DTD XHTML 1.0 Transitional//EN">
<html xmlns="http://www.w3.org/1999/xhtml">
<head>
<title>A More Effective Rollover</title>
<script src="script02.js" language= "javascript" type="text/javascript"> </script>
</head>
<body bgcolor="#FFFFFF">
<a href="next1.html"><img src= "images/button1_off.gif" width="113" height="33"
 border="0" alt="button1" id="button1" /></a>
<a href="next2.html"><img src= "images/button2_off.gif" width="113" height="33"
border="0" alt="button2" id="button2" /></a>
</body>
</html> border="0" alt="button1" id="button1" /></a>
<a href="next2.html"><img src= "images/button2_off.gif" width="113" height="33"
border="0" alt="button2" id="button2" /></a>
</body>
</html>
|
To keep your JavaScript more manageable, we'll extract the JavaScript code from the HTML page and put it in an external .js file, as in Script 4.3 (see Chapter 3 for more about .js files).
Script 4.3. This is a better way to do rollovers than in Script 4.1, because it is much more flexible.
window.onload = rolloverInit;
function rolloverInit() {
     for (var i=0; i<document.images.length; i++) {
        if (document.images[i].parentNode. tagName == "A") {
           setupRollover(document.images[i]);
        }
     }
}

function setupRollover(thisImage) {
     thisImage.outImage = new Image();
     thisImage.outImage.src = thisImage.src;
     thisImage.onmouseout = rollOut;

     thisImage.overImage = new Image();
     thisImage.overImage.src = "images/" + thisImage.id +"_on.gif";
     thisImage.onmouseover = rollOver;
}

function rollOver() {
     this.src = this.overImage.src;
}
function rollOut() {
     this.src = this.outImage.src;
}
|
To create a better rollover:
1. |
<script src="script02.js" language= "javascript" type="text/javascript"> </script>
This tag is in Script 4.2, the HTML page. It uses the src attribute to tell the browser where to find the external .js file, which is where the JavaScript resides.
| 2. |
<a href="next1.html"><img src= "images/button1_off.gif" width="113" height="33" border="0"
alt="button1" id="button1" /></a>
<a href="next2.html"><img src= "images/button2_off.gif" width="113" height="33" border="0"
alt="button2" id="button2" /></a>
Still in Script 4.2, these are two typical link tags for the buttons, with image tags embedded in them. The HRef attribute describes the destination of the link when the user clicks it. In the img tag, the src attribute provides the path to the image before the user rolls over it. The rest of the attributes are descriptive and familiar: the image's width, height, border, and alt text. Note that each of the two buttons also has an id attribute; as described in Chapter 1, the id must be unique for each object. The script uses the image's id to make the rollover work.
| | | 3. |
window.onload = rolloverInit;
Moving to Script 4.3, the window.onload event handler is triggered when the page has finished loading. The handler calls the rolloverInit() function.
This handler is used here to make sure that the script doesn't execute before the page is done loading. That's because referring to items on the page before the page has finished loading can cause errors if some of the page's elements haven't yet been loaded.
| 4. |
function rolloverInit() {
  for (var i=0; i<document.images.length; i++) {
The rolloverInit() function scans each image on the page, looking to see if the tag around the image is an <a> tag, indicating that it is a link. The first of these two lines begins the function. The second begins a for...next loop that goes through all of the images. The loop begins by setting the counter variable i to 0. Then, each time the loop goes around, if the value of i is less than the number of images in the document, increment i by 1.
| 5. |
if (document.images[i].parentNode. tagName == "A") {
This is where we test to see if the tag surrounding the image is an anchor tag. We do it by looking at an object and seeing if the object's value is A (the name of the anchor tag). Let's break that object apart a bit. The first part of the object, document.images[i], is the current image. Its parentNode property is the container tag that surrounds it, and tagName then provides the name of that container tag. So in English, you can read the part of the line in the parentheses as "For this particular image, is the tag around it an 'A'?"
| | | 6. |
setupRollover(document.images[i]);
If the result of the test in step 5 is true, then the setupRollover function is called and passed the current image.
| 7. |
function setupRollover(thisImage) {
Take a minute to look at the whole function before we go through it line by line. Here's the overview: this function adds two new properties to the image object that's passed in. The new properties are outImage (the version of the image when you're not on it) and overImage (the version of the image when you are on it), both of which are image objects themselves. Because they're image objects, once they're created, we can add their src. The src value for outImage is the current (off) image src. The src value for overImage is calculated based on the id attribute of the original image.
This line starts off the function with the image that was passed to it by the rolloverInit() function.
| 8. |
thisImage.outImage = new Image();
This line takes the image object that was passed in and adds the new outImage property to it. Because you can add a property of any kind to an object, and because properties are just objects themselves, what's happening here is that we're adding an image object to an image. The parentheses for the new image object are optional, but it's a good coding practice; if needed, you can set properties of the new image object by passing certain parameters.
| 9. |
thisImage.outImage.src = thisImage.src;
Now we set the source for the new outImage to be the same as the source of thisImage. The default image on the page is always the version you see when the cursor is off the image.
|
In the example, you see the word this used, but it's not completely clear what this is.
The JavaScript keyword this allows the script to pass a value to a function, solely based on the context where the keyword is used. In this case, this is used inside a function triggered by an event attached to an img tag, so this is an image object. In later examples, you'll see this used elsewhere, and you should be able to tell what this is, based on the context where it's being passed to a function.
|
| | | 10. |
thisImage.onmouseout = rollOut;
This line tells the browser to trigger the rollOut() function when the user moves the mouse away from the image.
| 11. |
thisImage.overImage = new Image();
thisImage.overImage.src = "images/" + thisImage.id + "_on.gif";
In the first line, we create a new image object that will contain the overImage version of the image. The second line sets the source for overImage. It builds the name of the source file on the fly, concatenating "images/" with the id of the image (remember, in Script 4.2, we saw that those ids were button1 and button2) and adding "_on.gif".
| 12. |
thisImage.onmouseover = rollOver;
This line tells the browser that when the user moves the cursor over the image, the rollOver() function should trigger.
| 13. |
function rollOver() {
  this.src = this.overImage.src;
}
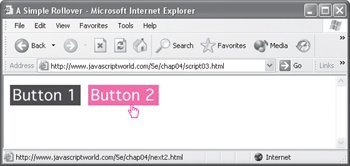
This function is where the rollover actually happens when the user moves the mouse cursor over the image. It does so by resetting the current image's source to that of the overImage version, as seen in Figures 4.3 and 4.4.

| 14. |
function rollOut() {
  this.src = this.outImage.src;
}
When the user moves the mouse cursor away from the image, this function sets the image source back to the beginning source value, that is, the outImage version of the image.
|
 Tips Tips
When you prepare your graphics for rollovers, make sure that all your GIF images are not transparent. If they are, you will see the image you are trying to replace beneath the transparent imageand that's not what you want. Both the original and the replacement images need to have identical dimensions. Otherwise, some browsers resize the images for you, and you probably won't like the distorted result. In the previous example, the rollover happened when you moved the cursor over the link; here, the rollover happens when you move the cursor over the imagethat is, the onmouseover and onmouseout are now attached to the image, not the link. While these methods usually give the same effect, there's one big difference: some older browsers (Netscape 4 and earlier, IE 3 and earlier) don't support onmouseover and onmouseout on the img tag. While you might think that because all of the tags on the HTML page are lowercase (as required by XHTML), tagName should be compared to a lowercase "a". That's not the way it works. tagName always returns an uppercase value.
|
If you're thinking about now that hey, this isn't the way I remember JavaScript code looking beforedon't panic! Things have changed a little on the face of it, which you'll particularly notice if you're familiar with the code in previous editions of this book.
Styles change over the years, and (as mentioned in Chapter 1) the recommended way to write JavaScript has changed. If you're more familiar with the older approach, it won't be that hard to switch, and you'll soon wonder how on earth you ever made do with all that JavaScript and HTML jumbled together.
For example, the scripts on the next page show what the same functionality from "Creating More Effective Rollovers" looked like in the previous edition compared to this edition. In the previous edition, the script was called "Putting Multiple Rollovers On a Page," a task we eliminated from this edition because the "Creating More Effective Rollovers" script is more flexible now.
What you're likely to notice first is that the two are just about the same lengthbut that's a little misleading, because the page (in both cases) has only two buttons. Once you add a third button, while you have to add one line of HTML to both, you also have to add seven lines of JavaScript to the old-style code to handle that button. The new version? Zero new lines of code.
Additionally, you have to remember to add the onmouseover and onmouseout event handler attributes to your link tags when you're using the old method. If not, you'll find that no matter how much JavaScript you add, your rollovers won't roll. With the newer method, your HTML page requires no JavaScript mixed in. This is especially handy if you work in a larger group, where some people do JavaScript and some just do HTML.
And finally, the new style is preferable because you don't have to have all that JavaScript in every single page! If you've got rollovers, you almost definitely have a site with multiple pages. If every page has to load that same JavaScript, your site will load and feel slow. If all your pages reference a single external JavaScript file, however, it only has to load once, and as long as your pages refer to it, it never needs to be downloaded again. That means less bandwidth hits for your site and faster browsing for your visitors. And best of all: if you need to make a change to your JavaScript, you only need to change the one file, and the change is immediately propagated to the entire site.
|
Previous edition
<!DOCTYPE html PUBLIC "-//W3C//DTD XHTML 1.0 Transitional//EN">
<html xmlns="http://www.w3.org/1999/xhtml">
<head>
<title>A Simple Rollover</title>
<script language="Javascript" type="text/javascript">
<!-- Hide script from old browsers
if (document.images) {
button1On = new Image
button1Off = new Image
button2On = new Image
button2Off = new Image
button1On.src = "images/button1_on.gif"
button1Off.src = "images/button1_off.gif"
button2On.src = "images/button2_on.gif"
button2Off.src = "images/button2_off.gif"
}
else {
button1On = ""
button1Off = ""
button2On = ""
button2Off = ""
document.button1 = ""
document.button2 = ""
}
// End hiding script from old browsers -->
</script>
</head>
<body bgcolor="#FFFFFF">
<a href="next1.html" onmouseover= "document.button1.src=button1_off.src"
onmouseout="document.button1.src= button1_off.src"><img src="images/ button1_off.gif"
width="113" height="33" border="0" name="button1" alt="button1" /></a>
<a href="next2.html" onmouseover="document.button2.src=button2On.src" onmouseout=
"document.button2.src=button2Off.src"> <img src="images/button2_off.gif" width="113"
height="33" border="0" name="button2" alt="button2" /></a>
</body>
</html>
|
This edition
<!DOCTYPE html PUBLIC "-//W3C//DTD XHTML 1.0 Transitional//EN">
<html xmlns="http://www.w3.org/1999/xhtml">
<head>
<title>A Simple Rollover</title>
<script src="script02.js" language="javascript" type="text/javascript"></script>
</head>
<body bgcolor="#FFFFFF">
<a href="next.html"><img src= "images/button1_off.gif" width="113" height="33"
border="0" alt="button1" id="button1" /></a>
<a href="next2.html"><img src= "images/button2_off.gif" width="113" height="33"
border="0" alt="button2" id="button2" /></a>
</body>
</html>
window.onload = rolloverInit;
- - - - - - - - - - - - - - - - - - - - - - - - -
function rolloverInit() {
for (var i=0; i<document.images.length; i++) {
if (document.images[i].parentNode. tagName == "A") {
setupRollover(document.images[i]);
}
}
}
function setupRollover(thisImage) {
thisImage.outImage = new Image();
thisImage.outImage.src = thisImage.src;
thisImage.onmouseout = rollOut;
thisImage.overImage = new Image();
thisImage.overImage.src = "images/" + thisImage.id+ "_on.gif";
thisImage.onmouseover = rollOver;
}
function rollOver() {
this.src = this.overImage.src;
}
function rollOut() {
this.src = this.outImage.src;
}
|
|