This guide will help you secure your WebForms applications using Secure Access Application Configuration Wizard. It's recommended that you use this wizard since it sets up all settings and copies all files required by Secure Access. Still, if you want to understand what the wizard does or want to add Secure Access support to existing applications, please read the next chapter - Configuring Your Application Manually.
After finishing this guide your application will require authentication using a logon form.
- Before you start, you need to create a new ASP.NET application in Visual Studio.NET. Please launch Visual Studio.NET, create a new empty Web application and run it to verify that it works.
- Launch Catalog Manager (from the Start -> All Programs -> PortSight Secure Access 2.0 menu). If you still haven't created any catalog, please create a new catalog. The catalog is a database that contains information about users, groups and other settings.
Secure Access Catalog Manager
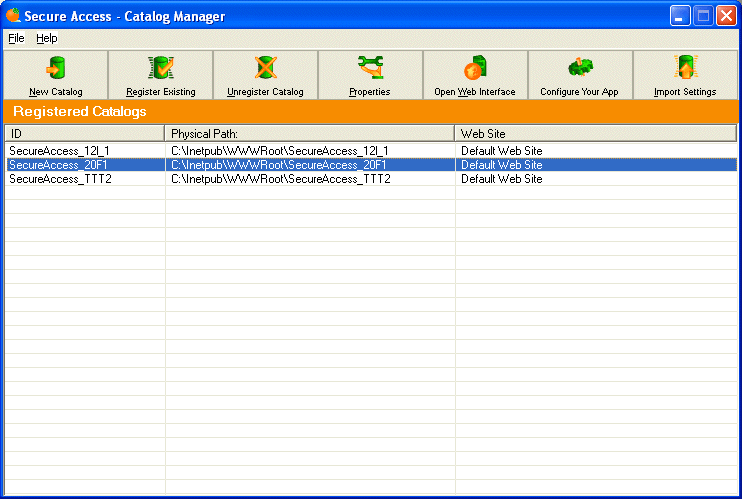
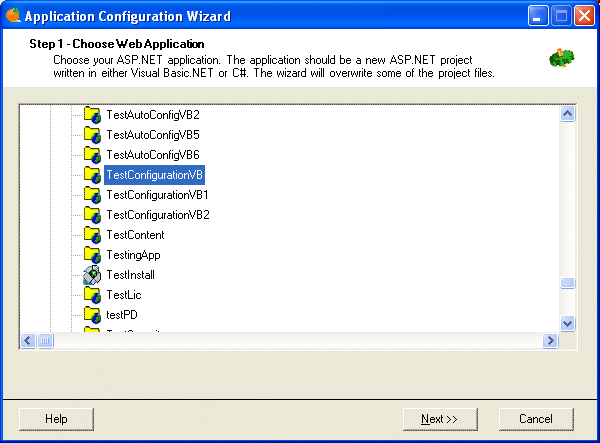
- Choose the catalog you want to use in your application and click "Configure Your App". The Application Wizard dialog appears and displays all Web applications on your computer registered in IIS. Select your application and click Next.
Step 1 - Choose Web Application
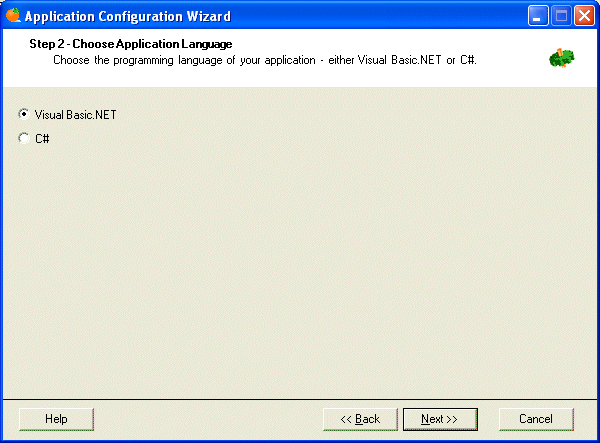
- In the next step, choose the programming language of your application - either Visual Basic.NET or C#.
Step 2 - Choose Application Language
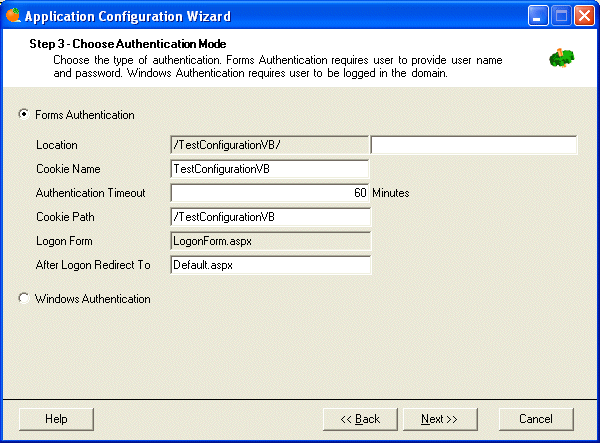
- Now you can choose the type of authentication you want to use. If you choose Forms Authentication you can set additional properties:
- Location - defines the folder the authentication will be required for. Leave the default value if you want to secure the whole application or enter name of the subfolder you want to secure.
- Cookie Name - name of the cookie. It's recommended that you use a different cookie name for each application.
- Authentication Timeout - number of minutes after that the authentication expires and user must log on again. The time is calculated since the last user's request.
- Cookie Path - path the authentication will be valid for. By default, it's valid only for the current application.
- Logon Form - name of the logon form. This is a read-only value since the default Secure Access logon form will be used. You can change this later.
- After Logon Redirect To - the default page the user will be redirected to after he/she sings successfully in. You will typically use default.aspx or webform1.aspx.
If you decide to use Windows Authentication click the Windows Authentication. You also need to create a new user (if it doesn't exist yet) with the same user name as your domain user name including the domain name - e.g.: MYDOMAIN\JOHNF.
Click Next to continue.
Step 3 - Choose Authentication Mode
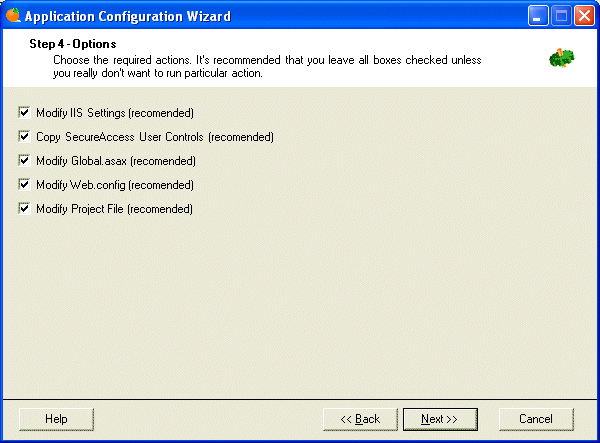
- Now choose steps the wizard should do. It's recommended that you leave all boxes checked unless you really don't want to run particular steps.
Step 4 - Options
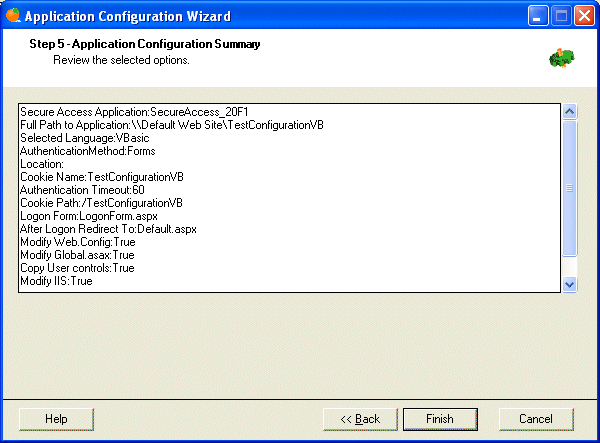
- In this step you can check the selected option. Click Finish to complete the Application Configuration Wizard.
Step 5 - Application Configuration Summary
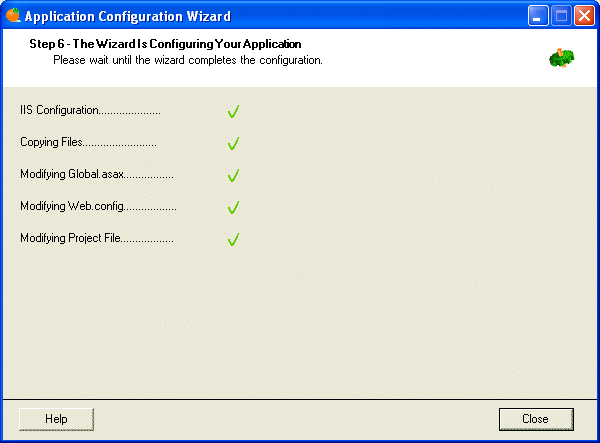
- Wait until Wizard completes the configuration.
Step 6 - Wizard Is Configuring Your Application
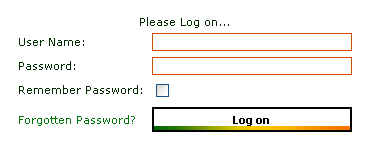
- When the wizard finishes, open you project in Visual Studio.NET. Compile it and run it. If Visual Studio asks you whether to reload project or ignore changes, choose to reload. If you previously chose Forms authentication you need to enter your credentials to sign it.
Signing in Using the Logon Form control
- After you successfully sign in you will be redirected to the default page you specified in the forms authentication properties.
-
Put the following code at the beginning of the HTML code of your default page:
<%@ Register TagPrefix="uc1" TagName="ARUISignOut" Src="ARUISignOut.ascx" %>
Put the following text somewhere inside the <form></form> tags:
<uc1:ARUISignOut id="ARUISignOut1" runat="server"></uc1:ARUISignOut>
-
Add the following lines at the beginning of the code-behind of your default page:
[Visual Basic]

Imports PortSight.SecureAccess.ARDataServices
Imports PortSight.SecureAccess.ARObjects


[C#]

using PortSight.SecureAccess.ARDataServices;
using PortSight.SecureAccess.ARObjects;
- Now you can add a welcome message that will display the user name of the current user. Please add a new label control on your Web form and name it Label1. Add the following code in the Page_Load method:
[Visual Basic]

Dim userTicket As ARUserTicket
userTicket = CType(Session("ARUserTicket"), ARUserTicket)
If Not userTicket Is Nothing Then
    Label1.Text = "Hi " & userTicket.ObjectName & ", welcome to the PortSight Secure Access demo."
End If


[C#]

ARUserTicket userTicket;
userTicket = (ARUserTicket) Session["ARUserTicket"];
if (userTicket != null) {
	Label1.Text = "Hi " + userTicket.ObjectName + ", welcome to the PortSight Secure Access demo.";
}
|
You added code that takes user ticket stored in the session variable and displays the welcome message.
Compile and run the application again. You should see the welcome message after you sign in:
Click the "Sign out" button and you will be redirected back to the logon form.
