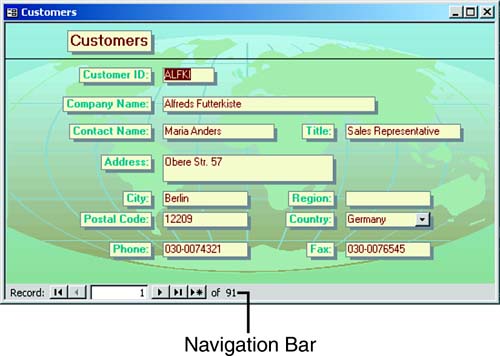
[ Team LiB ] Previous Section Next Section

Working with Data in a Form

After you have opened a form, you probably want to work with the data you have bound it to. You most likely want to move from record to record, edit data, add new records, delete records, and copy records. The process of editing data includes learning important techniques such as how to select records, delete field contents, undo changes, and search and replace. The following sections cover all these techniques.

Moving from Record to Record in a Form

The Navigation Bar appears at the bottom of the Form window (see Figure 4.4). It allows you to move from record to record. The First Record navigation tool moves you to the first record, the Previous Record navigation tool moves you to the previous record, and the Record Number navigation tool allows you to quickly move to a desired record. To the right of the Record Number tool are the Next Record tool, the Last Record tool, and the New Record tool.

Figure 4.4. The Navigation Bar.

graphics/04fig04.jpg

You can also you use keystrokes to move from record to record. Pressing Page Down moves you forward through the records, one record at a time. Pressing Page Up moves you backward through the records, one record at a time. Pressing Ctrl+End moves you to the last record, and pressing Ctrl+Home moves you to the first record. Finally, Ctrl+ moves you to a new record.

Editing the Data Underlying a Form

You can modify the table data from within a form. For example, you might want to change a customer's company name or address. Here's the process:

  1. Select the record you want to change by using any of the techniques covered in the previous section of this hour, "Moving from Record to Record in a Form."

  2. Select the field you want to change by clicking the field or using the directional keys.

  3. Type to make the necessary changes to the data.

Deleting Field Contents Within a Form

Now that you know how to modify the contents of a field, let's talk about how to delete the contents of a field. In following along with this section, make sure that you understand that you are not deleting records, you are simply deleting the contents of an individual field within a record. You would do this, for example, if you entered a region for a company and then realized that the company was located in a country that did not have regions. The process is simple:

  1. Select the field contents you want to delete.

  2. Press the Delete key.

graphics/book_icon.gif

A couple items are important to note. First, if you press the Esc key twice, Access cancels all changes you made to that record. Second, it is important to recognize that Access saves the record you are working with as soon as you move off it onto another record.


Undoing Changes Made Within a Form

There are many times when you need to undo changes that you made to a control or to a record. An example is when you started making changes to the incorrect control—or even to the incorrect record. Undo comes to the rescue! You have several different options for how to do this, depending on whether you are still within a control, have left the control, or have left the record. You can use the Undo feature only to undo the last change made to a control or changes made to the most recently modified record.

Undoing Changes Made to the Current Control

When you are in the process of making changes to a control, you might realize that you really didn't want to make changes to that control or to that record. To undo changes to the current control, you can either click the Undo tool on the toolbar, select Edit | Undo Typing, or press the Esc key once.

Undoing Changes After You Move to Another Control

The process of undoing changes after you move to another control is slightly different from the process of undoing changes made to the current control. You can either click the Undo tool on the toolbar, select Edit | Undo Current Field/Record, or press the Esc key once.

Undoing Changes After You Save the Record

When you make changes to a control and then move to another record, Access saves all changes to the modified record. As long as you do not begin making changes to another record, you can still undo the changes you made to the most recently modified record. To do this, you can either click the Undo tool on the toolbar, select Edit | Undo Saved Record, or press the Esc key twice.

graphics/book_icon.gif

If Access is unable to undo a change, the Undo tool appears dimmed.


graphics/clock_icon.gif

If you have made changes to a record and then have gone on to make changes to another record, you cannot undo the changes that you made to the first record.


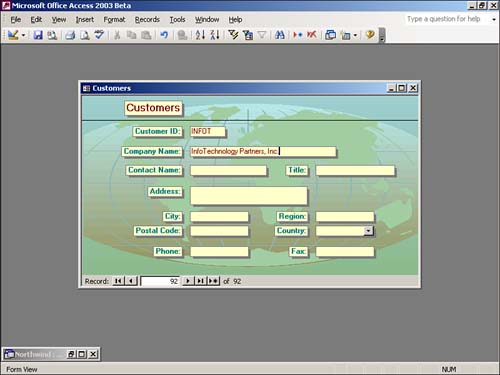
Using a Form to Add New Records to a Table

Access adds records to the end of a table, regardless of how you add them to the table. To use a form to add new records to a table, follow these steps:

  1. Click the New Record tool on the Navigation Bar at the bottom of the form.

  2. Type the data for the new record (see Figure 4.5).

    Figure 4.5. Adding a new record.

    graphics/04fig05.jpg

  3. Press Tab to go to the next control.

  4. Repeat steps 2 and 3 to enter all the data for the record.

  5. Press Tab to move to another new record. Access saves the record.

graphics/book_icon.gif

There are some important things you should be aware of when adding new records. First, you can add records to a table by choosing Edit | Go To | New Record. Second, Access always displays one blank record at the end of a table. This blank record is ready to act as the new record. Finally, you can press the Tab key to add a record when you are on the last field of the last record in the table.


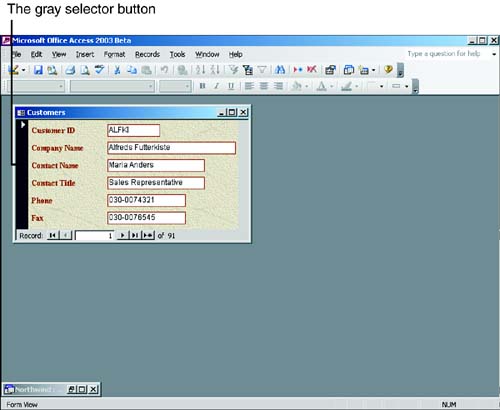
Using a Form to Delete Records from a Table

Before you can delete records, you must first select them. I therefore cover the process of selecting records before I cover the process of deleting records.

Selecting One or More Records

To select a record, you simply click the gray record selector button to the left of a record within a form (see Figure 4.6). Access selects the record.

Figure 4.6. The gray selector button.

graphics/04fig06.jpg

graphics/newterm_icon.gif

To select multiple records (when the form is in Continuous Forms view or Datasheet view), you click and drag within the record selector area. Continuous Forms view allows you to view multiple rows of data in a form at a time. Access selects the contiguous range of records in the area over which you click and drag. As an alternative, you can click the selector button for the first record you want to select, hold down the Shift key, and then click the selector button of the last record that you want to select. Access selects the entire range of records between the two selector buttons. Figure 4.7 shows the Orders table, with three records selected.

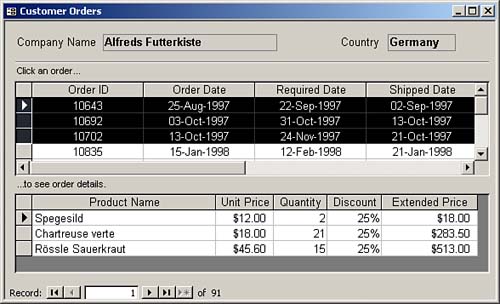
Figure 4.7. The Orders table, with three records selected.

graphics/04fig07.jpg

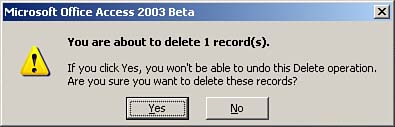
If you want to select a single record when the cursor is within the record, you can simply select Edit | Select Record.

Deleting Records from Within a Form

When you know how to select records, deleting them is quite simple. The process is almost identical to that of deleting records in a datasheet:

  1. Select the record you want to delete.

  2. Press the Delete key. A dialog box appears, asking if you're sure you want to delete the record(s) (see Figure 4.8).

    Figure 4.8. A dialog box that asks if you want to delete the selected records.

    graphics/04fig08.jpg

  3. Click the Yes button.

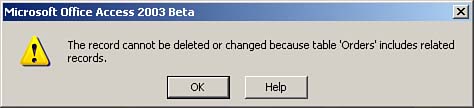
The process of deleting a record is not so simple if you have established referential integrity between the tables in a database and the row that you are attempting to delete has child rows. Hour 9, "Creating Relationships," covers relationships and referential integrity. For now, you can think about the fact that customers generally have orders associated with them, and those orders have order detail records associated with them. The relationship between the Customers table and the Orders table prohibits the user from deleting customers who have orders. Here's how you delete a customer who has orders:

  1. Select the record(s) you want to delete.

  2. Press the Delete key. A dialog box appears, saying that the record cannot be deleted or changed because the table includes related records (see Figure 4.9).

    Figure 4.9. Access notifying you that you cannot delete the selected records.

    graphics/04fig09.jpg

  3. Click OK to close the dialog box.

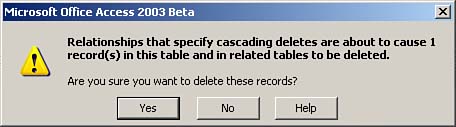
Access provides a referential integrity option with which you can cascade a deletion down to the child table. This means, for example, that if you attempt to delete an order, Access deletes the associated order detail records. If you establish referential integrity with the cascade delete option, the deletion process works like this:
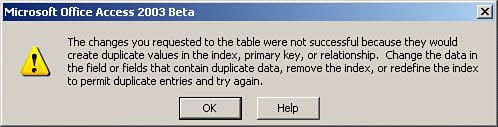
  1. Select the record(s) you want to delete.

  2. Press the Delete key. A dialog box appears, asking whether you are sure you want to delete the record(s) (see Figure 4.10 ).

    Figure 4.10. Access asking if you want to delete the parent row and the associated child records.

    graphics/04fig10.jpg

  3. Click Yes to complete the deletion process.

graphics/book_icon.gif

After you have selected records, they appear in black and you can copy them, delete them, or modify them as a group. It is important to be aware that deleting records is a permanent process. You cannot undo a deletion.


Copying Records Within a Form

At times you may want to copy an entire record. This generally occurs because you are creating a new record and the new record is very similar to an existing record. For example, you might have two contacts at the same company who share similar information. You can copy the existing record and then make the necessary changes to the new record. Here's the process:

  1. Select the record you want to copy. You can select the record by clicking the gray record selector or by selecting Edit | Select Record.

  2. Select Edit | Copy.

  3. Select Edit | Paste Append. Access copies the original record and places you in the new record (the copy).

Copying a record often results in what is called a referential integrity error. This occurs, for example, when copying a record would cause a duplicate primary key (that is, unique record identifier). In such a situation, you see an error message such as that displayed in Figure 4.11. You can either change the data in the field or fields that constitute the duplicate key, or you can press the Esc key to cancel the process of appending the new row. For example, in the example shown in Figure 4.11, you can modify the category name.

Figure 4.11. A referential integrity error that appears when copying a record.

graphics/04fig11.jpg

Finding a Record That Meets Specific Criteria

If you are editing records in a form, you need to find specific records quickly. The same procedure used in Datasheet view helps you to quickly locate data in a form:

  1. Select the field that contains the criteria for which you are searching (in this case, ShipCity).

  2. Click the Find button on the toolbar. The Find and Replace dialog box appears (see Figure 4.12).

    Figure 4.12. The Find tab of the Find and Replace dialog box, where you search for values in a datasheet.

    graphics/04fig12.jpg

  3. Type the criteria in the Find What text box. For this example, type Madrid.

  4. Use the Look In drop-down list box to designate whether to search only the current field or all fields in the table. For this example, designate that you want to search only the current field.

  5. Use the Match drop-down list box to designate whether to match any part of the field you are searching, the whole field you are searching, or the start of the field you are searching. For example, if you type the word Federal in the Find What text box and you select Whole Field in the Match drop-down list box, you find only entries where Ship Via is set to Federal. If you select Any Part of Field, you find Federal Shipping, Federal Express, United Federal Shipping, and so on. If you select Start of Field, you find Federal Shipping and Federal Express, but you do not find United Federal Shipping. For this example, designate that you want to match the whole field.

  6. Use the Search drop-down list box to designate whether to search only up from the current cursor position, only down, or in all directions. For this example, designate that you want to search in all directions.

  7. Use the Match Case check box to indicate whether you want the search to be case-sensitive.

  8. Use the Search Fields as Formatted check box to indicate whether you want to find data only based on the display format (for example, 17-Jul-96 for a date).

  9. Click the Find Next button to find the next record that meets the designated criteria.

  10. To continue searching after you close the dialog box, use the Shift+F4 keystroke combination or the Find Again menu option.

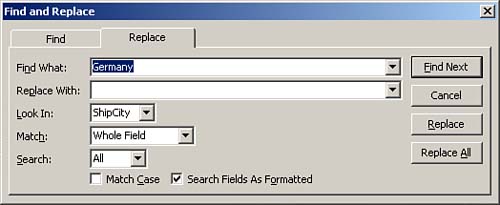
Replacing Data in the Table Underlying a Form

There may be times when you want to update records that meet specific criteria. You might want to do this, for example, if a company changes its name or if you realize that you have improperly entered an employee's Social Security number. The Replace feature automatically inserts new information into the specified fields. Here's the process:

  1. Click within the field that contains the criteria you are searching for (ShipCity, for this example).

  2. Click the Find button on the toolbar. The Find and Replace dialog box appears.

  3. Select the Replace tab (see Figure 4.13).

    Figure 4.13. The Replace tab of the Find and Replace dialog box, where you can replace table data.

    graphics/04fig13.jpg

  4. Type the criteria in the Find What text box. Type Madrid for this example.

  5. Type the new information (the replacement value) in the Replace With text box. Type GreatCity for this example.

  6. Choose values for the Look In drop-down list box, Match drop-down list box, Search drop-down list box, Match Case check box, and Search Fields as Formatted check box, as described in the "Finding a Record That Meets Specific Criteria" section of this hour.

  7. Click the Find Next button. Access locates the first record that meets the criteria designated in the Find What text box.

  8. Click the Replace button.

  9. Repeat steps 7 and 8 to find all occurrences of the value in the Find What text box and replace them. As an alternative, you can click the Replace All button to replace all occurrences at once.

    graphics/clock_icon.gif

    You should use Replace All with quite a bit of caution. Remember that the changes you make are permanent. Although Replace All is a viable option, when you use it, you need to make sure you have a recent backup and that you are quite certain of what you are doing. In fact, I usually do a few replaces to make sure that I see what Access is doing before I click Replace All.


  10. Click Cancel when you're done.

graphics/bulb_icon.gif

If you are searching a very large table, Access can find a specific value in a field fastest if the field you are searching on is the primary key or an indexed field. Hours 8, "Creating Tables," and 14 "Power Table Techniques," cover primary keys and indexes.


When using either Find or Replace, you can use several wildcard characters. A wildcard character is a character you use in place of an unknown character. Table 4.1 describes the wildcard characters.

Table 4.1. Wildcard Characters You Can Use When Searching

Wildcard Character

Description

*

Acts as a placeholder for multiple characters.

?

Acts as a placeholder for a single character.

#

Acts as a placeholder for a single number.

    [ Team LiB ] Previous Section Next Section