Creating a Form Using a Wizard
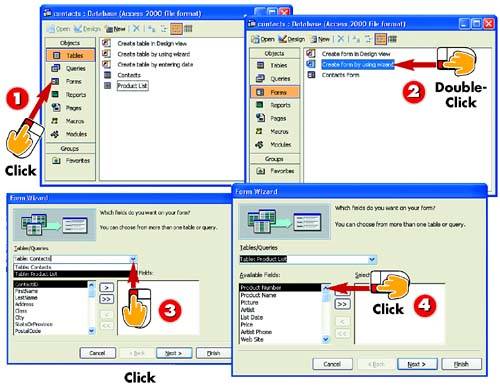
 | After you open the database for which you want to create a form, click the Forms option in the Objects bar. |
 | Double-click the Create form by using wizard option. |
 | The Form Wizard starts. Click the down arrow next to the Tables/Queries field and select the table on which you want to base the form from the list that appears. |
 | The Available Fields list catalogs all the fields in the selected table. Click the first field you want to appear in the form. |
|
AutoForms are great if you want your form to include all the available fields in the selected table in the order they appear in the table. If, however, you want your form to include only certain fields, or to include fields in a different order, you'll want to use Access's Form Wizard to create your form. The wizard enables you to select only those fields you want and to place them in any order you choose. |
|
Selecting Fields
You do not have to select all the fields in your table. Keep in mind, though, that when you add a new record using a form, the fields that were not included in the form will be blank in those records. |
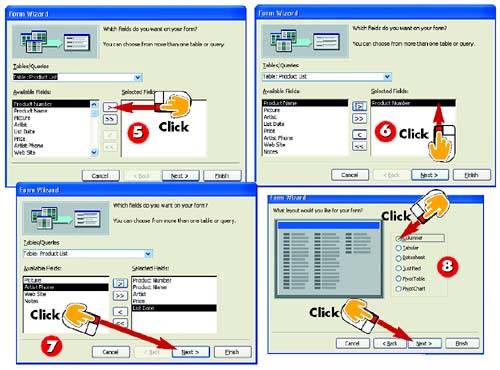
 | Click the Add button (it's the one with a single right-pointing arrow on it). |
 | The field is added to the Selected Fields list. Continue selecting and adding fields until all the necessary fields appear in the Selected Fields list. |
 | When you finish selecting the fields you want to appear in your form, click the Next button. |
 | The Form Wizard displays a list of available layouts for your form. Click a layout to preview it in the left side of the dialog box. When you find a layout you like, click Next. |
|
Adding and Removing Fields
If you want to include all available fields in your form, click the button that contains two right-pointing arrows. To remove a field from the Selected Fields list, select it and click the left-pointing arrow button. |
|
Listing Fields
The fields are listed in the order you add them. If you prefer a particular order, simply add the fields in the order you want. |

 | The wizard presents a list of styles that affect how the form looks (such as its colors, background, fonts, and so on). Click a style to preview it. When you find one you like, click Next. |
 | Type a name for the form in the What title do you want for your form? field; the form will be saved with this name. |
 | Select whether you want to open the form immediately (shown here) or modify the form's design first. |
 | Click Finish. |
|
Saving the Form
When you use the Form Wizard to create a form, that form is saved automatically using the name you type for that form in step 10. You do need to save the form manually, however, if you make any changes to the form's design later. |
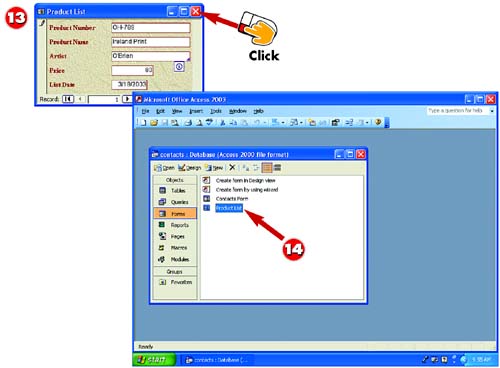
 | Depending on your selection in step 11, Access displays the new form in Datasheet view (for viewing and entering records) or Design view (for changing the form's design). Click its Close button. |
 | The form is listed in the database window; you can open the form again when you want to use it. |
|
AutoForm Versus Wizard
The wizard offers the same layout choices as the AutoForm but provides additional choices on which fields you can include, as well as different styles. |
|
Including Multiple Tables
For more complex forms, you can include fields from more than one table. You can also base a form on a query (queries are covered in Part 6). For more information, see Access's Help system. |
|