Adding Labels to a Report
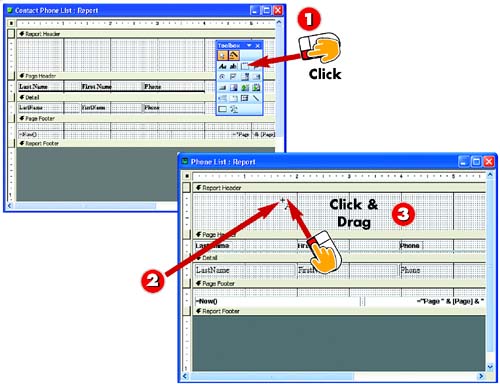
 | After you've opened the report you want to modify in Design view, click the Label button in the Control toolbox. |
 | The mouse pointer becomes a plus sign with a capital A. Move the pointer to the spot in the report where you want to create the label. |
 | Click and drag to draw the text box for the label. |
|
If the information in a report is not self-explanatory, it's a good idea to add other identifying information, such as a descriptive report title, the author's name, the company name, and other items. To do so, you simply add a text box control to the report and include the necessary information in the control. |
|
Placement
Keep in mind that the placement of the label affects where it appears in the report. If you place the label in the page header, it appears at the top of every page. If you include the label in the Details section, it is included with the detailed information for each record in the report. |
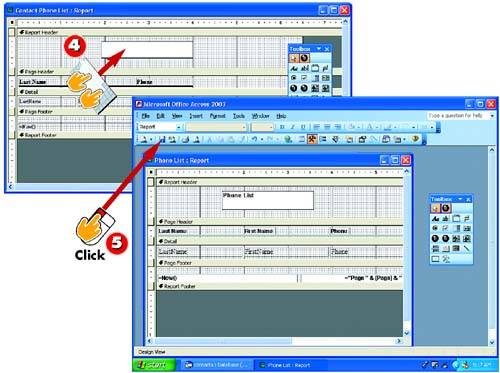
 | The text box is added, and the insertion point is placed within the box. Type the label text. |
 | The label is added. Click the Save button on the Standard toolbar in the main Access window to save the report. |
|
Editing a Label
You can edit a label by clicking in the label's text box. You can then edit the text as needed or select all the text, press Delete, and type new text. |
|
Formatting Label Text
You can format the text in the label much like formatting text in a Word document. To do so, select the text box and then use the formatting buttons in the toolbar or the commands in the Format menu. |
 |