You can rapidly assign maintenance details such as Defects, Changes, Issues and Tasks directly to an element from a diagram, using the menu. To use this feature follow the steps below:
| 1. | Open the diagram containing the element. |
| 2. | Click on the element name. The name is highlighted in a lighter shade (the default is white), to indicate that it has been selected.

|
| · | Right-click on the highlighted name to display the context menu, and select the option.
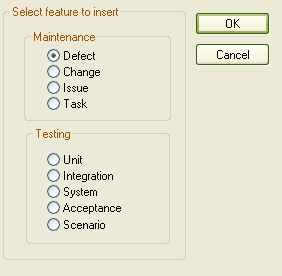
The Insert Feature dialog displays.
|
| 4. | Click on the appropriate radio button option to associate the required maintenance feature with the element item. |
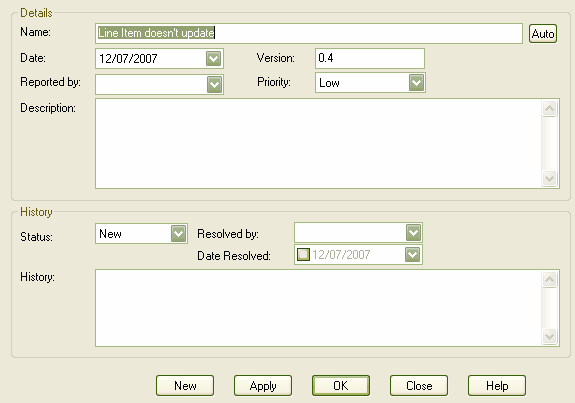
| 5. | Click on the button. The <Maintenance Feature> details for <element> dialog displays.
|
| 6. | Complete the fields to define the maintenance activity, and then click on the button. To create a subsequent maintenance activity of this type, click on the button. |
| 7. | When you have defined all of the maintenance activities of this type, click on the button. The maintenance details are added to the element. |
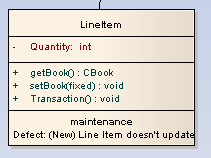
To ensure that the maintenance items are visible in the diagram element, as shown in the example below, select the checkbox in the diagram properties appearance options. For more information on diagram appearance options, see the Show Maintenance Scripts in Compartments topic.