You can also manage states and transitions using the States tab of the Configure Timeline dialog. To display this, either:
| · | Double-click on the Lifeline element |
| · | Right click on the Lifeline element and, from the context menu, select the option, or |
| · | On a Value Lifeline, click on the button ( ). ). |
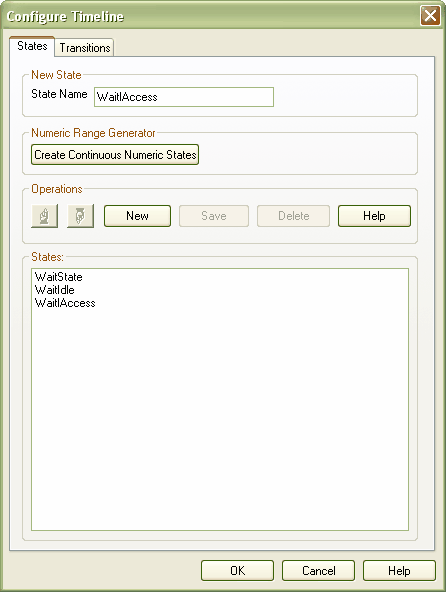
The Configure Timeline dialog defaults to the States tab.
All states currently defined for the Lifeline element are listed in the States panel.
Add a New State:
| 1. | In the field, type the name of the first new state in the Lifeline element; for example, . |
| 2. | Click on the button. The state is added to the States panel and (for a State Lifeline Element) to the diagram. |
| 4. | In the field, type the name of the next state in the Lifeline element. |
| 5. | Repeat steps 2 to 5 until you have added all required states (you must add at least three to the Lifeline element). |
| 6. | When you have added all the required states, click on the button to close the Configure Timeline dialog. |
Edit an Existing State:
| 1. | Click on the state in the States: list. |
| 2. | In the field, change the name of the state. |
Delete an Existing State:
| 1. | Click on the state in the States: list. |
Change the Order of States:
| 1. | Click on the state in the States: list. |
| 2. | Click on the  or or  buttons to move the state up or down the sequence. buttons to move the state up or down the sequence. |
Numeric Range Generator
You can also use the Configure Timeline dialog to create a range of states having numeric values to be applied to the Timeline.
IMPORTANT: This operation deletes all existing states and transitions for the Timeline element.
| 1. | Display the Configure Timeline dialog. |
| 2. | Click on the button. The Numeric Range Generator dialog displays. |
| 3. | In the and fields, type the upper and lower values of the range. |
| 4. | In the field, type the increase interval. |
Note: Nonsense values do not parse; must be less than , and must be a positive value smaller than the total range.
| 5. | In the field, type the name of the measurement unit; for example, . |
| 6. | Click on the button. Enterprise Architect displays a warning that existing states and transitions will be deleted. |
| 7. | Click on the button. The Configure Timeline dialog redisplays, with the defined range of states listed in the States panel. |
| 8. | Click on the OK button. For a: |
| · | Value Lifeline, the first state is shown on the Timeline for the full time range of the Timeline. |
| · | State Lifeline, the range of states is displayed as the y-axis of the Timeline. |
See Also


