Before we can decide which specific GUI classes will be needed in building the SRS GUI, we must consider what functionality the GUI is to provide. In particular, we must answer the questions "What information should the GUI present to the user?" and "What actions will the GUI allow a user to perform?" Once we've answered these two questions, we can decide which classes are best suited to accomplishing the objectives of the GUI.
In a nutshell, the SRS GUI we'll create will function as follows:
When the GUI is launched, the list of available courses in the current semester's schedule of classes will be displayed.
Before a student can use the SRS GUI, he or she will have to log in. Logging in will be accomplished by having the user type in his or her student ID number.
Once a student has logged in, the student's name will be displayed, along with a list of the courses for which the student is already registered (i.e., the student's current course load/list).
After logging on, the SRS GUI should allow a student to take any of the following actions:
Adding a course to his or her course list by selecting one from the schedule of classes
Dropping a course from his or her course list
Saving his or her current course schedule to a file
Logging off from the SRS
Sketching out the functional flow of a graphical user interface through pictures and accompanying narrative—a technique informally known as storyboarding—is a great way to come to agreement with the future users of a system on how the application should look and behave before development begins. And, if the application truly evolves as we envisioned that it would, then the document that we've prepared to narrate the storyboard before developing the application, known as a concept of operations document, can be used as the basis for a user's guide and/or online tutorial after the application is finished. The "story" that is told by the concept of operations document is presented from the external viewpoint of a user; it is, in essence, a pictorial representation of how the various use cases for the application will be fulfilled.
Because we developed the code for the SRS GUI before this chapter was written, we had the luxury of using actual screen snapshots of the GUI as illustrations for our concept of operations; but, in a real-life situation, we'd start by informally sketching our ideas, perhaps with pen or paper or on a whiteboard, so as to "test drive" the concepts with future users of the system. Once we verified that we were on the right track, then, depending on what tools we have available, we might either render our conceptualized GUI with a conventional drawing tool such as Microsoft PowerPoint, or perhaps even create a GUI "shell" using an IDE.
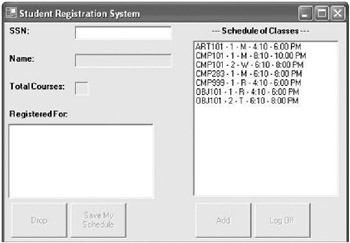
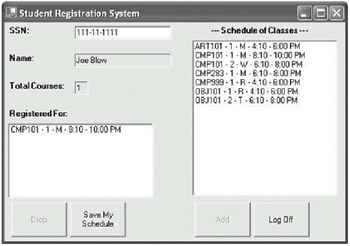
A concept of operations document helps us to think through and describe how the GUI should look and flow. For the SRS application, our concept of operations begins when Joe Blow, a student user, launches the SRS application. The GUI that first appears, shown in Figure 16-10, presents a list of all sections offered this semester titled Schedule of Classes, along with a number of empty fields labeled SSN, Name, and Total Courses. A number of buttons appear at the bottom of the window labeled Drop, Save My Schedule, Add, and Log Off, but these are all initially grayed out to signal that they are disabled; until a user logs on, none of the functions provided by these buttons is valid. (We recognize that the SSN field can accept user input by its white background, whereas the Name and Total Courses fields are read-only due to their gray backgrounds.)
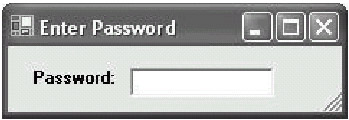
Joe logs on to the SRS by typing his student ID number (which for the SRS is the student's social security number), 111-11-1111, in the field labeled SSN, and then presses the Enter key. A small dialog window, illustrated in Figure 16-11, pops up to request that he enter his password to complete the logon process. As Joe types in his password (which happens to be 111, the first three digits of his social security number), asterisks (*) appear in place of the characters that he types, to ensure his privacy.
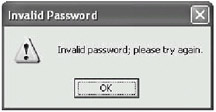
After typing in his password, Joe presses the Enter key. Unfortunately, Joe has mistyped his password, and so the pop-up message in Figure 16-12 appears.
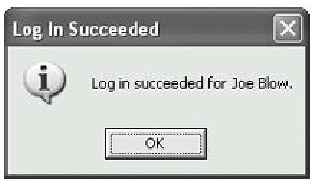
After Joe clicks the OK button on this pop-up dialog box to dismiss it, he must click anywhere in the SSN field to give that field focus, and then press the Enter key again to redisplay the password dialog box a second time (he needn't retype his SSN, however). Assuming that he types his password correctly this time, he receives confirmation of a successful logon (see Figure 16-13).
After clicking OK on this confirmation pop-up, Joe sees that his current registration information appears in the Name, Total Courses, and Registered For fields in the main GUI window. (Although Joe doesn't know it, this information was read in behind-the-scenes from a data file named 111-11-1111.dat.) We see that Joe had previously used the SRS to register for section 1 of course number CMP101. Notice that two of the buttons at the bottom of the GUI—Save My Schedule and Log Off—have now become enabled and "clickable." (See Figure 16-14.)
| Note?/td> |
Note that there are three data files supplied with the SRS code download from Apress that support this application, and which represent three different students' data: 111-11-1111.dat, 222-22-2222.dat, and 333-33-3333.dat. |
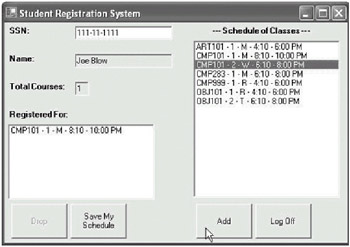
Joe decides to try to enroll in course CMP101–2. He selects this section from the Schedule of Classes list, which causes the Add button at the bottom of the screen to automatically become active. (Until he had selected a section in the Schedule of Classes list, it made no sense for the Add button to be selectable.)
Joe clicks the Add button, shown in Figure 16-15.
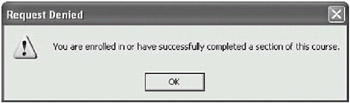
But because Joe is already registered for a different section of that same course (CMP101–)1, the system notifies him via the pop-up message shown in Figure 16-16 that he may not register for CMP101–2. (Had Joe's transcript reflected successful prior completion of any section of CMP101, his request would have also been rejected.)
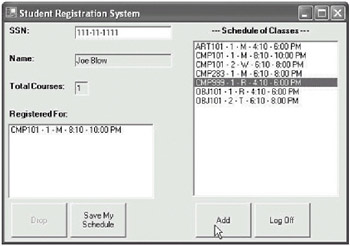
Joe clicks OK to dismiss the dialog box. He next selects CMP999–1 from the Schedule of Classes, and again clicks the Add button (see Figure 16-17).
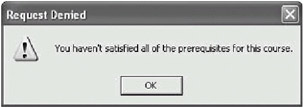
Unfortunately, Joe strikes out again! Course CMP999, "Living Brain Computers," requires students to have successfully completed the prerequisite course CMP283, "Higher Level Languages (C#)." Since Joe's transcript (which is being checked behind-the-scenes, unbeknownst to Joe) doesn't show any evidence that he has previously completed CMP283, the system once again rejects his registration request with a pop-up explanation (see Figure 16-18).
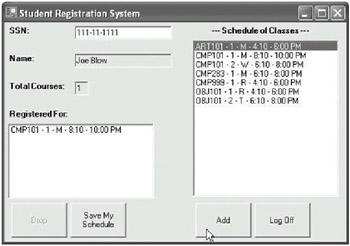
After clicking OK to dismiss this pop-up dialog box, Joe selects ART101–1 from the Schedule of Classes list, and clicks the Add button yet again (see Figure 16-19).
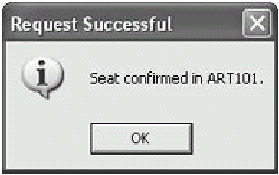
Success at last! ART101 has no prerequisites to satisfy, and Joe is neither currently registered for, nor has ever successfully completed, a section of this course. Joe receives confirmation that he has been registered in ART 101-1, as shown in Figure 16-20.
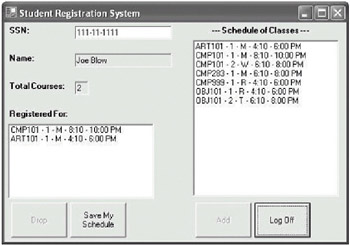
After Joe dismisses the confirmation pop-up by clicking the OK button, he sees the newly added section reflected in the Registered For list on the main SRS window, with the Total Courses field reflecting his correct new total of two (2) registered courses (see Figure 16-21).
Note that Joe's selection in the Schedule of Classes list has been cleared, and that the Add button is no longer enabled.
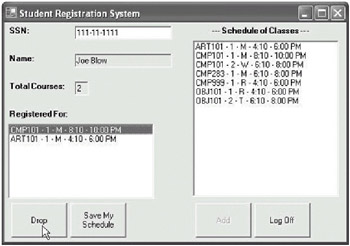
Next, Joe decides that he wishes to drop CMP101. He clicks that entry in his Registered For list, at which point the Drop button becomes enabled and selectable.
Joe clicks the Drop button, as shown in Figure 16-22.
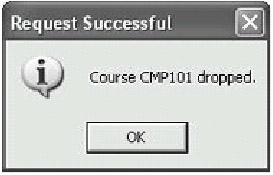
In response, the SRS displays a confirmation pop-up dialog box, as we can see in Figure 16-23, that the course has been dropped from his course load.
When Joe dismisses the pop-up by clicking OK, we see that Joe's course load information has once again been properly updated, and that the Drop button has once again become disabled, as shown in Figure 16-24.
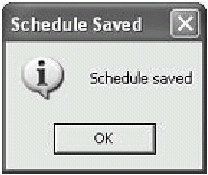
Satisfied with his new schedule, Joe decides to save this information by clicking the Save My Schedule button, and the system confirms this operation with the dialog box shown in Figure 16-25. (Behind the scenes, Joe's updated course load information has been persisted to file 111-11-1111.dat, replacing the information that was previously stored in that file.)
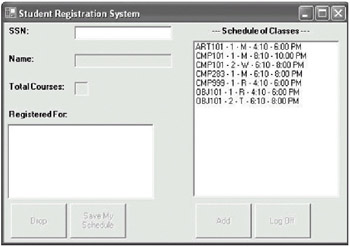
Joe dismisses the dialog box, and then clicks the Log Off button on the main window; in response, the screen is cleared of all of Joe's student-specific information as shown in Figure 16-26, and is ready for a different student to log on.
Now that we've narrated the concept of operations for our GUI, let's move on to stage 2: programming the look of the GUI through the use of FCL GUI classes.