18.7 Update a Template
Templates aren't just useful for building pages rapidly; they also make quick work of
site updates. Pages created from templates maintain a link to the original template
file; you can automatically pass changes to a template along to every page built from
it. If you used templates to build your site, you probably won't cry on your keyboard
when the boss says you must add an additional button and link to the navigation
bar. Instead of editing every page, you can simply open the template file, update the
navigation bar, and let Dreamweaver apply the update to all the pages.
You update a template (and all the pages based on it) like this:
Choose Window Assets. Assets.
The Assets panel appears. Click the Templates button (see Figure 18-4).
A list of the site's templates appears. Double-click the template's name to open it.
Alternatively, you can select the template in the Assets panel and click the Edit
button to open the original template (.dwt) file (see Figure 18-4).
The template opens.  |
You can also open a template by double-clicking the appropriate template (.dwt) file located in the
Templates folder in the Files panel (see Section 14.1.5.)
|
|
Edit the template as you would any Web page.
Since this is the original template file, you can edit any of the HTML in the document,
including Cascading Style Sheets, meta tags, timelines, and layers. You can
also add or remove editable regions (see Section 18.3).
Take care, however, to edit only the areas that you did not
mark as editable regions.
The reason: When you update your pages, any region marked as editable in a template
file isn't passed on to pages based on that template. After all, the template is
only supposed to dictate the design of those pages' non-editable regions.
NOTE
Be careful when you remove editable regions from a template. If you've already built some pages
based on the template, Dreamweaver warns you when you save the template. As described below, you
can either delete the content that was added to that region in each of the pages you
created, or move it to another editable region in the page.
Choose FileSave.
If you've already created pages based on this template, Dreamweaver opens the
Update Template Files dialog box. It lists all the files that use the template.
Click Update to update all files based on the template.
Dreamweaver automatically applies the changes you made to the pages based on
the template. Then, the Update Pages dialog box opens and displays a log of all
changes Dreamweaver made to the files in your site.
On a large site, this automatic update feature can be an incredible timesaver, but
you may not want to click Update, at least not right now. Perhaps you're just saving some of your hard work on the template,
but aren't quite finished perfecting
it梬hy waste your time updating all those pages more than once? In such a
scenario, click the Don't Update button. Remember, you can always update the
pages later (see the box below).
Click Close.
The Update Pages dialog box closes.
You'll need to update all your files even if you make a simple change to the template,
like changing its name.
18.7.1 Updating Nested Templates
When you build a Web site using nested templates, you'll have multiple templates affecting
your pages. The master template controls design elements of a nested template,
which in turn controls pages based on the nested template. (You can even make nested
templates out of nested templates, but for sanity's sake, you'd better not.) With this
level of complexity, updates to nested templates can get confusing fast.
In a nutshell, here's how it works:
If you edit a locked region in a master template and then update your site, not only
will a nested template update, but so will all pages built from it.
|
Whenever you modify and save a Library item or a template,
Dreamweaver gives you the option to update any pages
in the site that are descended from it. Very often, you'll
say Yes.
But there are times when you
might wait to update the site. If
you're making a lot of changes
to multiple Library items or
templates, for example, you
may wish to wait until you've
finished all your edits before
letting the changes ripple
through your pages. After all, it
can take some time to update
large sites with lots of pages.
Dreamweaver lets you update
pages that use Library items and templates at any time.
Just choose ModifyLibraryUpdate Pages or Modify
TemplatesUpdate Pages. Both menu options open the same dialog box.

At this point, you can update pages that use a specific Library
item or template by choosing Files that Use from the "Look
in" menu and then selecting
the appropriate name from
the pop-up menu. If you want
to update all pages in the site,
choose Entire Site, and select
the name of the local site
from the pop-up menu. Turn
on both the "Library items"
and Templates checkboxes to
update all pages.
When you click Start, Dreamweaver
does its work, reporting
the results of the update
in the Log field at the bottom of the dialog box. If you find
the log useless, just turn off "Show log" to hide the report.
Click Close after Dreamweaver finishes.
|
If you edit a locked region in a nested template and then update, those changes
will pass on to pages built from that nested template.
However, changes you make to an editable region of a master template do not pass on
to any page. Neither do changes you make in editable regions of a nested template.
NOTE
Sometimes after making changes to a master template, Dreamweaver doesn't update pages based
on nested templates based on the master template. The surefire way to verify that all template updates are
correctly done is to choose ModifyTemplatesUpdate Pages and select the "Entire Site" option.
18.7.2 Unlinking a Page from a Template
If you're confident that you won't be making any further changes to a page's template,
and you'd like to be able to edit the page's locked regions, you can break the
link between a page and its template choosing ModifyTemplatesDetach from
Template.
All of the HTML in the page is now editable, just as on a regular Web page梬hich
is what it is. You've removed all references to the original template, so changes to the
template will no longer have any effect on this page.
NOTE
If you unlink a nested template from its master template, Dreamweaver removes only the code provided
by the original master template. Any editable regions you added to the nested template remain.
18.7.3 Exporting a Template-Based Site
The good news about Dreamweaver's sophisticated templating features is that they let
you build complex Web pages that are easy to create and update. The bad news is that
some behind-the-scenes code is necessary to achieve this ease of use. Dreamweaver's
template features rely on HTML comment tags to identify editable, optional, and
repeating regions, as well as nested template and editable tag attributes (see the box
in Section 18.3.1). Although this code is only for Dreamweaver's use and has
no effect
on how a Web browser displays the page, it does add a small amount to the size of
your Web pages.
Fortunately, Dreamweaver includes a feature that lets you export an entire site into a
new folder on your computer without any template markup code. It's a good last step
before transferring a freshly completed Web site to a Web server.
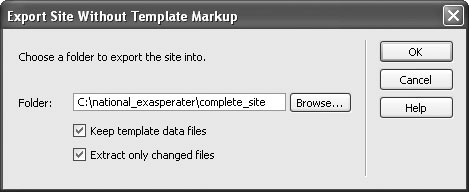
Choose ModifyTemplatesExport Without Markup.
Dreamweaver MX uses the currently active site, so make sure you've got the site you
wish to export selected in the Files panel (see Section 14.1.5). The Export Site Without Template Markup window appears (see Figure 18-19).
Click the Browse button and select a folder for the exported site.
Select a folder other than the current local site folder. You'll always want to keep the
original files in the local folder, since they're the ones that will keep the template
markup, making future updates possible.
Turn on the export options you want.
The Export window includes two options. The first, Keep Template Data Files, creates
an XML file for each template-based page. In other words, when you export
the site, there will be one HTML page (without any special template code) and an
XML file (which includes all the template code as well as the page content).
Theoretically, you could then go back and choose the FileImportXML into
Template to recreate the page, complete with the original template information.
However, in practice, you probably won't. For one thing, this process creates lots
of additional files that you wouldn't want to move to the Web site. Also, when you
want to work on the site to update and edit it, you should use the original files in the
site's local folder anyway, since they still have the useful template code in them.
The "Extract only changed files" option speeds up the process of exporting a large
template-based site. It forces Dreamweaver to export only pages that you've changed
since the last export. Unfortunately, it doesn't tell you which files it exported until
after the fact. So, to make sure you get those newly exported files to the Web server,
you need to keep track of changes by hand.
Click OK to export the site.
Dreamweaver goes through each page of the site, stripping out template code and
exporting it to the folder you specified.
It's a fine idea to perform an export after you've completed your Web site and are
ready to move it to the Internet. You can then move the lean, clean exported files to
the Web server.
You can use Dreamweaver's FTP feature to do the uploading (Section 16.2
), but you'll need to create a new site and define the folder with the exported files as a local root
folder. Whenever you need to add or update template-based pages, use the original
site files and then export the changed files. You can then switch to the site containing
the exported files and transfer the new or updated files to the Web server.
|