|
|
< Day Day Up > |
|
7.9 Merging and Splitting CellsCells are very basic creatures with some severe limitations. For example, all of the cells in a row share the same height. A cell can't be taller than the cell next to it, which can pose some serious design problems. Consider Figure 7-22 at top, for example. In the top figure, the left cell (containing the gear graphic) is much taller than the top banner to its right. In fact, it's as tall as both banners to its right, as shown in the bottom figure. Ideally, you'd want the gear graphic cell to straddle the two cells to its right, as shown in the second banner example. In such situations, Dreamweaver provides several ways of persuading cells to work well together. The trick is to merge cells梒ombine their area梩o create a larger cell that spans two or more rows or columns. In this example, the solution is to merge the two cells in the left column. This single cell holds the image of the gear, while perfectly aligning the two cells in the adjacent column. By using this technique, you can create some very complex designs. In fact, if you view tables created in Dreamweaver's layout mode, you'll notice that Dreamweaver itself makes extensive use of this technique. NOTE
It's easy to abuse this trick. Merging too many cells together can lead to complex and inflexible tables. In many cases, you can achieve the same effect by nesting simple tables; see Section 7.10. You can create larger cells that span multiple rows and columns by merging adjacent cells. This trick can help solve some design issues and let you align items that normally would not align (top). The result can join multiple columns into one, multiple rows, or both at once (bottom).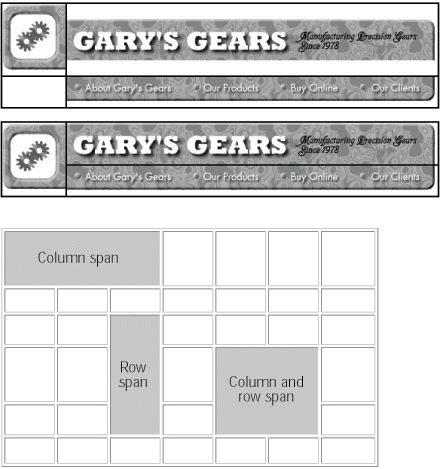
To merge cells, start by selecting the cells you wish to merge, using any of the methods described in Section 7.4.3. (You can only merge cells that form a rectangle or square. You can't, for instance, select three cells in a column and only one in the adjacent row, as in an L shape. Nor can you merge cells that aren't adjacent; in other words, you can't merge a cell in one corner of the table with a cell in the opposite corner.) Then, on the Property inspector, click the Merge Cells button ( Figure 7-23), or choose
Modify The Merge Cells button is only active when you've selected multiple cells. The Split Cells button only appears when you select a single cell or have clicked inside a cell.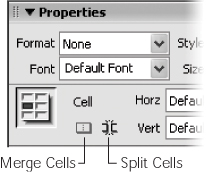
Dreamweaver joins the selected cells, forming a single new super cell. You may also find yourself in the opposite situation: you have one cell that you want
to divide into multiple cells. To split a cell, click inside, or select, a single cell. Click the
Split Cells button in the Property inspector. (Once again, you can trigger this command
in several alternative ways. For example, you can choose Modify When the Split Cell dialog box opens (see Figure 7-24), click one of the buttons to indicate whether you want to split the cell into rows or columns. Then type the number of rows or columns you wish to create; click OK. If you split a cell into columns, everything in the cell winds up in the right column, with the new, empty column or columns to the left. When you split a cell into rows, the contents end up in the top row. The Split Cell dialog box lets you divide a single cell into multiple cells. You can choose whether to divide the cell into rows (multiple cells on top of one another) or columns (multiple cells side by side).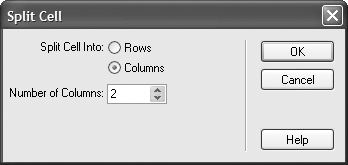
|
|
|
< Day Day Up > |
|
 Table
Table