Building a New Table
There are several ways to add a new table to an Access 2003 database: You can use a wizard to help you with the design process, design the table from scratch, build the table from a datasheet (a spreadsheet-like format), import the table from another source, or link to an external table. This hour discusses the processes of building a table from a datasheet and designing a table from scratch; Hour 6, "Using Wizards to Create a Database," covers the process of using a wizard to help with the design process, and Hour 18, "Sharing Data with Other Applications," covers the processes of importing and linking.
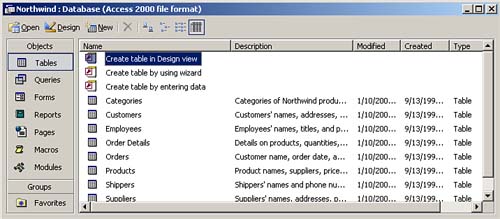
Regardless of which method you choose, you should start building a new table by selecting the Tables icon from the list of objects in the Database window. The icons that appear allow you to create a table in Design view, create a table using a wizard, and create a table by entering data (see Figure 8.1).
 | Access 2003 natively supports the Access 2000 file format so that you can read and write to Access 2000 files under Access 2003 without converting the file format. Access 2003 gives you the option of choosing which file format to use as a default. From the menu bar, you click Tools Options and select the Advanced tab. Then you select either Access 2000 or Access 2002-2003 as the default file format that you prefer from the drop-down list box. |
Building a Table from a Datasheet
Building a table from a datasheet might seem simple, but it isn't always the best way to build a table because it's easy to introduce severe design flaws into a table. Microsoft added this method of building tables as an "enhancement" to Accessand it is primarily for spreadsheet users getting their feet wet in the database world. I suggest you use one of the other methods to design tables. If you decide to use the datasheet method, though, follow these steps:
Select the Tables icon from the list of objects in the Database window. Click the New button. The New Table dialog box appears. Select Datasheet View from the New Table dialog box. A window similar to that shown in Figure 8.2 appears.

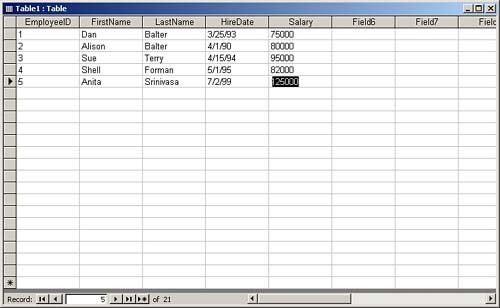
Rename each column by double-clicking the column heading (for example, Field1) you want to change or by right-clicking the column and selecting Rename Column from the context menu. Type a name for the field and then press Enter. Enter data into the datasheet. Be sure to enter the data in a consistent format. For example, if a table includes a column for employee hire dates, make sure all entries in that column are valid dates and that you enter all dates in the same format (see Figure 8.3). Access uses the contents of each column to determine the data type for each field, so inconsistent data entry confuses Access and causes unpredictable results.
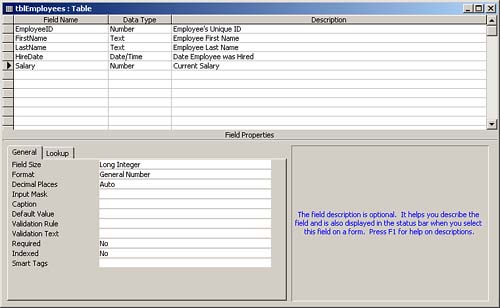
After you have added all the columns and data you want, click the Save button on the toolbar. Access prompts you for a table name and asks whether you want to add a primary key. Access assigns data types to each field based on the data you have entered. When Access is done with this, click the View button on the toolbar to look at the design of the resulting table. Add a description to each field to help make the table self-documenting. Your table design should look something like Figure 8.4.
 | It is very important that you be cognizant of the type of data in each column. For example, if you accidentally place a letter in a number field, Access considers the entire column a text field. It is therefore important that you recognize that although this might be the easiest method of creating a table, you should use it with extreme caution. |
| Adding descriptions to table, query, form, report, macro, and module objects goes a long way toward making an application self-documenting. Such documentation helps you, or anyone who modifies an application, perform any required maintenance on the application's objects. Hour 21, "Database Documentation," covers documenting databases. |
 | If you forget a field and need to insert it later, you can right-click the column heading to the right of where you want to insert the new column and then select Insert Column from the context menu. Access inserts a column that you can rename by double-clicking the column heading. |
Designing a Table from Scratch
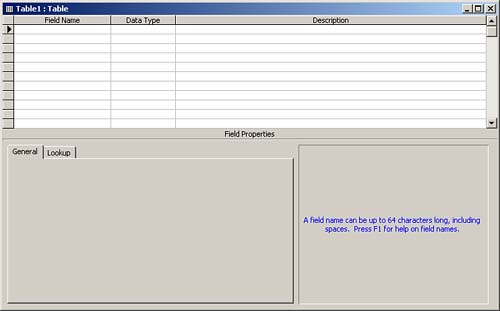
Designing tables from scratch offers flexibility and encourages good design principles. It is almost always the best choice when you're creating a custom business solution. Although it requires some knowledge of database and table design, it gives you much more control and precision than designing a table from Datasheet view. It allows you to select each field name and field type and to define field properties. To design a table from scratch, you select Tables from the list of objects and double-click the Create Table in Design View icon. The Table Design view window, pictured in Figure 8.5, appears.
When the Table Design view window appears, follow these steps to design a table:
Define each field in the table by typing its name in the Field Name column.
| If you prefer, you can click the Build button on the toolbar (the button with the ellipsis […]) to open the Field Builder dialog box, shown in Figure 8.6. The Field Builder lets you select from predefined fields that have predefined properties. Of course, you can modify the properties at any time.

|
Tab to the Data Type column. Select the default field type, which is Text, or use the drop-down combo box to select another field type. You can find details on which field type is appropriate for data in the "Selecting the Appropriate Field Type for Data" section, later in this hour. Note that if you use the Field Builder, it sets a data type value for you that you can modify. Tab to the Description column and enter a description for the data. What you type in this column appears on the status bar when the user is entering data into the field. This column is also great for documenting what data is actually stored in the field.   Continue entering fields. If you need to insert a field between two existing fields, click the Insert Rows button on the toolbar. Access inserts the new field above the field you were on. To delete a field, select it and click the Delete Rows button. Continue entering fields. If you need to insert a field between two existing fields, click the Insert Rows button on the toolbar. Access inserts the new field above the field you were on. To delete a field, select it and click the Delete Rows button.
To save your work, click the Save tool on the toolbar. The Save As dialog box, shown in Figure 8.7, appears. Enter a table name and click OK. A dialog box appears, recommending that you establish a primary key. Every table should have a primary key. Primary keys are discussed in the section "The All-Important Primary Key," later in this hour.
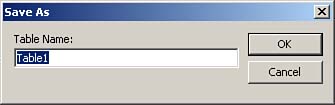
| Access supplies default names for the tables that you create (for example, Table1, Table2). I suggest that you supply more descriptive names. I generally follow the industrywide naming convention of prefixing all my table names with tbl. |
Field names can be up to 64 characters long. For practical reasons, you should try to limit them to 1015 characters, which is enough to describe the field without making the name difficult to type.
Field names can include any combination of letters, numbers, spaces, and other characters, excluding periods, exclamation points, accents, and brackets. I recommend that you stick to letters. Spaces in field names can be inconvenient when you're building queries, modules, and other database objects. You shouldn't be concerned that users will see the field names without the spaces. The Caption property of a field, discussed in Hour 14, "Power Table Techniques," allows you to designate the text that Access displays for users.
A field name can't begin with leading spaces. As mentioned previously, field names shouldn't contain any spaces, so the rule to not begin a field name with spaces shouldn't be a problem. Field names also cannot include ASCII control characters (ASCII values 031).
You should try not to duplicate property names, keywords, function names, or the names of other Access objects when naming fields (for example, naming a field Date). Although the code might work in some circumstances, you might get unpredictable results in others.
To make a potential move to the client/server platform as painless as possible, you should be aware that not all field types are supported by every back-end database. Furthermore, most back-end databases impose stricter limits than Access does on the length of field names and the characters that are valid in field names. To reduce the number of problems you'll encounter if you migrate tables to a back-end database server, you should consider these issues when you're naming the fields in Access tables.
|