Before you can connect to a remote repository, you must:
| · | Have version control setup on your local machine |
| · | Have version control setup on a remote server |
| · | Have a working directory on your local machine that points to the repository on the server. |
To set up CVS version control with a remote repository, follow the steps below:
| 1. | Ask your system administrator to install CVS and create a remote repository with a module that you can use to control your Enterprise Architect package files. Your administrator must create a username and password for you before you can make a connection. |
| 2. | Open a command prompt window and navigate to, or create, a suitable directory to hold your CVS working copy directory; for example: |
C:\> cd myCVSWorkSpace
| 3. | Connect to the remote CVS repository. An example connection command is: |
C:\myCVSWorkSpace> cvs -d :pserver:myUserID@ServerName:/repositoryFolder login
Note: Replace myUserID with your CVS username, replace ServerName with the name of your CVS server and replace repositoryFolder with the path to the repository on the server. Enterprise Architect prompts you to enter your password.
| 4. | Create a local CVS workspace, derived from the remote repository. An example command is: |
c:\myCVSWorkSpace> cvs -d :pserver:myUserID@ServerName:/cvs checkout moduleName
Note: The above command creates a subdirectory in your current working directory, called moduleName. (Replace moduleName with the name of the module created by your system administrator). It creates local copies of all files contained in the CVS module found at ServerName:/cvs
It also creates a subdirectory beneath moduleName, called CVS. This subdirectory contains a file called Root, that contains your CVS connection information. Enterprise Architect uses this file to obtain your CVS userID.
| 5. | Verify that your CVS installation is working correctly. |
| 6. | Change directory to the one you specified as the working copy, in the 'cvs checkout' command above, i.e. C:\myCVSWorkSpace\moduleName |
| 7. | Now create a test file, eg. Test.txt, containing the text CVS Test. You can do this with the command: |
echo CVS Test > Test.txt
| 8. | Execute the following CVS commands: |
| · | cvs commit -m"Commit comment" Test.txt |
| 9. | The editors command should produce output resembling the following: |
Test1.txt myUserID Tue Aug 9 10:08:43 2009 GMT myComputer C:\myCVSWorkSpace\moduleName
| 10. | Take note of the userID that follows the filename. Enterprise Architect must find and use this userID when you create your version control configuration. (See the example dialog below.) |
| 11. | Launch Enterprise Architect and open or create the model containing the packages to place under version control. |
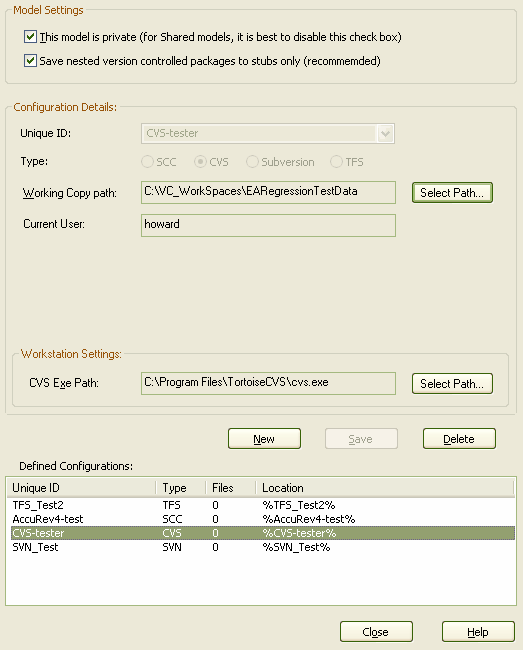
| 12. | Select the menu option. The Version Control Settings dialog displays.
|
| 13. | Click on the button, enter a suitable name in the field, then click on the radio button in the field. |
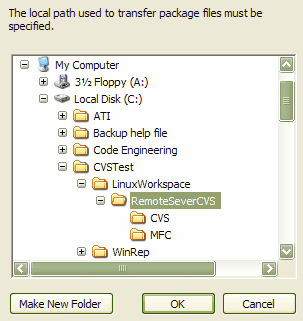
| 14. | To specify the value, click on the button. Select the local folder in which to keep local working copies of the XML files to be stored in the Version Control repository. |
| 15. | The field should display the user name used to log into the remote CVS repository. If this does not happen, it indicates that Enterprise Architect cannot extract the user name from the file ...\WorkingCopyPath\CVS\Root and the configuration does not work correctly. |
| 16. | If necessary, set the by clicking on the button and browsing to the file path for the for file 'cvs.exe', the CVS executable.
|
| 17. | Click on the button to save the configuration you have defined. The new configuration is added to the list of Defined Configurations. |
Note: A new entry is also created in the Local Paths list, with the same ID as the new version control configuration. The Local Path entry records the Local Project path, for use in subsequent path substitutions.
|
|
|
This model is Private
|
This setting controls whether the Get Latest and Get All Latest commands are enabled. For an explanation of why this is so, see the Specifying Private or Shared Models topic.
|
Save nested version controlled packages to stubs only
|
For a full explanation of this option, see Use Nested Version Control Packages.
|
Unique ID
|
Specify a configuration name that readily distinguishes it from other configurations. The unique ID displays as a selection in a list of Version Control configurations a package can connect to. In addition it is possible to select a previous version control configuration from this drop-down menu providing the configuration is not in use in the current model.
|
Working Copy Path
|
The folder where the XML files representing the packages are stored. This folder should already exist before it is specified here.
Every version control configuration you define in Enterprise Architect, should have its own local Working Copy Folder in which to store working copies of the XMI package files; this should not be a shared network folder. Particularly bear this in mind if you are creating an EAP file which is to be shared (eg. A SQL database).
|
Current User
|
The CVS user name associated with all CVS commands that are issued. This name is used by Enterprise Architect, to determine who has a package 'checked-out'.
|
CVS EXE Path
|
The full path of the CVS client's executable file.
|
Note: We strongly urge you not to manipulate version controlled package files outside of Enterprise Architect. It is possible to leave the package files in a state that Enterprise Architect cannot recognize.
See Also


