You can change the size of the diagram area (or scrollable/printable area) using the Diagram Properties dialog.
To set the page size, follow the steps below:
| 2. | Double-click on the background to open the Diagram Properties dialog. |
| 3. | Click on the Diagram tab and, in the Page Setup section, click on the button. The Print Advanced dialog displays. |
| 4. | Click on the button. The Page Setup dialog displays.
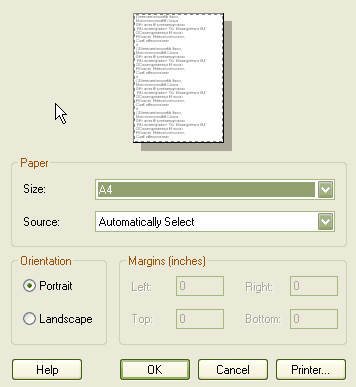
|
| 5. | In the field, click on the drop-down arrow and select an appropriate page size. In the Orientation panel click on the radio button for the orientation of the page to print. |
The scrollable area for your diagram is expanded or reduced accordingly. Note that when you print or print preview, the output is cropped to the bounding rectangle for the diagram.
Setting the Default Paper Size for New Diagrams
You can set the default paper size for new diagrams on the Diagram page of the Options dialog (select the menu option). Once the paper size is set there, all new diagrams have that as the default size.
See Configure Local Options - Diagram Settings.


