


You can define the people who are working on a project, such as the authors of specific elements.
To define the project authors, select the Settings | People menu option. The People dialog displays, defaulted to the Project Author(s) tab.
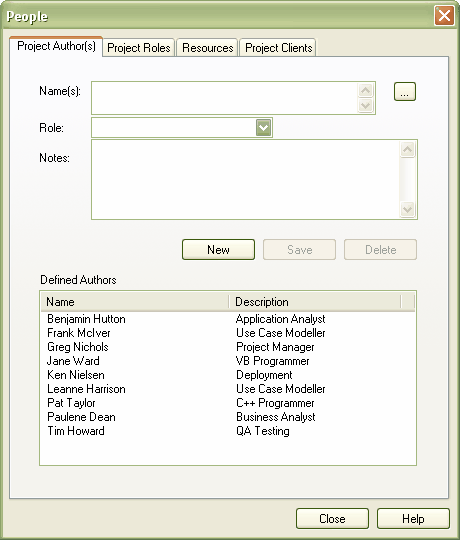
Complete the fields as described below:
Field |
Description |
Name |
Type the name of the person registered as a Project Author. If you are using a Windows Active Directory, you can select names from the directory. Click on the [...] (Browse) button to display the Select Users dialog. You can also type a list of names separated by semi-colons. This enables you to define a group of people sharing a role, such as a team of Developers, Testers or Analysts. Do not leave any spaces between the names and the semicolon. Note: If you enter multiple names, Enterprise Architect adds them separately and in alphabetical order to the Defined Authors list. If you then click on one of these names, Enterprise Architect displays that name only in the Name field. |
Role |
The role the Project Author plays in the project (eg. Designer, Analyst, Architect). You can type a role name or click on the drop-down arrow and select a role defined through the Project Roles tab. Note: If you type a role, this is not added to the roles on the Project Roles tab. |
Notes |
Type any additional notes concerning the Project Author. |
Defined Authors |
Lists the Project Authors already defined. |
Click on the Save button to add the new names to the Defined Authors list.
To add further Authors, click on the New button.
To delete a Project Author, click on the name in the Defined Authors list and click on the Delete button.
If your company is using a Windows Active Directory, you can select the Project Author names from the local or corporate-wide directory. To do this, follow the steps below:
| 1. | On the Project Author(s) tab, click on the [...] button. The Select Users dialog displays.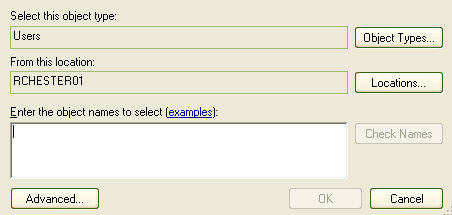 |
| 2. | Click on the Object Types button and select the checkbox for the object type User. |
| 3. | Click on the OK button to return to the Select Users dialog. |
| 4. | Click on the Locations button. The Locations dialog displays.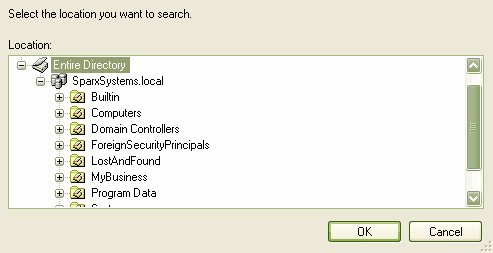 |
| 5. | Click on the appropriate area or level of the directory, and click on the OK button. The Select Users dialog redisplays. |
| 6. | In the Enter the object names to search field, type the first letter of the user name you want to search for. |
| 7. | Click on the Check Names button. The Multiple Names Found dialog displays, listing the names starting with the specified letter found in the directory location. |
| 8. | Click on the required name (or press and hold [Ctrl] and click on several names), and click on the OK button. The simple Select Users dialog redisplays, with the selected names listed. |
| 9. | Click on the OK button. The Project Authors tab redisplays, with the selected name or names in the Name(s) field. |
See Also