


The Element List is a tabular, editable view of elements that can be displayed in the main workspace. You can use the Element List to streamline the process of creating and updating elements in a package or diagram selected from the Project Browser window. This can be particularly useful for analysts to create and maintain formal requirement definitions within the model. You can also print the list or generate an RTF document directly from the entries on the Element List.
To access the Element List, either:
| · | Select a diagram or package in the Project Browser window and select the View | Element List menu option |
| · | Right-click on a diagram or package in the Project Browser window and select the Show Element List menu option |
| · | Click on the Element List button on the Other Views toolbar. |
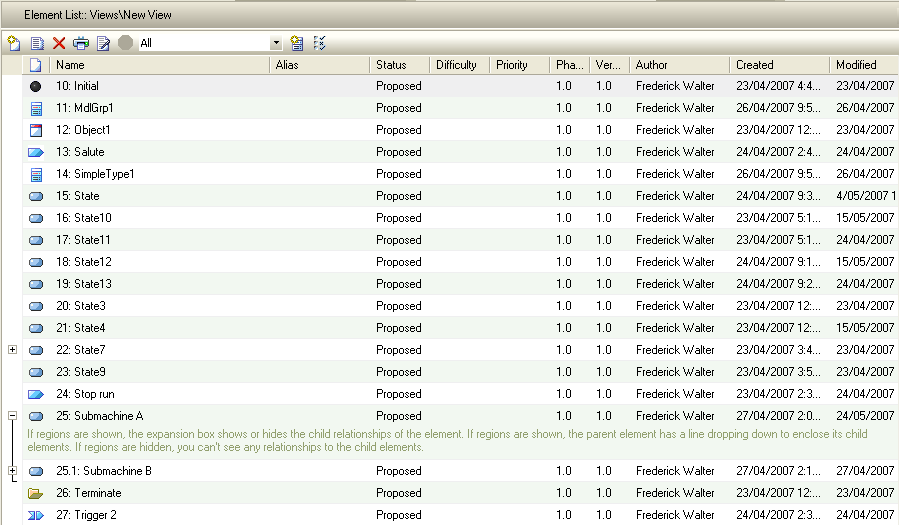
The Element List tab displays, showing the element information for the selected package or diagram.
Note: As you navigate the Element List, the item you have currently selected is highlighted in the Project Browser.
In the Element List you can:
| · | Sort the items by any column value in ascending or descending order, by clicking on the column header; initially the elements are listed in numerical order (if level numbering is turned on in the Project Browser) |
Note: This turns off collapsible regions; collapsible regions are shown for the State 7 and Submachine A elements in the illustration above. They are displayed only if you generate the Element List for a package, not for a diagram.
| · | Change the sequence of columns, by dragging column headers left or right; however, the order you place them in is not retained in subsequent sessions |
| · | Display the Properties dialog for an item by double-clicking on the item entry |
| · | Report on specific element types by clicking on the drop-down arrow in the Element List Toolbar and selecting the appropriate element type from the filter list, or All to list all objects; the report then lists only elements of that type |
| · | Change the elements available in the filter list by clicking on the Select another toolbox or technology icon to the right of the list field, and selecting the appropriate category |
| · | Select: |
| · | An element by clicking on it |
| · | A specific value by clicking twice on it (not double-clicking) |
| · | Several individual elements by holding [Ctrl] as you click on them |
| · | A range of elements by holding [Shift] as you click on the first and last in the range. |
| · | Edit a specific value in the list by clicking three times on it (or twice and press [F2]); either the value becomes directly editable or the Properties dialog displays in which you can edit the value |
| · | Add new items to the Element List by pressing [Ctrl]+[N] or [Insert] |
| · | Automatically add elements to a diagram by generating the Element List on the diagram and adding elements to the list |
| · | Delete elements from the list by selecting the item and pressing [Ctrl]+[D]. |
Tip: The report also includes each element's documentation (notes), where this exists. See the Submachine A element in the illustration above. This is a useful way to determine which elements in a diagram require further work and which are complete. You can add or edit notes by clicking on the item and pressing [Enter].
Element List Options
You can also influence what information is displayed on the Element List by clicking on the Options icon in the toolbar. This displays the Element List Options dialog, with two checkboxes:
| · | Show nested packages content - defaults to deselected, so child packages are not expanded in the list; select to show the contents of child packages in the selected package or element |
| · | Show notes compartment - defaults to selected to show the element notes; deselect the checkbox to hide the notes text. |
Audit History
In the Corporate edition of Enterprise Architect, if Auditing is turned on and the Element List is open, you can view a history of changes to any selected element or connector, in the Audit History tab of the Output window. (If security is enabled, you must have at least Audit View permissions to display the audit history).
Work on Elements in the Element List
You can also use the context menu to perform operations on elements in the Element List . Right-click on the required element to display the context menu. The menu options are described below:
Menu Option |
Description |
||||
Properties |
Displays the Properties dialog for the selected element. |
||||
Add New |
If the Filter List field in the toolbar is set to All, displays the New Element dialog, through which you create an element of the required type. If the Filter List field is set to a specific element type, this option adds an element of that type to the package or diagram in the Element List, the Project Browser and the Diagram View. Alternatively, select the Add New icon in the Element List toolbar. |
||||
Edit Notes |
Makes the Notes area of the selected item available to create or edit the note text. Alternatively, select the Edit Notes icon in the Element List toolbar. |
||||
Show Regions (Hide Regions) |
Shows or hides the parent-child relationships between elements in a package (not in a diagram). If regions are hidden, all elements are listed with equal status. If regions are shown, the parent element has an expand/collapse box ( |
||||
RTF Report |
Generates an RTF report. You have two options:
In either case, the Generate RTF Documentation dialog displays. Alternatively, select the RTF Report icon in the Element List toolbar. This generates one report for all selected items. |
||||
Usage |
Takes you to the diagram that uses the element or, if the element is used in multiple diagrams, presents a list of diagrams to choose from. |
||||
Bookmark Selected |
Bookmarks the element. |
||||
Delete Selected |
Deletes the selected element from the Element List. Alternatively, select the Delete Selected icon in the Element List toolbar. |
||||
Prints out the filtered results. Alternatively, select the Print icon in the Element List toolbar. |