|
The Toolbox can be docked on either side of the diagram, or free floated on top of the diagram to expose more surface for editing.
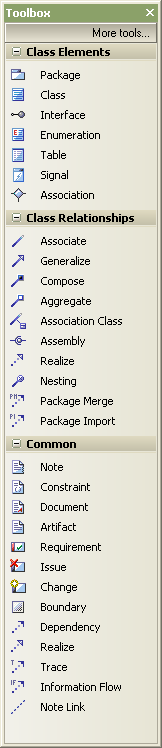
Creating Elements and Connectors:
| 1. | Select the required diagram from the Project Browser window. |
| 2. | Click on select the appropriate UML, Extended or customized Toolbox option, and select the diagram type from the menu. Three pages display: <type> Elements, <type> Relationships and Common.
If you select the option, you display only the Common page. |
| 3. | Click on the required item; for example, the Class element or Associate relationship. |
| 4. | For element items, click anywhere on the diagram to place the new element. |
| 5. | For connector items, drag the cursor between the start and end elements on the diagram. Alternatively, drag from the start element to an empty area of the diagram; the Quick-linker enables you to create the end element. |
Note: The Toolbox pages relate to specific UML diagrams. When you open a diagram, the Toolbox automatically provides the Elements and Relationships pages corresponding to the UML diagram type. This does not prevent the use of elements and connectors from other pages in a given diagram, though some combinations might not represent valid UML.
Note: Dropping a Package element from the Toolbox into a diagram creates a new package in the Project Browser window, and a default diagram of the same type as the current diagram.
Tip: You can hide and show the Toolbox using the  button on the shortcut toolbar. button on the shortcut toolbar.
Toolbox Appearance Options
You can modify the appearance of the Toolbox pages in a number of ways, mainly through the context menu. Right-click on the Toolbox page to display the menu.
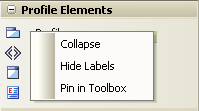
| · | To collapse a page to just show the heading (<type> Elements, <type> Relationships or Common), select the context menu option. Alternatively, click on the 'minus' box at the left of the page heading. To expand the page again, click on the heading. |
| · | To hide the element or relationship labels (and subsequently redisplay them), select the or context menu option. The icons in the page then 'wrap' within the page, without text labels.
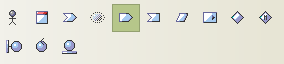
When you hide the labels, you can display the label of an individual element or relationship by moving the cursor over the icon. |
| · | To 'pin' the page so that it displays for any category in the Toolbox, select the menu option. (This is not available on the Common page, which displays in all categories anyway.)
For example, if you 'pinned' the Class Elements page, and switched to the Communication pages, the Toolbox would show both a Class Elements page and a Communication Elements page. |
| · | To unpin the page so that it displays only in its own Toolbox category, right-click on it and select the context menu option. |
|


