


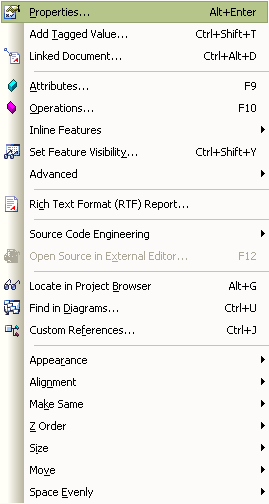
You can configure and access element details using the Element menu. This enables you to control element layout, generate documentation and manage project resources.
Menu Option |
Functionality and Function Keys |
Properties |
View the properties window of the selected element. [Alt]+[Enter] |
Add Tagged Value |
Add a Tagged Value to the currently selected element. [Ctrl]+[Shift]+[T] |
Linked Document |
Link any element to a rich text document. [Ctrl]+[Alt]+[D] |
View and edit the attributes for the selected element. [F9] |
|
View and edit the operations for the selected element. [F10] |
|
Inline Features |
See below. |
Set Feature Visibility |
Set various states relating to the selected element(s) visibility. [Ctrl]+[Shift]+[Y] |
Advanced |
See below. |
Rich Text Format (RTF) Report |
Generate a report for the currently selected package in rich text format. |
Source Code Engineering |
See below. |
Open Source in External Editor |
Open the source code of the selected class in the default external editor for that language. (Source code must have been generated, and the selected element must be a class.) [Ctrl]+[E] or [F12]. |
Locate in Project Browser |
Locate the currently selected element in the Project Browser window [Alt]+[G]. (If no element is selected, [Alt]+[G] locates the current diagram in the Project Browser window.) |
Find in Diagrams |
Display all occurrences of the currently selected element. [Ctrl]+[U] |
Custom References |
Show model element cross references. [Ctrl]+[J] |
Appearance |
See below. |
Alignment |
See below. |
Make Same |
See below. |
Z Order |
See below. |
Size |
See below. |
Move |
See below. |
Space Evenly |
See below. |
The Inline Features Sub-Menu
The Inline Features sub-menu provides various options to directly edit class diagram model elements from the class diagram.
Menu Option |
Description |
Edit Selected |
Attach a note or attach a constraint to the element. [F2] |
View Properties |
Opens the dialog window containing details of the selected element feature, or the element if no feature is selected. |
Insert New After Selected |
Inserts a new item to the element. [Ctrl]+[Shift]+[Insert] |
Add Attribute |
Adds an attribute to the element. [Ctrl]+[Shift]+[F9] |
Add Operation |
Adds an operation to the element. [Ctrl]+[Shift]+[F10] |
Add Other |
Enables you to insert a feature on the specific element item, such as Maintenance features and Testing features. [Ctrl]+[F11] |
Delete Selected from Model |
Deletes the selected item from the model. [Ctrl]+[Shift]+[Delete] |
Other options that are available while in editing elements mode in a diagram (when an attribute or operation is highlighted) include:
Key |
Description |
[Enter] |
Accept current changes. |
[Ctrl]+[Enter] |
Accept current changes and open a new slot to add a new item. |
[Esc] |
Abort edit, without save. |
[Shift]+[F10] |
Context menu for in-place editing. |
[Ctrl]+[Space] |
Invoke the Classifier dialog. |
The Advanced Sub-Menu
The Advanced sub-menu provides various options to choose from to customize the appearance of model elements.
Menu Option |
Description |
Automatically override methods from parent classes and from realized interfaces. [Ctrl]+[Shift]+[O] |
|
Manually set an element's parent or an interface it realizes. [Ctrl]+[I] |
|
Embedded Elements |
Enable you the attach elements to currently selected element. [Ctrl]+[Shift]+[B] |
Change Type |
Change the element type of the selected element. |
The Source Code Engineering Sub-Menu
Note: This sub-menu is a tear off menu.
Forward and reverse engineer code using the language of your choice.
Menu Option |
Description |
Generate Current Element |
Generate source code for the currently selected element. [Ctrl]+[G] or [F11] |
Synchronize Current Element |
Synchronize selected class with source code. [Ctrl]+[R] or [F7] |
Batch generate source code for the currently selected element(s). [Shift]+[F11] |
|
Batch synchronize the currently selected element(s) with source code. [Ctrl]+[R] |
|
Open Source Directory |
Open the directory containing the source for this element. [Ctrl]+[Alt]+[Y] |
The Appearance Sub-Menu
The Appearance sub-menu provides various options to choose from to customize the appearance of model elements.
Menu Option |
Description |
Autosize |
Auto-size a group of elements in a diagram to a best fit. [Alt]+[Z] |
Set border, font, background color and border thickness for the selected element. [Ctrl]+[Shift]+[E] |
|
Select Alternate Image |
Select an alternative image for the selected element. [Ctrl]+[Shift]+[W] |
Apply Image From Clipboard |
Insert the image currently held on the clipboard. |
The Alignment Sub-Menu
Use the Alignment sub-menu to align the selected element(s) to each other.
Menu Option |
Description |
Left |
Align left edges of elements. [Ctrl]+[Alt]+[Left] |
Right |
Align right edges of elements. [Ctrl]+[Alt]+[Right] |
Top |
Align top edges of elements. [Ctrl]+[Alt]+[Up] |
Bottom |
Align bottom edges of elements. [Ctrl]+[Alt]+[Down] |
Centers |
Align centers of elements, horizontally or vertically. |
The Make Same Sub-Menu
Use the Make Same sub-menu to make the selected elements the same width, height or both.
The Z Order Sub-Menu
Use the Z Order sub-menu to bring the selected element(s) back, forward, to the top or bottom.
The Size Sub-Menu
Use the Size sub-menu to make the selected element(s) wider, narrower, taller or shorter by one increment.
The Move Sub-Menu
Use the Move sub-menu to move the selected element(s) left, right, up or down by one increment.
The Space Evenly Sub-Menu
Use the Space sub-menu to distribute the selected elements evenly.
Menu Option |
Description |
Across |
Space elements evenly, horizontally. [Alt]+[-] |
Down |
Space elements evenly, vertically. [Alt]+[=] |
See Also